Rotisserie Chicken Broccoli Pasta is more than just a weeknight meal; it’s a culinary hug in a bowl, a testament to how simple ingredients can come together to create something truly extraordinary. As someone who appreciates both gourmet flavors and practical kitchen solutions, I’ve found this dish to be an absolute lifesaver on countless busy evenings. It promises a comforting, hearty dinner that feels both special and effortless, making it a staple in my own kitchen.
While this specific combination may not trace its origins back to ancient culinary texts, its widespread popularity is deeply rooted in the modern desire for wholesome, incredibly flavorful, and time-efficient dinners. It’s a dish that brilliantly celebrates the ingenuity of using ready-made rotisserie chicken, transforming it into a fresh, homemade masterpiece. Think of it as a beloved modern classic, born from the beautiful necessity of feeding families well without sacrificing precious time or taste.
Why This Dish Becomes an Instant Favorite
People absolutely adore this Rotisserie Chicken Broccoli Pasta for so many wonderful reasons. The savory, perfectly seasoned chicken, the crisp-tender bite of fresh broccoli, and the comforting embrace of al dente pasta, all coated in a luscious, often creamy, sauce – it’s a symphony of textures and tastes that truly satisfies. It’s wonderfully versatile, satisfyingly filling, and remarkably quick to assemble, making it an undeniable family favorite that promises deliciousness with minimal fuss. I invite you to discover the joy and ease of bringing this fantastic recipe to your own table tonight.

Ingredients:
- One whole rotisserie chicken, approximately 2 to 3 pounds. This is our star ingredient, making this rotisserie chicken broccoli pasta recipe incredibly quick and flavorful. Shred it into bite-sized pieces, ensuring all bones and skin are discarded. You should aim for about 3-4 cups of shredded chicken.
- 1 pound of your favorite pasta shape. I love using penne, rotini, or even farfalle for this dish, as their shapes are perfect for holding onto that delicious creamy sauce and little bits of chicken and broccoli. Make sure it’s a sturdy shape that can stand up to a rich sauce.
- 2 large heads of broccoli, or about 4-5 cups of fresh broccoli florets. We want vibrant, green broccoli here, so pick heads that look fresh and firm. Cut them into small, bite-sized florets, ensuring they’re roughly the same size for even cooking.
- 2 tablespoons extra virgin olive oil. A good quality olive oil will lend a lovely foundation to our sauce, providing a silky texture and a touch of Mediterranean richness.
- 1 large yellow onion, finely diced. While optional, I find that a little onion adds a wonderful depth and sweetness that truly elevates the overall flavor profile of our rotisserie chicken broccoli pasta.
- 4-5 cloves garlic, minced. Garlic is absolutely essential! The more, the merrier, in my opinion. It’s the aromatic backbone of our sauce.
- 1 teaspoon dried Italian seasoning. This blend of herbs like oregano, basil, thyme, and rosemary will infuse our dish with classic Italian flavors.
- 1/2 teaspoon red pepper flakes (optional, but highly recommended for a little kick!). If you like a touch of warmth and spice, these are a must. Adjust to your preference.
- 4 cups chicken broth, low sodium preferred. This forms the liquid base of our sauce, bringing rich chicken flavor and helping to create that luscious consistency.
- 1 cup heavy cream. This is where the magic happens for that luxurious, creamy texture we’re aiming for in our rotisserie chicken broccoli pasta. Don’t skimp on this!
- 1 cup freshly grated Parmesan cheese, plus extra for serving. Freshly grated is key here – it melts beautifully and has a much superior flavor compared to pre-shredded varieties.
- 1/4 cup fresh parsley, finely chopped, for garnish. Fresh herbs always brighten a dish and add a lovely pop of color and freshness right at the end.
- Salt and freshly ground black pepper, to taste. Seasoning is paramount! We’ll adjust these throughout the cooking process to ensure perfect balance.
- Zest of 1/2 a lemon (optional, for brightness). A little lemon zest at the end can cut through the richness and add a surprising burst of freshness.
Preparation Phase: Getting Ready
-
Prepping the Rotisserie Chicken: Our Time-Saving Secret!
First things first, let’s tackle that beautiful rotisserie chicken. Gently remove the skin and discard it. Then, carefully pull the meat from the bones, shredding it into bite-sized pieces. I like to aim for chunks that are easy to eat with a fork, roughly an inch or so in size. This step is a fantastic shortcut, saving you a good 30-45 minutes of cooking raw chicken and infusing our rotisserie chicken broccoli pasta with incredible pre-cooked flavor. Place all your shredded chicken in a bowl and set it aside; it’s ready to join the party later. Remember to be thorough, ensuring no small bones are left behind.
-
Broccoli Brilliance: Preparing Our Green Goodness
Now, let’s get our broccoli ready. Wash the heads thoroughly under cool running water. Using a sharp knife, carefully cut the broccoli into small, uniform florets. Try to make them roughly the same size, about an inch to an inch and a half, so they cook evenly. We want them tender-crisp, not mushy! If you have any thick stems, you can peel them and chop them into small pieces too; they’re delicious and nutritious. Place your prepared broccoli florets in a separate bowl.
-
Aromatic Foundations: Chopping the Onion and Mincing Garlic
This is where the flavor truly begins! Take your large yellow onion, peel it, and finely dice it. We’re looking for small, consistent pieces that will soften and become translucent, releasing their sweet essence into the sauce. Next, grab those 4-5 cloves of garlic. Peel them, then finely mince them. You can use a garlic press if you prefer, but I find that hand-mincing gives a slightly more rustic texture and potent flavor. Remember, the finer the mince, the more evenly distributed the garlic flavor will be in our rotisserie chicken broccoli pasta. Combine the diced onion and minced garlic in a small bowl, ready for sautéing.
-
Cheese and Herb Prep: The Finishing Touches
For the Parmesan cheese, it’s absolutely crucial to use freshly grated. Trust me on this; the flavor and melt-ability are incomparable to pre-shredded options. Grate about 1 cup of Parmesan cheese and set it aside. For the fresh parsley, give it a good rinse, pat it dry, and then finely chop it. This vibrant herb will be sprinkled over our finished dish, adding a burst of color and freshness. If you’re using lemon zest, zest half a lemon now, being careful to only get the yellow part and avoid the bitter white pith. Keep these separate until they’re needed.
Cooking Phase: Bringing It All Together
-
Cooking the Pasta: Al Dente Perfection
Bring a large pot of heavily salted water to a rolling boil. Salt the water generously – it should taste like the ocean! This is your only chance to season the pasta itself. Once boiling, add your chosen pasta shape and cook according to package directions until it’s al dente. This means it should be cooked through but still have a slight bite to it. We don’t want mushy pasta in our rotisserie chicken broccoli pasta! Before draining, reserve about 1 cup of the starchy pasta water. This “liquid gold” will be invaluable later for adjusting the consistency of our sauce and helping it cling beautifully to the pasta. Drain the pasta and set it aside.
-
Sautéing the Aromatics: Building the Flavor Base
While the pasta is cooking, or immediately after it’s drained, heat the 2 tablespoons of extra virgin olive oil in a large, deep skillet or Dutch oven over medium heat. Once the oil is shimmering, add your finely diced onion. Sauté, stirring occasionally, for about 5-7 minutes, until the onion has softened and become translucent, filling your kitchen with a wonderful aroma. This slow caramelization is key to developing depth.
Next, add the minced garlic, Italian seasoning, and red pepper flakes (if using) to the skillet. Continue to cook for another 1-2 minutes, stirring constantly. Be very careful not to burn the garlic, as burnt garlic turns bitter very quickly. You’ll know it’s ready when the garlic becomes fragrant and its raw edge has mellowed. The aroma at this stage is absolutely intoxicating, signaling the deliciousness to come for our rotisserie chicken broccoli pasta.
-
Introducing the Broccoli: A Quick Steam
Pour the 4 cups of chicken broth into the skillet with the aromatics. Bring the mixture to a gentle simmer. Once simmering, add your prepared broccoli florets. Cover the skillet and let the broccoli steam in the chicken broth for about 3-5 minutes. We’re looking for the broccoli to become tender-crisp – vibrant green and still holding its shape, with a slight give when pierced with a fork. Overcooking it here will lead to mushy broccoli, which we definitely want to avoid! This quick steam ensures the broccoli is perfectly cooked and infused with the broth’s flavor.
-
Creating the Creamy Sauce: The Heart of the Dish
Once the broccoli is tender-crisp, remove the lid. Reduce the heat to low. Stir in the 1 cup of heavy cream. Let the sauce gently warm through for about 2-3 minutes, just until it’s slightly thickened and coats the back of a spoon. Do not let it come to a rolling boil once the cream is added, as it can separate.
Next, gradually add the 1 cup of freshly grated Parmesan cheese, stirring continuously until the cheese has completely melted into the sauce. The sauce will become wonderfully smooth, glossy, and impossibly creamy. Taste the sauce at this point and season generously with salt and freshly ground black pepper. Remember, our rotisserie chicken is already seasoned, so adjust carefully, but the sauce itself needs a good kick! This is where you can truly make the sauce your own.
Finishing Touches and Serving: The Grand Finale
-
Combining Everything: The Ultimate Rotisserie Chicken Broccoli Pasta
Now for the grand assembly! Add the cooked and drained pasta directly to the skillet with the creamy broccoli sauce. Add the shredded rotisserie chicken as well. Using tongs or a large spoon, gently toss everything together, ensuring the pasta, chicken, and broccoli are thoroughly coated in that rich, luscious sauce.
If the sauce seems a little too thick for your liking, this is where that reserved pasta water comes in handy. Add it a tablespoon at a time, stirring well after each addition, until you reach your desired consistency. The starch from the pasta water will help the sauce cling beautifully to all the ingredients. We want a coating that’s thick enough to hold but loose enough to be incredibly saucy and decadent. Continue to gently toss until everything is perfectly integrated into this glorious rotisserie chicken broccoli pasta.
-
Final Seasoning and Garnish: Ready to Impress
Give the entire dish one final taste test. Does it need more salt? A bit more pepper? Perhaps a dash more red pepper flakes for an extra zing? Adjust the seasonings as needed. Now, stir in about half of your chopped fresh parsley. The vibrant green adds not only color but also a burst of fresh flavor. If you’re using lemon zest, sprinkle it in now and give it another gentle toss; it adds a delightful brightness that cuts through the richness beautifully.
-
Serving with Style: Enjoying Your Culinary Masterpiece
Your incredible rotisserie chicken broccoli pasta is now ready to be served! Divide the pasta among serving bowls. For an extra touch of elegance and flavor, sprinkle each portion with the remaining fresh chopped parsley and an additional generous dusting of freshly grated Parmesan cheese. A final twist of black pepper wouldn’t hurt either.
Serve this dish immediately while it’s warm and wonderfully creamy. This is a comforting, hearty meal that’s perfect for a busy weeknight yet impressive enough for company. The convenience of the rotisserie chicken paired with the fresh broccoli and the velvety sauce creates a truly unforgettable culinary experience. Enjoy every single bite of this delightful creation! The aroma alone will have everyone at the table excited.
Conclusion:
Well, we’ve reached the end of our culinary journey for today, and I truly hope you’re feeling inspired to get into your kitchen! What we’ve explored together isn’t just another recipe; it’s a gateway to easy, delicious weeknight meals that will quickly become a cherished favorite. This Rotisserie Chicken Broccoli Pasta isn’t merely about combining ingredients; it’s about crafting comfort, convenience, and incredible flavor all in one bowl. I wholeheartedly believe it’s a must-try for anyone seeking a wholesome, satisfying dish that doesn’t demand hours of prep time. Its genius lies in its simplicity – leveraging the pre-cooked goodness of rotisserie chicken and pairing it with vibrant, nutritious broccoli, all tossed with your favorite pasta in a delightful, often creamy, sauce. It’s the kind of meal that disappears quickly from plates, leaving everyone feeling content and asking for seconds.
The beauty of this particular recipe is its effortless elegance. You’re getting a complete meal that’s packed with protein, fresh vegetables, and satisfying carbohydrates, all without a mountain of dirty dishes or a complicated ingredient list. Think about those busy evenings when you want something homemade and comforting but lack the energy for an elaborate production. That’s precisely when this dish shines brightest. It’s comforting without being heavy, hearty yet surprisingly quick. Furthermore, it’s an incredibly versatile canvas, allowing for adjustments to suit different palates and dietary preferences, making it truly adaptable for every family table.
Serving Suggestions & Creative Variations to Elevate Your Dish
While delicious on its own, this pasta dish also welcomes companions. I often serve it with a simple side salad dressed with a light vinaigrette to add extra freshness and a pleasant crunch. A sprinkle of fresh parsley or basil just before serving can brighten the flavors even more. For a touch of warmth and spice, consider a pinch of red pepper flakes stirred in with the sauce. As for pairings, a crisp white wine, like a Sauvignon Blanc or Pinot Grigio, complements the dish beautifully, or for a non-alcoholic option, a sparkling lemon water or unsweetened iced tea is equally refreshing.
Make It Your Own: Unleash Your Inner Chef!
One of my favorite aspects of cooking is the freedom to experiment and customize, and this recipe is absolutely perfect for that! Here are some ideas to spark your creativity:
- Cheese Power-Up: While Parmesan is classic, don’t shy away from other cheeses! A sharp white cheddar, a creamy Gruyère, or even a smoky provolone can add incredible depth. For a richer, cheesier sauce, consider incorporating cream cheese or mascarpone.
- Vegetable Swap-Ins: No broccoli? No problem! Spinach, asparagus, peas, bell peppers, or even sliced mushrooms would be fantastic additions or substitutions. For a truly seasonal twist, try roasted cherry tomatoes or finely diced zucchini. Just remember to adjust cooking times accordingly to ensure your veggies are perfectly tender-crisp.
- Sauce Adventures: The base sauce is lovely, but you can certainly play with it. A splash of white wine can deepen the flavor profile, or a spoonful of pesto swirled in at the end can add an herbaceous kick. For a lighter, broth-based sauce, simply reduce the cream or milk and increase the chicken broth. Want a bit of tang? A squeeze of fresh lemon juice at the very end is always a winner.
- Spice it Up: Don’t be afraid to reach for your spice rack! A dash of garlic powder, onion powder, or even a pinch of dried oregano or Italian seasoning can transform the taste. For those who love a bit of heat, a dash of cayenne pepper or a good pinch of red pepper flakes will definitely do the trick.
- Protein Alternatives: If you’re not using rotisserie chicken, leftover grilled chicken, shredded turkey, or even pan-seared shrimp would work wonderfully in this recipe. For a vegetarian option, consider adding cannellini beans or a hearty mix of sautéed mushrooms instead of chicken.
So, what are you waiting for? I’ve laid out all the reasons why this dish is a winner, from its incredible flavor and ease of preparation to its endless adaptability. It’s time to roll up your sleeves and experience the magic for yourself. I genuinely hope you give this recipe a try and discover just how utterly delightful a homemade meal can be, even on your busiest days. Once you’ve whipped up your own batch of this fantastic Rotisserie Chicken Broccoli Pasta, please, please, please come back and share your experience with me! I absolutely love hearing about your culinary adventures, your clever variations, and how this recipe brought joy to your table. Happy cooking, and I can’t wait to hear all about it!
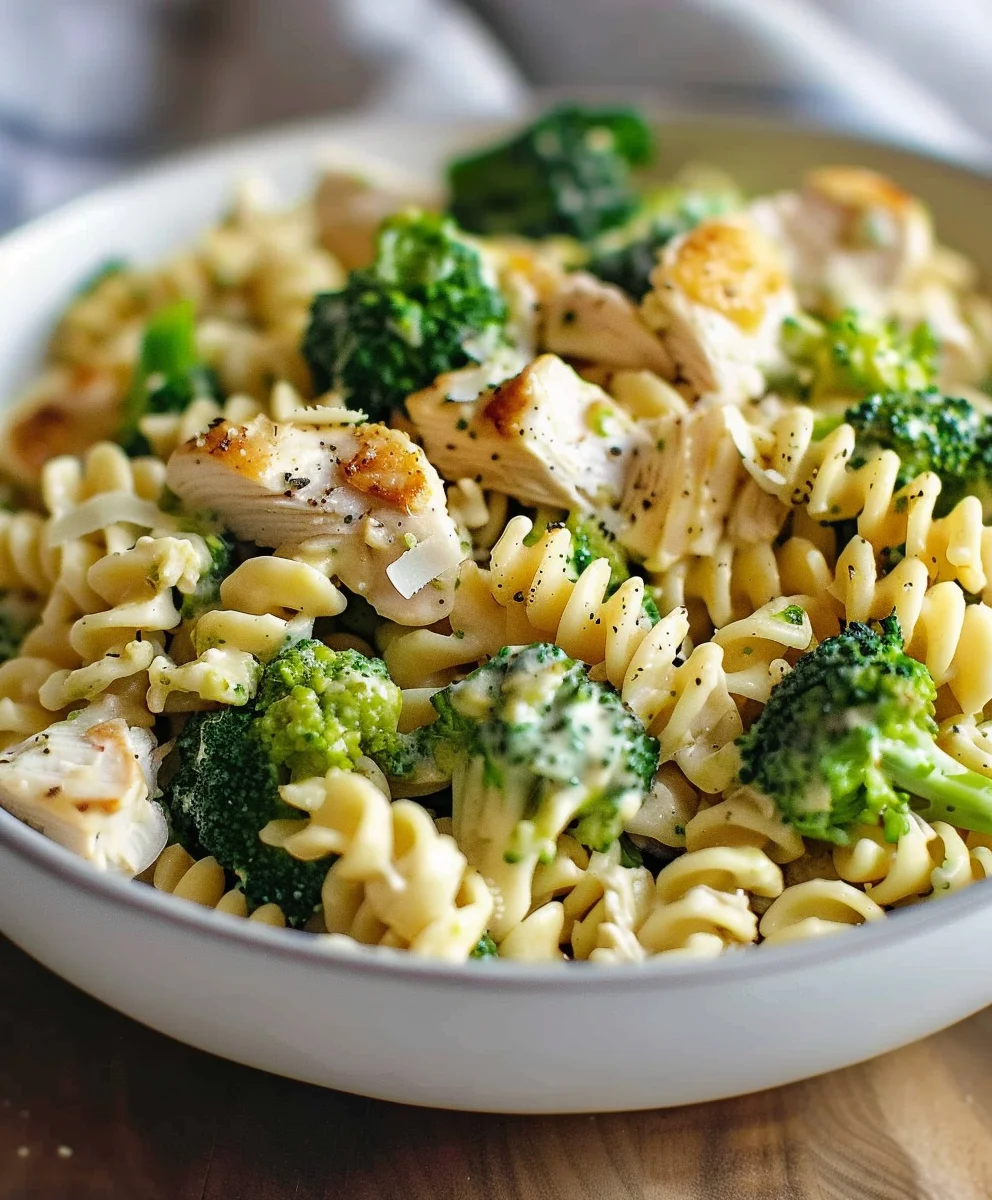
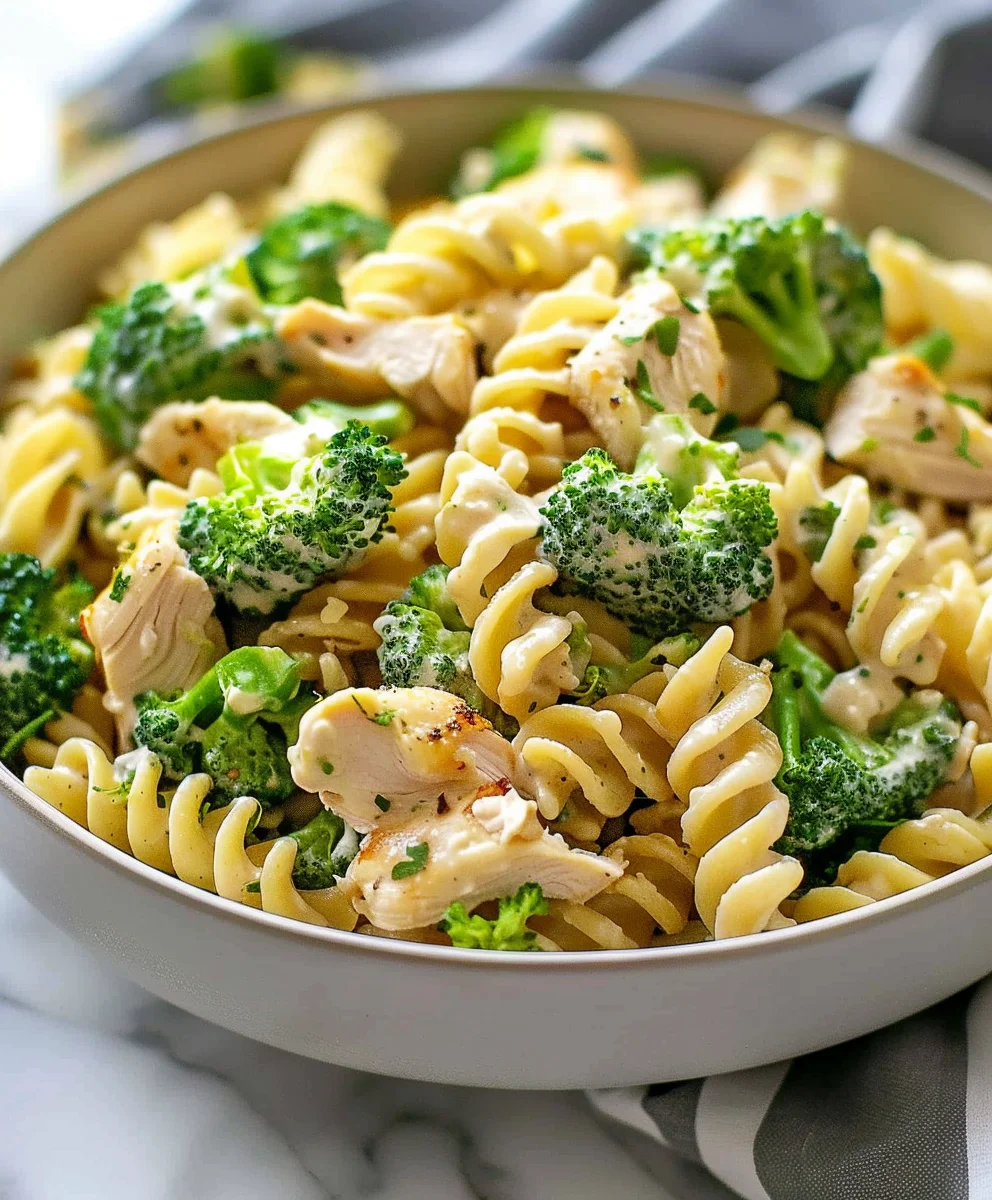
Rotisserie Chicken Broccoli Pasta: Easy Family Dinner!
Rotisserie Chicken Broccoli Pasta is a comforting, hearty dinner that feels both special and effortless. This dish brilliantly celebrates the ingenuity of using ready-made rotisserie chicken, transforming it into a fresh, homemade masterpiece with crisp-tender broccoli and al dente pasta in a luscious, creamy sauce.
Ingredients
-
1 whole rotisserie chicken (3-4 lbs), shredded (about 4 cups)
-
1 lb penne pasta
-
4 cups broccoli florets (fresh or frozen)
-
2 tbsp olive oil
-
2 tbsp butter
-
1 medium yellow onion, diced
-
3 cloves garlic, minced
-
1 tsp Italian seasoning
-
1/2 tsp garlic powder
-
1/4 tsp red pepper flakes (optional)
-
4 cups chicken broth, low-sodium
-
1 cup heavy cream
-
1 cup Parmesan cheese, freshly grated
-
1/2 cup mozzarella cheese, shredded (optional)
-
1/4 cup fresh parsley, chopped (for garnish)
-
Salt and black pepper, to taste
-
Zest of 1/2 lemon (optional)
Instructions
-
Step 1
Shred rotisserie chicken into bite-sized pieces; discard skin/bones. Cut broccoli into small, uniform florets (1-1.5 inches). Dice onion finely and mince garlic. Grate Parmesan, chop parsley, and zest lemon (if using). -
Step 2
Cook pasta al dente in a large pot of heavily salted water according to package directions. Reserve 1 cup starchy pasta water, then drain. -
Step 3
In a large, deep skillet or Dutch oven, heat olive oil and butter over medium heat. Sauté diced onion for 5-7 minutes until translucent. Add minced garlic, Italian seasoning, garlic powder, and red pepper flakes; cook 1-2 minutes until fragrant, being careful not to burn the garlic. -
Step 4
Pour in chicken broth and bring to a gentle simmer. Add broccoli florets, cover the skillet, and steam for 3-5 minutes until tender-crisp and vibrant green. -
Step 5
Remove lid and reduce heat to low. Stir in heavy cream and warm gently for 2-3 minutes. Gradually add grated Parmesan and shredded mozzarella (if using), stirring continuously until melted and the sauce is smooth and glossy. Season generously with salt and black pepper to taste. -
Step 6
Add the cooked pasta and shredded rotisserie chicken to the skillet with the sauce. Toss everything together, ensuring all ingredients are thoroughly coated. If the sauce is too thick, add reserved pasta water, one tablespoon at a time, until desired consistency is reached. Stir in half of the chopped parsley and lemon zest (if using). Give a final taste and adjust seasonings as needed. -
Step 7
Serve immediately. Garnish each portion with the remaining fresh chopped parsley and an extra dusting of freshly grated Parmesan cheese.
Important Information
Nutrition Facts (Per Serving)
It is important to consider this information as approximate and not to use it as definitive health advice.
Allergy Information
Please check ingredients for potential allergens and consult a health professional if in doubt.