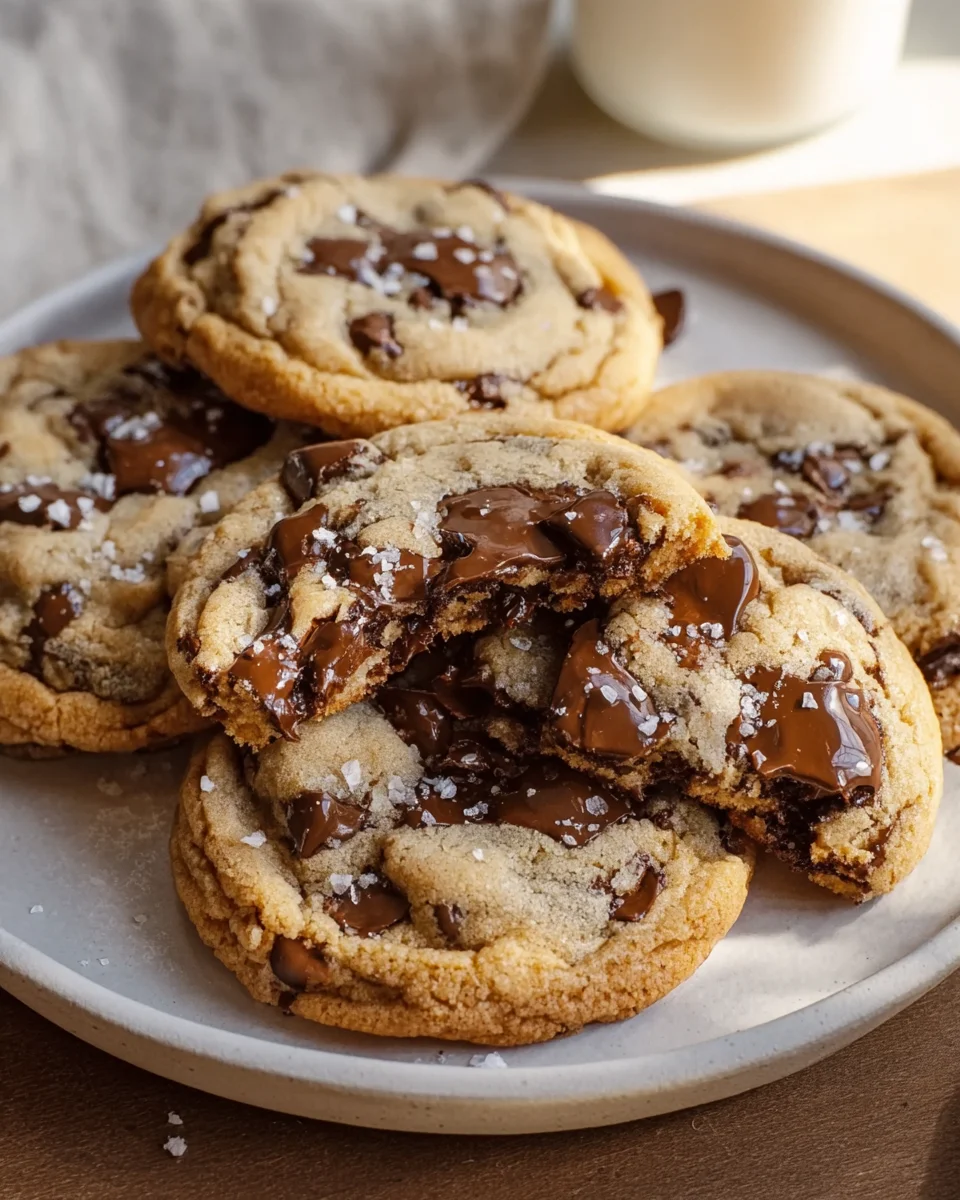
Ultra Thick Bakery Style Chocolate Chip Cookies Crispy Edges Gooey Centers And Loaded With Chocolate are truly the stuff of dreams for any dessert enthusiast. Imagine sinking your teeth into a warm, golden-brown cookie that offers the perfect textural contrast: a delightfully crisp edge that gives way to an incredibly soft, chewy, and melt-in-your-mouth center, absolutely bursting with rich, molten chocolate. This isn’t just any chocolate chip cookie; it’s the kind of indulgent treat that transports you straight back to your fondest childhood memories or that beloved local bakery.
The Timeless Allure of a Perfect Chocolate Chip Cookie
Few desserts hold such an iconic and comforting place in our collective culinary consciousness as the humble chocolate chip cookie. Originating from Ruth Wakefield’s Toll House Inn in the 1930s, it quickly became an American staple, evolving over decades into countless variations. What makes this particular version so universally adored? It’s the promise of supreme satisfaction: the deep, complex flavor of premium chocolate, the buttery richness of the dough, and that undeniable sensory delight of contrasting textures in every single bite. Achieving this bakery-quality perfection at home is a culinary quest many embark upon, and today, I’m thrilled to guide you.
I have spent countless hours meticulously refining this recipe to ensure that you, too, can effortlessly create your very own batch of Ultra Thick Bakery Style Chocolate Chip Cookies Crispy Edges Gooey Centers And Loaded With Chocolate that will impress even the most discerning cookie connoisseur. Prepare to bake something truly extraordinary!

Ingredients:
- Unsalted Butter: 1 cup (2 sticks or 226g), softened to room temperature. This is crucial for achieving that light, fluffy texture when creamed with sugar. I always make sure mine is truly soft – I can easily press a finger into it without it melting.
- Granulated Sugar: ¾ cup (150g). This sugar contributes to the crispy edges and helps the cookies spread just enough.
- Light Brown Sugar: 1 ½ cups (300g), packed. The molasses in brown sugar adds chewiness, moisture, and a wonderful depth of flavor that is absolutely essential for those gooey centers. Make sure it’s fresh and soft!
- Large Eggs: 2, at room temperature. Just like butter, room temperature eggs emulsify better with the other ingredients, leading to a smoother, more cohesive dough.
- Pure Vanilla Extract: 2 teaspoons. Don’t skimp on good quality vanilla; it truly makes a difference in the overall flavor profile of your cookies.
- All-Purpose Flour: 3 cups (360g), spooned and leveled. Measuring flour correctly is paramount for thick cookies. Scooping directly from the bag can add too much, resulting in dry, dense cookies. I always use the spoon and level method for precision.
- Baking Soda: 1 teaspoon. This helps with the lift and spread, contributing to the perfect texture.
- Baking Powder: ½ teaspoon. Another leavening agent that works alongside baking soda to give these cookies their signature thick, puffed-up appearance.
- Fine Sea Salt: 1 teaspoon. Salt balances the sweetness and enhances all the other flavors. Don’t skip it!
- Chocolate Chips/Chunks: 2 cups (approximately 340g), a mix of semi-sweet, dark, and milk chocolate. For “Loaded With Chocolate,” I love using a medley! Some chopped chocolate bars melt beautifully, creating those irresistible puddles, while chips hold their shape slightly more. Use what you love, but definitely go for high-quality chocolate.
- Extra Chocolate Chips/Chunks: ½ cup (approximately 85g), for pressing on top of the cookie dough balls before baking. This step is a secret weapon for that professional, bakery-style look and ensures every cookie is truly “Loaded With Chocolate.”
Equipment You’ll Need:
- Large mixing bowl(s)
- Electric mixer (stand mixer with paddle attachment or a hand mixer)
- Whisk
- Rubber spatula
- Measuring cups and spoons
- Large baking sheets (at least two)
- Parchment paper or silicone baking mats
- Large cookie scoop (about 3-tablespoon size)
- Wire cooling rack
Preparing for Ultra Thick Bakery Style Chocolate Chip Cookies:
Before we dive into the delicious magic of making these Ultra Thick Bakery Style Chocolate Chip Cookies Crispy Edges Gooey Centers And Loaded With Chocolate, let’s make sure we have everything in place. This preparation stage is often overlooked, but I promise you, it sets the foundation for success!
- Bring Ingredients to Room Temperature: This is my golden rule for baking, especially for cookies. I always take out my butter and eggs at least an hour, sometimes two, before I plan to start baking. Room temperature butter creams beautifully, incorporating air more efficiently with the sugars, which results in a lighter, more tender cookie. Cold butter simply won’t achieve the same creamy texture. Likewise, room temperature eggs emulsify better with the butter and sugar mixture, creating a smoother batter without curdling. If you’re in a pinch, you can warm eggs by placing them in a bowl of warm (not hot!) water for 5-10 minutes, and slice your butter into smaller pieces to help it soften faster.
- Prepare Your Baking Sheets: Line at least two large baking sheets with parchment paper or silicone baking mats. This is absolutely non-negotiable for me. Parchment paper prevents sticking, ensures even baking, and makes for super easy cleanup. Silicone mats offer similar benefits and are reusable. Do not grease your baking sheets directly, as this can cause the cookies to spread too much.
- Measure All Ingredients: I swear by the “mise en place” method – having all your ingredients measured out and ready to go before you start mixing. This prevents frantic searching for ingredients mid-recipe and ensures you don’t miss anything. For flour, remember to spoon it into your measuring cup and then level it off with a straight edge (like the back of a knife) to avoid over-measuring. Too much flour will lead to dry, dense cookies that won’t spread correctly.
Crafting the Cookie Dough:
This is where the magic truly begins! Pay close attention to these steps, as the order and method are crucial for achieving that perfect bakery-style texture.
- Whisk Dry Ingredients: In a medium bowl, whisk together the all-purpose flour, baking soda, baking powder, and fine sea salt. Whisking ensures that these leavening agents and salt are evenly distributed throughout the flour, meaning every cookie gets the same lift and flavor. Set this bowl aside for now.
- Cream Butter and Sugars: In the large bowl of your stand mixer (fitted with the paddle attachment) or with a hand mixer, beat the softened unsalted butter on medium speed for about 1 minute until it’s smooth and creamy. Then, add both the granulated sugar and the packed light brown sugar. Increase the speed to medium-high and beat for 2-3 minutes, or until the mixture is light in color, fluffy, and well-combined. This creaming process is vital; it incorporates air into the butter and sugar, which contributes significantly to the cookies’ texture and helps prevent them from becoming too dense. You want it to look almost like a very pale, sandy cloud.
- Add Eggs and Vanilla: Reduce the mixer speed to low. Add one large egg at a time, mixing well after each addition until just combined. Scrape down the sides and bottom of the bowl with your rubber spatula after each egg to ensure everything is incorporated. Once both eggs are in, add the pure vanilla extract. Increase the speed to medium and beat for another 30 seconds to 1 minute, until the mixture is cohesive and looks smooth. Don’t overmix at this stage, but ensure everything is fully combined.
- Combine Wet and Dry Ingredients: With the mixer on low speed, gradually add the dry ingredient mixture to the wet ingredients, about one-third at a time. Mix only until just combined, being very careful not to overmix the dough. As soon as you see no more streaks of dry flour, stop the mixer. Overmixing develops the gluten in the flour too much, which can lead to tough, chewy cookies instead of the desired tender, gooey texture we’re aiming for. A few small streaks of flour are acceptable, as they will disappear in the next step.
- Fold in the Chocolate: Remove the bowl from the mixer and, using your rubber spatula, gently fold in the 2 cups of mixed chocolate chips and chunks. I like to do this by hand to ensure even distribution without overworking the dough. Make sure you scrape the bottom of the bowl to incorporate any flour that might have settled there. This generous amount of chocolate is what makes these cookies truly “Loaded With Chocolate” and guarantees that rich, decadent experience in every bite.
The Crucial Chilling Process:
This step, my friends, is non-negotiable if you want truly Ultra Thick Bakery Style Chocolate Chip Cookies Crispy Edges Gooey Centers And Loaded With Chocolate. Skipping it will result in flatter, wider cookies, and we’re going for that impressive height!
- Chill the Dough: Cover the bowl tightly with plastic wrap and refrigerate the cookie dough for a minimum of 2 hours, but preferably 24-72 hours. Yes, you read that right – up to three days! This extended chilling time is a game-changer for several reasons:
- Flavor Development: The flavors in the dough have time to meld and deepen, resulting in a richer, more complex taste.
- Reduced Spread: Chilling solidifies the butter in the dough, which means the cookies will spread less in the oven, leading to those gorgeous thick centers.
- Texture Improvement: It helps create that perfect balance of crispy edges and wonderfully gooey centers.
If you’re short on time, even 30-60 minutes will help, but I strongly recommend going for the longer chill for the absolute best results. When chilling for more than a few hours, the dough will become very firm. You might need to let it sit at room temperature for 10-15 minutes before scooping if it’s too hard to work with.
Baking Your Bakery Style Masterpiece:
Now for the exciting part – turning that chilled dough into golden, irresistible cookies!
- Preheat Your Oven: While your dough is chilling (or after it’s been chilled and you’re ready to bake), preheat your oven to 375°F (190°C). It’s important to give your oven ample time to fully preheat and maintain a consistent temperature. An oven thermometer is a great tool here to ensure accuracy.
- Scoop the Dough Balls: Using a large cookie scoop (mine holds about 3 tablespoons), scoop generous balls of dough onto your prepared baking sheets. I typically place 6 cookies per standard large baking sheet, ensuring they have plenty of room to spread slightly without merging. These are truly “Ultra Thick Bakery Style” cookies, so don’t be shy with the size!
- Add Extra Chocolate (The Bakery Touch): This is one of my favorite tricks for that magazine-worthy, bakery-style look. Take a few of your reserved extra chocolate chips or chunks and press them gently into the tops and sides of each scooped cookie dough ball. This ensures you see beautiful puddles of chocolate on the surface of the baked cookies, making them look even more decadent and appealing.
- Bake to Perfection: Place one baking sheet at a time into the preheated oven. Bake for 10-14 minutes. Baking time can vary depending on your oven, so watch your cookies carefully.
- Visual Cues: You’re looking for cookies that are lightly golden brown around the edges, but still look quite soft and slightly underbaked in the very center. The centers might even appear slightly puffed up.
- The Gooey Secret: Removing them when the centers still look a little soft is the secret to achieving those desired “Gooey Centers.” They will continue to set up as they cool on the hot baking sheet. If you wait until they are fully golden and firm, you’ll lose that wonderful chewiness and gooey texture.
- Rotate if Necessary: If your oven bakes unevenly, you might rotate the baking sheet halfway through the baking time to ensure consistent browning, but I often find this isn’t strictly necessary with these cookies as they bake relatively quickly.
Cooling and Enjoying Your Perfect Cookies:
The final steps are just as important to preserve the texture and flavor of your freshly baked Ultra Thick Bakery Style Chocolate Chip Cookies Crispy Edges Gooey Centers And Loaded With Chocolate.
- Initial Cooling on Baking Sheet: Once baked, remove the baking sheet from the oven. Leave the cookies on the hot baking sheet for 5-10 minutes. This crucial cooling time allows the cookies to continue to cook slightly from the residual heat of the pan, firm up, and prevent them from falling apart when transferred. It also helps those “Crispy Edges” to develop properly while the centers remain “Gooey.”
- Transfer to Wire Rack: After the initial cooling on the baking sheet, carefully transfer the cookies to a wire cooling rack to cool completely. Allowing them to cool on a wire rack ensures air circulation all around the cookies, preventing them from becoming soggy on the bottom. I know it’s hard to resist, but completely cooled cookies offer the best texture experience, although a warm, slightly gooey cookie straight off the rack is pure bliss!
- Store for Freshness: Once completely cool, store your cookies in an airtight container at room temperature for up to 3-5 days. If you manage to have any left, that is! They tend to disappear rather quickly in my house.
There you have it – a comprehensive guide to baking the most incredible Ultra Thick Bakery Style Chocolate Chip Cookies Crispy Edges Gooey Centers And Loaded With Chocolate you’ll ever taste. Enjoy every single bite!
Conclusion:
And there you have it, my friends! We’ve reached the sweet finale of our journey, and I genuinely hope you’re as excited as I am about what we’ve created together. This isn’t just another cookie recipe; it’s a labor of love designed to deliver pure, unadulterated joy in every single bite. If you’ve ever dreamt of perfecting that elusive, quintessential bakery-style chocolate chip cookie right in your own kitchen, then consider this your golden ticket. The meticulous attention to detail, from the chilling time to the precise temperature, all culminates in an unparalleled textural masterpiece. Forget everything you thought you knew about chocolate chip cookies because this recipe genuinely redefines the gold standard.
What truly sets these apart, making them an absolute must-try for any baking enthusiast or dessert lover, is the incredible symphony of textures and flavors. We’re talking about that glorious contrast that makes a cookie truly unforgettable: those deeply caramelized, delightfully crispy edges that snap just so, giving way to an irresistibly gooey center that melts in your mouth. And let’s not forget the star of the show – they are absolutely loaded with chocolate, ensuring a generous, melty pool of deliciousness in every single bite. The blend of different chocolates creates a complex flavor profile that elevates these beyond simple sweetness into something truly extraordinary. It’s this precise balance and generous indulgence that makes these the ultimate Ultra Thick Bakery Style Chocolate Chip Cookies Crispy Edges Gooey Centers And Loaded With Chocolate. Trust me when I say, once you taste these, there’s no going back to thinner, less impactful versions. They truly embody everything wonderful about a homemade cookie – comforting, decadent, and utterly satisfying.
Now, while these cookies are absolutely perfect on their own, straight from the cooling rack (if you can resist!), I have a few suggestions to take your experience to the next level. Imagine serving a warm, freshly baked cookie alongside a tall, frosty glass of cold milk – a classic for a reason! For a more decadent treat, pair them with a scoop of premium vanilla bean ice cream, perhaps drizzled with a little extra chocolate sauce or a sprinkle of flaky sea salt to enhance that sweet-and-salty dynamic. They also make an incredible base for an impromptu ice cream sandwich; just soften your favorite ice cream slightly, press it between two cookies, and freeze for a few minutes. For a sophisticated twist, enjoy one with a hot cup of coffee or a robust espresso, allowing the bitterness to beautifully complement the cookies’ rich sweetness. Thinking outside the box? Crumble a cookie or two over yogurt or a fruit parfait for a delightful crunchy topping, or even incorporate them into a homemade milkshake for an ultra-indulgent dessert.
And don’t be afraid to experiment with variations once you’ve mastered the core recipe! Feel free to mix up the types of chocolate chips – maybe some white chocolate, butterscotch, or even peanut butter chips for a different flavor profile. A pinch of cinnamon or a tiny dash of almond extract can add a subtle layer of complexity. For those who love a bit of crunch, toasted pecans or walnuts can be a wonderful addition. The beauty of this recipe is its robust foundation, which can handle a little creative flair. So, please, don’t just read about these magnificent cookies; roll up your sleeves, preheat your oven, and dive into the wonderful world of baking these incredible treats. I am so confident that you will fall head over heels for their thick, chewy texture and abundant chocolate goodness.
I absolutely cannot wait to hear about your baking adventures! Please don’t hesitate to share your experiences, photos, and any creative twists you come up with. Tag me, tell me all about your first bite, and let’s celebrate the joy of baking together. Happy baking, and get ready for the best chocolate chip cookies you’ll ever make!
Ultra Thick Bakery Style Chocolate Chip Cookies Crispy Edges Gooey Centers And Loaded With Chocolate
These Ultra Thick Bakery Style Chocolate Chip Cookies are truly the stuff of dreams. Imagine sinking your teeth into a warm, golden-brown cookie that offers the perfect textural contrast: a delightfully crisp edge that gives way to an incredibly soft, chewy, and melt-in-your-mouth center, absolutely bursting with rich, molten chocolate. This indulgent treat transports you straight back to fond childhood memories or your beloved local bakery.
Ingredients
Instructions
Important Information
Nutrition Facts (Per Serving)
It is important to consider this information as approximate and not to use it as definitive health advice.
Allergy Information
Please check ingredients for potential allergens and consult a health professional if in doubt.