Honey Cinnamon Dessert – just the name conjures images of cozy evenings, warm spices, and a comforting sweetness that soothes the soul. From ancient times, the enchanting combination of golden honey and fragrant cinnamon has graced tables across the globe, cherished for its unique ability to transform simple ingredients into something truly magical. This pairing isn’t just a trend; it’s a timeless culinary tradition, deeply rooted in many cultures where it’s been a staple in celebratory sweets and everyday delights for millennia.
There’s an undeniable allure to a good Honey Cinnamon Dessert. People adore it not only for its exquisitely balanced flavour profile – the rich, floral notes of honey perfectly complementing the warm, slightly peppery kick of cinnamon – but also for the incredible aroma it fills your home with as it bakes. It’s a sensory experience that promises comfort, nostalgia, and pure indulgence. Whether you’re looking for a quick weeknight treat or an impressive dish for guests, this flavour combination offers versatility and a guaranteed smile. Prepare to fall in love with a dessert that truly warms you from the inside out.

Ingredients:
My dear friends, get ready to embark on a culinary journey to create the most delightful “Honey Cinnamon Dessert” you’ve ever tasted. This recipe focuses on creating a perfect balance of crispy exterior, soft interior, and an irresistible aromatic honey-cinnamon soak. Here’s what you’ll need for these golden fritters and their glorious syrup:
-
For the Golden Fritters:
- 2 ½ cups (300g) all-purpose flour: I always recommend sifting your flour. This simple step ensures a lighter, lump-free dough, which is essential for fluffy fritters. Trust me, it makes a difference in the final texture of our Honey Cinnamon Dessert.
- 1 tablespoon instant dry yeast: Make sure your yeast is fresh! If it’s old, your fritters won’t rise, and we’ll miss out on that beautiful airy texture. Instant yeast is great because you can mix it directly with the dry ingredients.
- ½ cup (100g) granulated sugar: This adds just enough sweetness to the dough itself, complementing the rich syrup we’ll be making.
- ½ teaspoon salt: A crucial ingredient that doesn’t just add flavor but also balances the sweetness and strengthens the gluten structure in the dough, leading to a better rise.
- 1 ½ cups (360ml) warm milk: The temperature here is key. It should be comfortably warm to the touch, like a baby’s bath – around 105-115°F (40-46°C). Too hot will kill the yeast; too cold won’t activate it.
- 1 large egg: This adds richness, helps bind the dough, and contributes to a beautiful golden color when fried. Bring it to room temperature if you can for better incorporation.
- ¼ cup (60g) unsalted butter, melted and slightly cooled: Butter provides an incredible flavor and helps create a tender crumb. Ensure it’s not hot when adding to the other ingredients, or it might cook the egg.
- 1 teaspoon pure vanilla extract: For that lovely aromatic background note that truly enhances the overall flavor profile of our Honey Cinnamon Dessert.
- 4-5 cups vegetable oil (or canola/sunflower oil) for deep frying: You’ll need enough oil to ensure the fritters can float freely without touching the bottom of your pot.
-
For the Aromatic Honey Cinnamon Syrup:
- 1 ½ cups (360ml) water: The base for our beautiful syrup.
- 1 cup (200g) granulated sugar: To create a luscious, thick syrup.
- 1 cup (340g) good quality honey: This is the star of our “Honey Cinnamon Dessert” and provides that unmistakable golden sweetness. Use a honey you truly love the taste of!
- 2-3 cinnamon sticks: Using whole sticks rather than ground cinnamon in the syrup allows for a deeper, more nuanced cinnamon flavor without making the syrup cloudy.
- 1 strip of lemon zest (from about ¼ lemon): This little touch is a game-changer! It brightens the syrup and cuts through the sweetness, preventing it from being cloyingly sweet.
- ½ teaspoon pure vanilla extract (optional, but highly recommended): Added at the end, it brings another layer of warmth to the syrup.
-
For Garnish (Optional, but pretty!):
- ¼ teaspoon ground cinnamon: For a final dusting.
- 2 tablespoons finely chopped pistachios or walnuts: Adds a lovely texture and visual appeal.
Preparing the Golden Fritter Dough
This is where the magic begins for our “Honey Cinnamon Dessert.” A well-prepared dough is the foundation for truly exceptional fritters.
-
Combine Dry Ingredients: In a large mixing bowl, whisk together the sifted all-purpose flour, instant dry yeast, granulated sugar, and salt. Make sure these are thoroughly combined. I like to imagine each granule getting to know its neighbor!
-
Whisk Wet Ingredients: In a separate, medium-sized bowl, gently whisk together the warm milk, room temperature egg, melted and slightly cooled unsalted butter, and vanilla extract. Take a moment to ensure the butter isn’t too hot, as we discussed; we don’t want scrambled eggs in our dough!
-
Combine Wet and Dry: Pour the wet ingredient mixture into the bowl with the dry ingredients. Using a sturdy wooden spoon or a stand mixer with a dough hook attachment, mix until a shaggy dough forms. Continue mixing for about 5-7 minutes, or until the dough comes together, is smooth, elastic, and pulls away from the sides of the bowl. It might seem a bit sticky at first, but resist the urge to add more flour; it will firm up as you knead. This kneading step is crucial for developing the gluten, which will give our fritters that wonderful chewiness.
-
First Rise (Proofing): Lightly grease a clean large bowl with a tiny bit of vegetable oil. Transfer the dough to this bowl, turning it once to coat the entire surface. Cover the bowl tightly with plastic wrap or a clean kitchen towel. Place it in a warm, draft-free spot in your kitchen. This could be near a sunny window, in a slightly warmed (but turned off) oven, or just on your countertop on a warm day. Let the dough rise for about 1 to 1 ½ hours, or until it has doubled significantly in size. Patience is a virtue here; don’t rush the rise!
-
Prepare for Shaping: Once doubled, gently punch down the dough to release the air. At this point, the dough should be soft and manageable. You can choose to chill the dough for 30 minutes to an hour if you find it too sticky to handle, which makes shaping a little easier, especially for spooning.
Crafting the Aromatic Honey Cinnamon Syrup
While our dough is enjoying its leisurely rise, let’s prepare the heart of our “Honey Cinnamon Dessert”: the rich, fragrant syrup. This syrup should be cooled before it meets our warm fritters, so making it ahead is perfect.
-
Combine Syrup Ingredients: In a medium saucepan, combine the water, granulated sugar, honey, cinnamon sticks, and the strip of lemon zest. Give it a gentle stir to mix everything.
-
Simmer and Infuse: Place the saucepan over medium heat. Bring the mixture to a gentle boil, stirring occasionally to ensure the sugar dissolves completely. Once boiling, reduce the heat to low and let it simmer for about 8-10 minutes. This simmering time allows the cinnamon and lemon zest to deeply infuse into the syrup, creating that incredible aroma. The syrup will thicken slightly, but we’re not looking for a super-thick caramel consistency, just a lovely pourable syrup that will be perfectly absorbed by our fritters.
-
Cool Down: Remove the saucepan from the heat. Carefully remove the cinnamon sticks and lemon zest. Stir in the optional vanilla extract now. Transfer the syrup to a heatproof bowl or jar and let it cool completely to room temperature. You can even make this syrup a day ahead and store it in the refrigerator; just bring it back to room temperature before using, or gently warm it if it’s too thick.
Frying the Golden Fritters to Perfection
Frying can seem intimidating, but with a few tips, you’ll be making perfectly golden fritters for your Honey Cinnamon Dessert in no time!
-
Heat the Oil: Pour the vegetable oil into a large, heavy-bottomed pot or Dutch oven. Ensure the oil is at least 3-4 inches deep. Attach a deep-fry thermometer to the side of the pot. Heat the oil over medium-high heat until it reaches a steady temperature of 350-360°F (175-180°C). Maintaining the correct oil temperature is paramount for perfect fritters. Too cold, and they’ll be greasy; too hot, and they’ll burn on the outside before cooking through.
-
Prepare Your Frying Station: While the oil heats, line a large plate or baking sheet with several layers of paper towels. Have a slotted spoon or spider handy for transferring the fried fritters. Make sure your cooled honey cinnamon syrup is also nearby and ready.
-
Shape and Fry in Batches: Once the oil is at the correct temperature, it’s time to fry! You have a few options for shaping:
- Spoon Method: Using two spoons dipped in oil or water, scoop small, walnut-sized portions of dough and carefully drop them into the hot oil. This creates a rustic, uneven shape that soaks up the syrup wonderfully.
- Piping Bag Method: For more uniform fritters, transfer the dough into a piping bag fitted with a large round nozzle. Snip off small portions directly into the hot oil using kitchen shears dipped in oil.
Fry only a few fritters at a time, making sure not to overcrowd the pot. Overcrowding will drop the oil temperature and lead to soggy fritters. As they fry, they’ll puff up and turn golden brown, usually taking about 2-4 minutes per batch. Flip them gently with your slotted spoon to ensure even cooking on all sides. They should be a beautiful deep golden hue.
-
Drain Excess Oil: Once golden brown and cooked through, use your slotted spoon to carefully remove the fritters from the oil. Transfer them to the paper towel-lined plate to drain any excess oil. This is important for ensuring the fritters aren’t too greasy before they meet their syrupy fate.
-
Repeat: Continue frying the remaining dough in batches, always ensuring the oil returns to the correct temperature between batches. This methodical approach will yield consistently delicious results for your Honey Cinnamon Dessert.
Assembling and Serving Your Irresistible Honey Cinnamon Dessert
The final, glorious step in creating this truly exceptional Honey Cinnamon Dessert!
-
Syrup Soak: While the fritters are still warm (this is key for absorption!), gently immerse them, a few at a time, into the cooled honey cinnamon syrup. You can do this in the bowl of syrup, turning them for a few seconds to ensure they’re coated on all sides. Alternatively, you can arrange the warm fritters on a serving platter and generously drizzle the syrup over them. The contrast of the warm fritters and the cool, aromatic syrup is what makes this Honey Cinnamon Dessert so special. They will greedily soak up all that wonderful flavor!
-
Arrange and Garnish: Carefully transfer the syrupy fritters to a beautiful serving plate or bowl. If you like, you can let them rest for a minute or two to allow the syrup to fully penetrate. For a final flourish, lightly dust them with a sprinkle of ground cinnamon and scatter the finely chopped pistachios or walnuts over the top. The nuts add a lovely textural contrast and a pop of color.
-
Serve Immediately: This Honey Cinnamon Dessert is best enjoyed warm, shortly after assembly. The exterior will still have a slight crispness, and the interior will be wonderfully soft and infused with the sweet, spicy notes of honey and cinnamon. It’s a truly comforting and decadent treat that I know you and your loved ones will adore. Get ready for compliments; this Honey Cinnamon Dessert is a showstopper!
I genuinely hope you enjoy creating and savoring this incredible Honey Cinnamon Dessert. It’s a recipe born from a love for warm, sweet, and comforting flavors, and it’s perfect for sharing, or for treating yourself to a little moment of pure bliss. Happy baking, my friends!
Conclusion:
Truly, if there’s one recipe I’d wholeheartedly urge you to try this season, it’s this one. It’s more than just a simple compilation of ingredients; it’s an invitation to a sensory delight, a culinary hug that warms you from the inside out. The enchanting aroma that will soon fill your kitchen as it bakes is, in itself, a delightful prelude to the extraordinary flavors awaiting you. This particular creation, our delightful
Honey Cinnamon Dessert
, stands out not just for its exquisite taste but also for the sheer joy it brings to every gathering, big or small. I’ve found that it strikes that perfect, delicate balance between comforting familiarity and sophisticated elegance, making it incredibly versatile for any occasion.
Imagine: the gentle, golden sweetness of honey, with its deep, floral undertones, perfectly intertwining with the robust, spicy warmth of cinnamon. This isn’t just a fleeting flavor; it’s a lingering embrace on your palate, a testament to how well these two classic ingredients complement each other. What I adore most about this recipe is its surprising simplicity. Despite delivering an impressive, gourmet experience that will undoubtedly have your guests clamoring for the recipe, it’s remarkably straightforward to master. You don’t need to be a seasoned pastry chef to achieve perfection here; the steps are clear, the ingredients accessible, and the outcome consistently spectacular. It truly embodies the magic of home baking. Whether you’re seeking a cozy treat for a quiet evening curled up with a book, an elegant finish to a festive dinner party, or a delightful contribution to a celebratory brunch, this recipe effortlessly rises to every occasion, promising satisfaction and smiles all around.
Serving Suggestions & Creative Variations:
While this dessert is utterly divine served warm, perhaps with a generous dollop of freshly whipped cream that slowly melts into its surface, creating a luscious river of dairy, or a scoop of premium vanilla bean ice cream for that irresistible hot-cold contrast, please don’t underestimate its charm when served chilled. A slice enjoyed straight from the refrigerator, alongside your morning coffee or as an afternoon pick-me-up, can truly transform an ordinary moment into something genuinely special. It’s a testament to its robust flavor profile that it holds up beautifully, whether hot or cold.
Feeling adventurous? This is where you can truly make this recipe your own! Try incorporating a sprinkle of toasted pecans or walnuts into the batter for an added textural crunch and a wonderfully nutty undertone that complements the honey and cinnamon so well. A hint of orange zest, grated finely and folded in, can brighten the flavors beautifully, offering a zesty counterpoint to the sweetness and adding an unexpected layer of complexity. For those who enjoy a richer, more decadent experience, consider a final drizzle of extra homemade caramel sauce or a luxurious honey glaze just before serving. The beauty of this
Honey Cinnamon Dessert
is its incredible adaptability and how forgiving it is to personal touches. And let’s not forget the versatility of other spices! A pinch of ground nutmeg or a touch of aromatic cardamom can introduce another layer of exotic warmth, transforming this delightful treat into an even more complex and captivating culinary adventure, perfect for exploring different flavor profiles.
If you’re catering to specific dietary needs, many elements of this recipe can be easily adjusted without sacrificing flavor. Consider using a dairy-free milk alternative, such as almond or oat milk, or a high-quality gluten-free flour blend if applicable. The core flavors of honey and cinnamon are so robust and universally loved that they truly shine through minor ingredient swaps, ensuring that almost everyone can partake in the pure joy of this creation. Don’t be afraid to experiment a little to suit your specific preferences; that’s part of the fun of baking!
Your Culinary Adventure Awaits!
Now, dear reader, it’s truly your turn! I genuinely hope you feel inspired to step into your kitchen, gather these simple yet magical ingredients, and bring this wonderful recipe to life. There’s an immense, unparalleled satisfaction that comes from creating something so delicious and heartwarming with your own hands, and I simply cannot wait for you to experience that profound joy. Don’t be shy; embrace the process, savor the incredible aromas that will envelop your home, and most importantly, enjoy every single glorious mouthful. This isn’t just baking; it’s creating memories, fostering warmth, and spreading happiness, one delicious bite at a time.
Once you’ve had the chance to whip up your own batch of this delightful dessert, I would absolutely love, love, love to hear about your experience. Did you add your own unique twist? How did your family or friends react when they tasted it? Share your photos, your stories, and your invaluable feedback with me! It truly warms my heart to see how you make these recipes your own, and your insights are incredibly valuable to our little community of food lovers and home bakers. So go ahead, preheat that oven, gather your ingredients, and prepare to create something truly magical. I promise you, this
Honey Cinnamon Dessert
will quickly become a cherished and frequently requested favorite in your personal recipe collection. Happy baking, and happy eating!
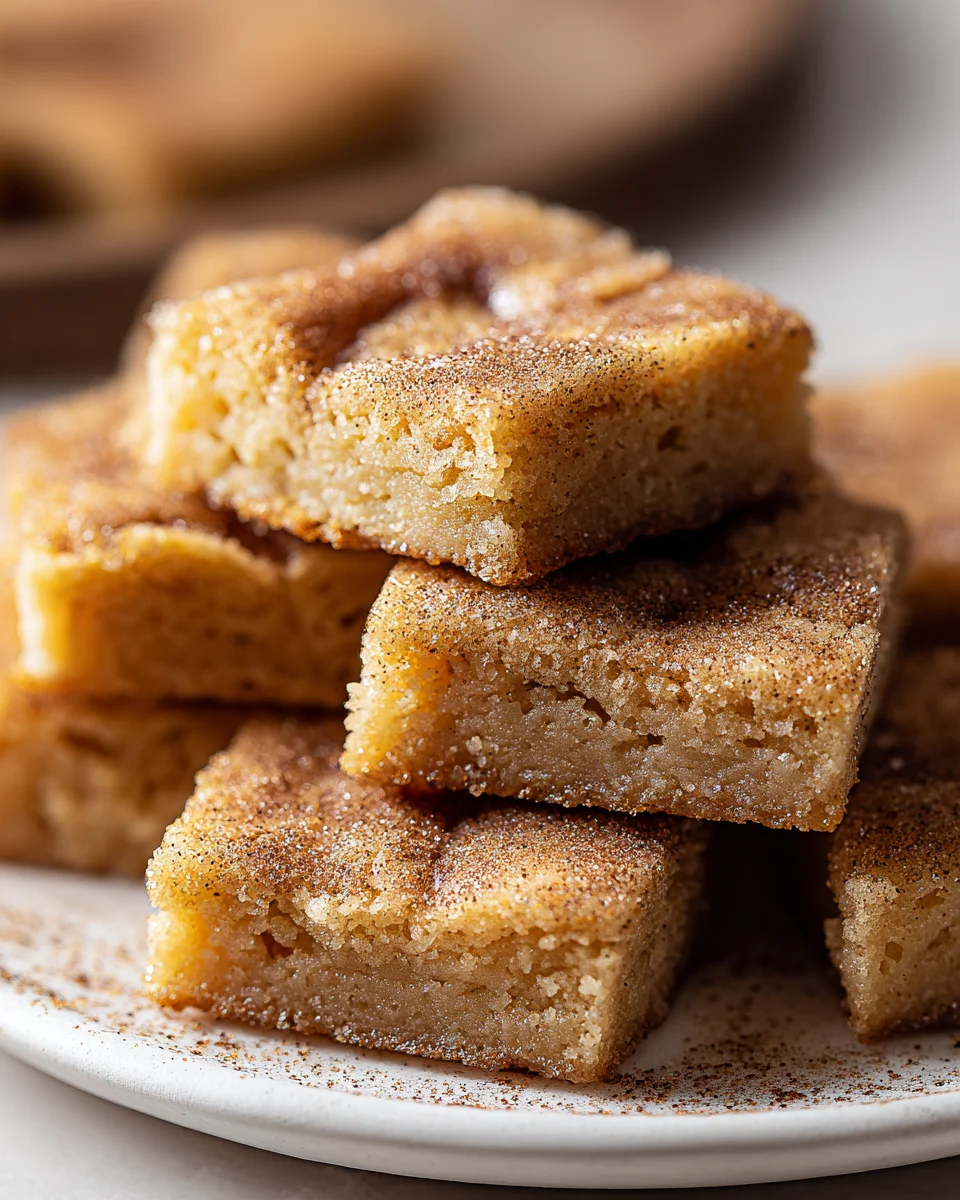
Honey Cinnamon Squares
Honey Cinnamon Squares are a timeless culinary tradition combining the rich, floral notes of honey with the warm, spicy kick of cinnamon. This dessert fills your home with a comforting aroma as it bakes, promising a truly satisfying and heartwarming treat.
Ingredients
Instructions
Important Information
Nutrition Facts (Per Serving)
It is important to consider this information as approximate and not to use it as definitive health advice.
Allergy Information
Please check ingredients for potential allergens and consult a health professional if in doubt.