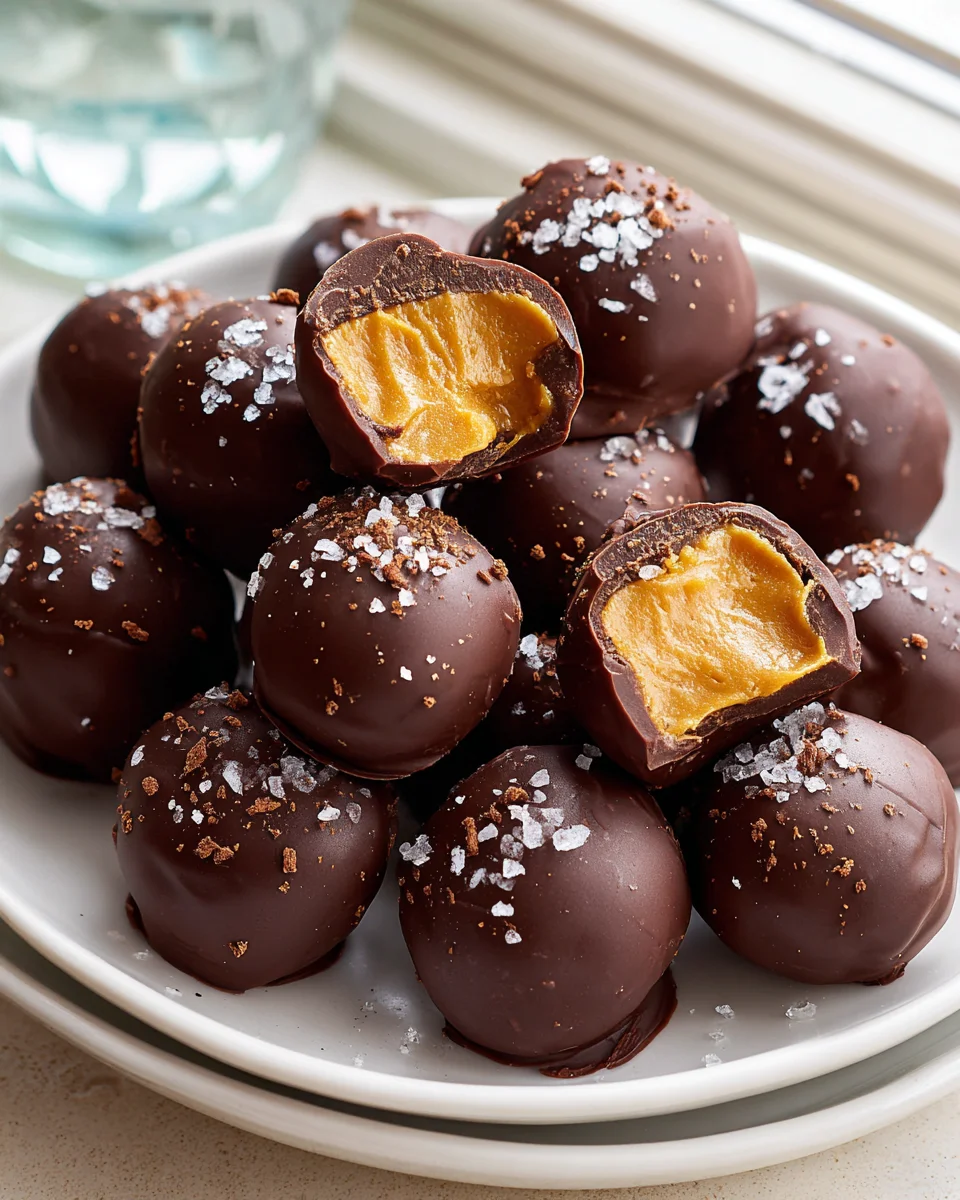
Salted Caramel Truffles Recipe
Oh, get ready to experience pure bliss! If there’s one sweet treat that consistently captures my heart and taste buds, it’s these incredible Salted Caramel Truffles Recipe. I promise you, this isn’t just another dessert; it’s an experience!
What makes these truffles so utterly special, you ask? It’s that harmonious dance between rich, gooey, buttery caramel and just the right whisper of flaky sea salt. That perfect sweet-and-salty combination is absolutely addictive! Each bite is a luxurious journey of creamy texture that simply melts in your mouth, leaving behind a profound sense of decadent satisfaction. You’ll adore how deceptively easy they are to make, considering their incredibly sophisticated taste and elegant appearance.
You’ll find yourself falling head over heels for these bite-sized gems. They’re perfect for impressing guests, making a thoughtful homemade gift, or simply indulging in a moment of pure, unadulterated pleasure. These aren’t complicated chocolate spheres; they are exquisite little parcels of salted caramel heaven, usually enrobed in a delicate chocolate shell or dusted with cocoa. Trust me, once you make these, you’ll wonder how you ever lived without them!

Ingredient Notes
Creating truly exquisite Salted Caramel Truffles begins with selecting the right ingredients. Trust me, the quality of what you put in directly impacts the amazing taste you get out!
- Good Quality Chocolate: This is the backbone of your truffle. I highly recommend using a high-quality dark or semi-sweet chocolate (around 60-70% cacao) in bar form, finely chopped. Chocolate chips often contain stabilizers that can prevent a smooth melt, so a good bar is always my preference. If you prefer a sweeter truffle, a good milk chocolate can also work, but adjust the sugar in the caramel if you find it too sweet.
- Heavy Cream: You’ll need full-fat heavy cream (at least 36% milk fat) for both the caramel and the ganache. This provides the essential richness and smooth texture. Do not substitute with half-and-half or milk, as your truffles won’t set correctly or have the same luxurious mouthfeel.
- Granulated Sugar: Standard white granulated sugar is perfect for making that luscious amber caramel.
- Unsalted Butter: I always use unsalted butter for my baking. It allows me to control the salt content precisely, especially important in a “salted” caramel recipe!
- Flaky Sea Salt: This is a non-negotiable for “salted” caramel truffles. Regular fine table salt simply won’t give you that delightful burst of salty flavor that contrasts so beautifully with the sweet caramel and rich chocolate. Maldon or another flaky sea salt is ideal for both mixing into the caramel and sprinkling on top.
- Vanilla Extract: A good quality pure vanilla extract enhances all the other flavors.
- Coating Options: For coating your finished truffles, I love using unsweetened cocoa powder for a classic look, or you could use powdered sugar, finely chopped nuts, or even a dip in tempered chocolate for an extra special touch.
Substitutions:
- Dairy-Free: While I haven’t personally tested it extensively for this specific recipe, you could try substituting the heavy cream with full-fat canned coconut cream (the thick part only). The texture might be slightly different, and there might be a subtle coconut flavor, but it’s a good alternative for those avoiding dairy.
- Flavor Enhancers: Beyond vanilla, you could experiment with a few drops of almond extract or a splash of non-alcohol coffee syrup added to your ganache for a subtle flavor twist.
- Different Salts: If flaky sea salt isn’t available, a good quality fine sea salt can be used, but you might need to use slightly less as it’s more potent by volume.
Step-by-Step Instructions
Making Salted Caramel Truffles might seem a little intimidating at first, but I promise you, breaking it down into steps makes it completely manageable and incredibly rewarding. Let’s get started!
Step 1: Prepare Your Caramel
- Measure Ingredients: Have your sugar, water, unsalted butter (cubed and at room temperature), heavy cream (warmed slightly in the microwave or a small saucepan), flaky sea salt, and vanilla extract all measured out and ready to go. Caramel moves fast once it starts cooking, so prep is key.
- Cook the Sugar: In a medium, heavy-bottomed saucepan, combine the granulated sugar and water. Stir gently just until the sugar is moistened. Place the pan over medium heat. Do NOT stir once it starts to boil. Stirring can cause the sugar to crystallize. Instead, you can gently swirl the pan occasionally to ensure even cooking.
- Watch the Color: Continue cooking until the sugar syrup turns a rich, amber color. This usually takes about 8-12 minutes. Keep a close eye on it, as it can go from perfect to burnt in a matter of seconds.
- Add Butter and Cream: Once you’ve reached that beautiful amber, immediately remove the pan from the heat. Carefully, and I mean CAREFULLY, add the cubed butter to the hot sugar. It will bubble up vigorously. Once the butter is melted, slowly pour in the warmed heavy cream while whisking continuously. Again, be very careful as it will bubble and steam.
- Finish the Caramel: Return the saucepan to low heat and whisk constantly for about 1-2 minutes until the caramel is completely smooth and any lumps of sugar have dissolved. Remove from heat and stir in the flaky sea salt and vanilla extract. Pour the caramel into a heatproof bowl and let it cool completely at room temperature, or even pop it in the fridge for about 30-45 minutes until it’s thick but still scoopable.
Step 2: Make the Chocolate Ganache Base
- Chop Chocolate: While your caramel is cooling, finely chop your good quality chocolate and place it in a medium heatproof bowl. The finer the chop, the faster and smoother it will melt.
- Heat Cream: In a small saucepan, heat the remaining heavy cream over medium heat until it just begins to simmer around the edges. Do not let it boil vigorously.
- Combine: Pour the hot cream directly over the chopped chocolate. Let it sit undisturbed for 5 minutes. This allows the hot cream to melt the chocolate evenly.
- Stir to Smooth: After 5 minutes, starting from the center of the bowl, gently whisk the chocolate and cream until it’s completely smooth, glossy, and emulsified into a beautiful ganache.
Step 3: Combine and Chill the Truffle Mixture
- Mix Caramel and Ganache: Once your caramel is thick and cool, add it to your chocolate ganache. Gently fold the caramel into the ganache until thoroughly combined. You’ll have a wonderfully rich, deep brown, and very fragrant mixture.
- Chill: Cover the bowl with plastic wrap, pressing it directly onto the surface of the mixture to prevent a skin from forming. Refrigerate for at least 3-4 hours, or preferably overnight, until the mixture is firm enough to scoop and roll.
Step 4: Form and Coat the Truffles
- Prepare Coating: Place your desired coating (cocoa powder, powdered sugar, chopped nuts, etc.) in a shallow dish.
- Scoop: Using a small cookie scoop (about 1 tablespoon in size) or a teaspoon, scoop out portions of the chilled truffle mixture.
- Roll: Quickly roll each portion between your palms to form a smooth ball. Try to work quickly to prevent the mixture from melting too much from the heat of your hands. If it gets too soft, pop the bowl back in the fridge for a bit.
- Coat: Immediately drop the rolled truffle into your chosen coating, rolling it around until fully covered. For an extra touch, you can lightly sprinkle additional flaky sea salt on top of some of the truffles before the coating fully sets.
- Final Chill: Place the coated truffles on a baking sheet lined with parchment paper. Once all are rolled and coated, return them to the refrigerator for about 30 minutes to firm up completely before serving.
Tips & Suggestions
Making Salted Caramel Truffles is a delightful process, and over the years, I’ve picked up a few tricks that I love to share to ensure your truffles turn out perfectly every time. These little gems are truly worth the effort!
- Quality Truly Matters: I can’t stress this enough – especially for truffles. Using a really good quality chocolate, butter, and heavy cream makes a huge difference in the final taste and texture. Think of it this way: there are only a few ingredients, so each one has to shine!
- Patience with Caramel: Making caramel requires a bit of attention and patience. Resist the urge to stir the sugar syrup once it’s boiling, as this can cause crystallization. Swirling the pan is fine. Watch the color diligently; it can go from perfectly golden to burnt very quickly. If you’re nervous, pull it off the heat slightly before you think it’s done, as it will continue to cook from residual heat.
- Warm Cream for Caramel: When adding the heavy cream to the hot caramel, ensure it’s slightly warmed first. Adding cold cream can cause the caramel to seize up and become lumpy. A quick zap in the microwave or a gentle warm on the stovetop will do the trick.
- Chill Thoroughly: The most common mistake I see is not chilling the truffle mixture long enough. It simply won’t roll well if it’s too soft. Give it ample time in the fridge – overnight is ideal. If you’re struggling to roll, pop the mixture back in the fridge for another 15-30 minutes.
- Keep Your Hands Cool: When rolling the truffles, try to work quickly. The warmth from your hands can melt the ganache, making it sticky and difficult to shape. If you have particularly warm hands, you can wear food-safe gloves or periodically rinse your hands in cold water and dry them thoroughly.
- Uniform Size: For a professional look, use a small cookie scoop to portion out the truffle mixture. This helps ensure all your truffles are roughly the same size, which is especially nice if you’re gifting them.
- Creative Coatings: While cocoa powder is a classic, don’t be afraid to get creative! I sometimes use finely crushed toasted pecans or almonds, shredded coconut, or even a blend of cocoa and espresso powder for a mocha kick. For a stunning finish, a light sprinkle of extra flaky sea salt after coating (especially on chocolate-dipped ones) really makes the “salted caramel” pop!
- Gift-Giving Perfection: Salted Caramel Truffles make a fantastic homemade gift. Arrange them in a pretty box with parchment paper between layers, tie it with a ribbon, and you’ve got a thoughtful and delicious present that anyone would adore.
Storage
These Salted Caramel Truffles are so irresistible, they often disappear quickly in my home! However, if you manage to have some leftover, proper storage is key to keeping them fresh and delicious.
- Refrigeration is Essential: Due to the heavy cream and butter in both the caramel and ganache, these truffles must be stored in the refrigerator.
- Air-Tight Container: Place your truffles in an airtight container. This prevents them from drying out, absorbing any odors from your fridge, and keeps them from getting squashed. I like to place a piece of parchment paper between layers if I’m stacking them.
- Shelf Life: Stored correctly in the refrigerator, your Salted Caramel Truffles will stay fresh and delicious for up to 1-2 weeks.
- Serving Suggestion: For the best texture and flavor, I recommend letting the truffles sit at room temperature for about 15-20 minutes before serving. This allows them to soften slightly, giving you that perfect melt-in-your-mouth experience.
- Freezing: Yes, you can freeze Salted Caramel Truffles! Place the coated truffles on a baking sheet and freeze them until solid (about 1-2 hours). Then, transfer them to a freezer-safe airtight container or freezer bag. They will keep well for up to 2-3 months. Thaw them in the refrigerator overnight or at room temperature for an hour or two before serving.
Final Thoughts
And there you have it! I truly hope you’re as excited about these as I am. This Salted Caramel Truffles Recipe isn’t just another dessert; it’s a little piece of edible magic. The way the smooth, rich chocolate melts in your mouth, followed by that luscious, chewy salted caramel, creates an experience that’s absolutely irresistible. It’s the perfect balance of sweet and salty, a truly sophisticated treat that still feels wonderfully comforting.
I genuinely believe this Salted Caramel Truffles Recipe is a must-try because it delivers incredible gourmet flavor with surprisingly simple steps. Whether you’re making them for a special occasion, as a heartfelt gift, or just to treat yourself to something extraordinary, these truffles are guaranteed to impress. Don’t wait – dive in and experience the pure joy of homemade salted caramel truffles. You won’t regret it!

Homemade Salted Caramel Truffles: Irresistible & Simple Recipe
- Total Time: 45 minutes
- Yield: 24 truffles
Description
Experience the bliss of homemade salted caramel truffles, where rich caramel meets decadent chocolate. These bite-sized treats are perfect for impressing guests or indulging in a moment of pure pleasure.
Ingredients
- Good Quality Chocolate (high-quality dark or semi-sweet chocolate, around 60-70% cacao, finely chopped)
- Heavy Cream (full-fat, at least 36% milk fat)
- Granulated Sugar (standard white granulated sugar)
- Unsalted Butter (cubed and at room temperature)
- Flaky Sea Salt (Maldon or another flaky sea salt)
- Vanilla Extract (good quality pure vanilla extract)
- Coating Options (unsweetened cocoa powder, powdered sugar, finely chopped nuts, or tempered chocolate)
Instructions
- Step 1: Prepare Your Caramel
- 1. Measure Ingredients: Have your sugar, water, unsalted butter, heavy cream, flaky sea salt, and vanilla extract all measured out and ready to go.
- 2. Cook the Sugar: In a medium saucepan, combine the granulated sugar and water. Stir gently just until the sugar is moistened. Place the pan over medium heat and do NOT stir once it starts to boil.
- 3. Watch the Color: Continue cooking until the sugar syrup turns a rich, amber color, about 8-12 minutes.
- 4. Add Butter and Cream: Remove the pan from heat and carefully add the cubed butter to the hot sugar. Once melted, slowly pour in the warmed heavy cream while whisking continuously.
- 5. Finish the Caramel: Return the saucepan to low heat and whisk constantly for about 1-2 minutes until smooth. Stir in the flaky sea salt and vanilla extract, then pour the caramel into a heatproof bowl and let it cool completely.
- Step 2: Make the Chocolate Ganache Base
- 1. Chop Chocolate: Finely chop your good quality chocolate and place it in a medium heatproof bowl.
- 2. Heat Cream: In a small saucepan, heat the remaining heavy cream over medium heat until it just begins to simmer.
- 3. Combine: Pour the hot cream over the chopped chocolate and let it sit undisturbed for 5 minutes.
- 4. Stir to Smooth: Whisk the chocolate and cream until completely smooth and emulsified.
- Step 3: Combine and Chill the Truffle Mixture
- 1. Mix Caramel and Ganache: Once the caramel is thick and cool, add it to your chocolate ganache and gently fold until combined.
- 2. Chill: Cover the bowl with plastic wrap and refrigerate for at least 3-4 hours, or preferably overnight.
- Step 4: Form and Coat the Truffles
- 1. Prepare Coating: Place your desired coating in a shallow dish.
- 2. Scoop: Using a small cookie scoop or a teaspoon, scoop out portions of the chilled truffle mixture.
- 3. Roll: Quickly roll each portion between your palms to form a smooth ball.
- 4. Coat: Immediately drop the rolled truffle into your chosen coating and roll until fully covered.
- 5. Final Chill: Place the coated truffles on a baking sheet lined with parchment paper and refrigerate for about 30 minutes to firm up completely.
- Prep Time: 15 mins
- Cook Time: 30 mins
- Category: Dessert
- Method: Cooking
- Cuisine: American
Nutrition
- Serving Size: 1 truffle
- Calories: 100
- Sugar: 10 g
- Sodium: 50 mg
- Fat: 6 g
- Saturated Fat: 4 g
- Unsaturated Fat: 2 g
- Trans Fat: 0 g
- Carbohydrates: 12 g
- Fiber: 1 g
- Protein: 1 g
- Cholesterol: 10 mg
Keywords: Quality truly matters; using high-quality chocolate, butter, and cream makes a huge difference. Be patient with caramel, and ensure your heavy cream is warmed before adding it to avoid lumps.