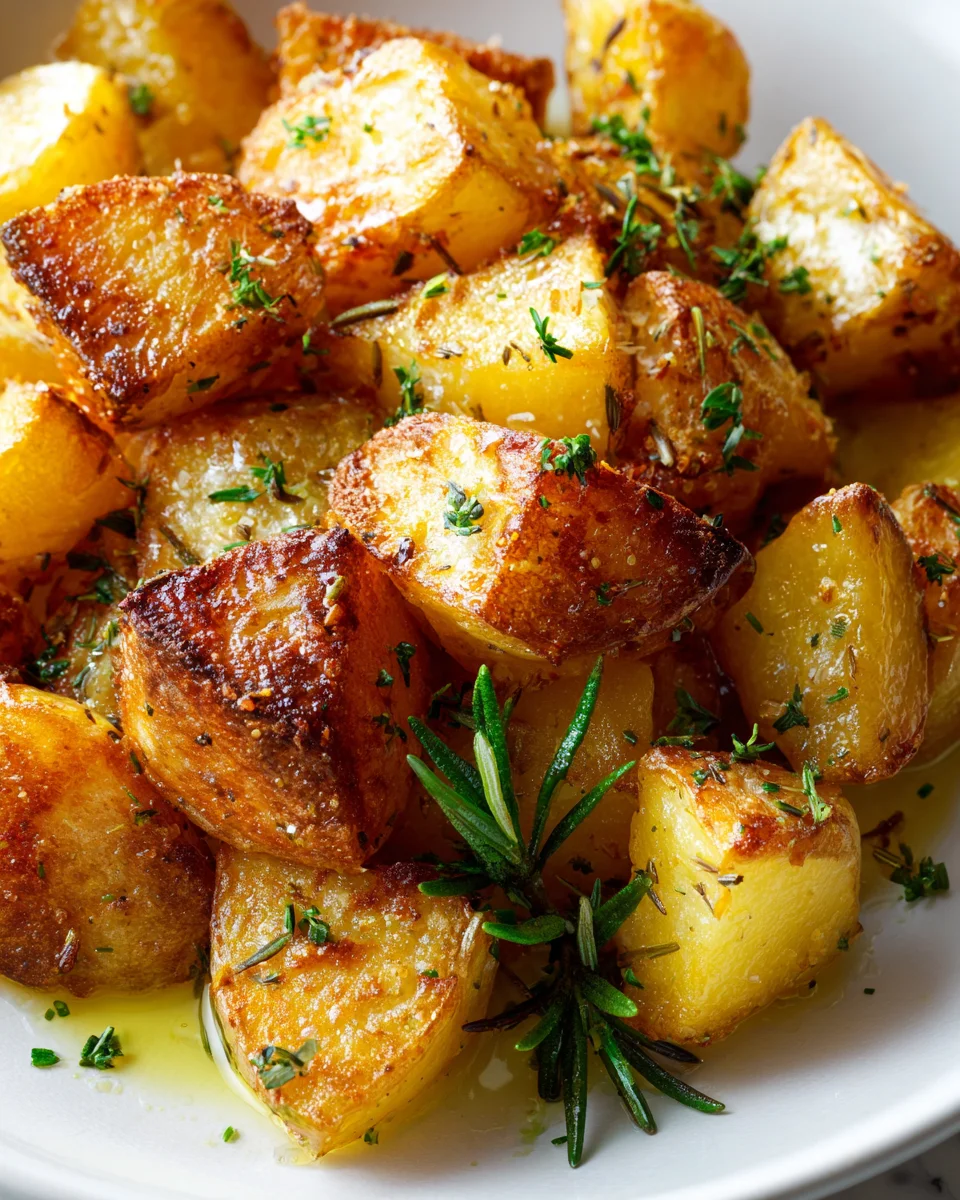
Homemade Roast Potatoes
Oh, homemade roast potatoes! There’s nothing quite like them, is there? For me, they’re the undisputed champion of side dishes, the absolute heart and soul of a truly memorable meal. You see, this isn’t just a recipe; it’s a quest for perfection, a journey to achieve that elusive combination of an incredibly crispy, golden-brown crust and a gloriously fluffy, steamy interior. Forget bland, forget soggy, forget grey – those days are over!
What makes my homemade roast potatoes so special, and why will you absolutely adore them? Well, it’s all about technique and a little bit of love. We’re talking about taking humble potatoes and transforming them into crunchy, flavour-packed nuggets of joy that demand to be devoured. Readers will love this recipe because it delivers on the promise of restaurant-quality roasties right in their own kitchen, turning ordinary dinners into extraordinary feasts. Imagine the smiles when you present these beauties – they’re perfect for Sunday roasts, holiday dinners, or frankly, any meal that deserves a little extra sparkle!
So, what’s the secret to this magic? We’ll briefly par-boil our spuds to get them tender, then give them a good ‘roughing up’ to create all those delicious nooks and crannies that will become incredibly crisp. Finally, we’ll roast them in seriously hot fat (think lovely beef drippings or your favourite high-smoke-point oil) until they’re deeply golden and utterly irresistible. Trust me, once you master these, you’ll never look back!

Ingredient Notes
Ah, homemade roast potatoes! The very heart of a comforting meal, and the secret to their glorious crispiness lies in choosing the right ingredients and treating them with love. Let me walk you through what you’ll need to create those golden, fluffy wonders.
The Potatoes
- Floury Potatoes: This is your number one priority for achieving that perfect fluffy interior and super crispy exterior. Varieties like Maris Piper, King Edward, Russet, or Yukon Gold are absolutely ideal. They break down beautifully on the outside when par-boiled and roughed up, creating that essential starchy surface that crisps up wonderfully in the hot fat.
- What if I only have waxy potatoes? While floury potatoes are superior, don’t despair! Waxy potatoes (like new potatoes or Red Bliss) can still be roasted, but they tend to hold their shape more, resulting in a slightly less fluffy interior and a different kind of crispness. They’ll still be delicious, just not the classic ‘fluffy inside, crispy outside’ roast potato you might be picturing.
- Preparation: I always peel my potatoes for roasties. Aim to cut them into roughly even-sized pieces, about 1.5 to 2 inches (4-5 cm) each. This ensures they cook evenly.
The Fat
The type of fat you use is incredibly important for flavour and crispiness. High smoke point fats are essential here.
- Goose Fat or Duck Fat: These are, in my humble opinion, the champions of roast potatoes. They impart a wonderful, rich flavour and achieve an unparalleled level of crispiness. They have a high smoke point, meaning they can get very hot without burning, which is crucial for achieving that golden crust.
- Beef Dripping: An excellent alternative, especially if you enjoy a more savoury, robust flavour. Beef dripping also has a high smoke point and delivers fantastically crispy results. It’s a superb choice, often available from good butchers or supermarkets.
- Vegetable Oil or Sunflower Oil: For a vegetarian or vegan option, or simply if you prefer a neutral flavour, a good quality vegetable or sunflower oil works well. Make sure it’s a type with a high smoke point. Olive oil, especially extra virgin, has a lower smoke point and can burn, so I tend to avoid it for high-temperature roasting.
Seasoning & Flavour
- Salt: Coarse sea salt is my preference. It provides a lovely texture and robust flavour. You’ll add this towards the end, after the roughing-up stage, but sometimes a little sprinkle before roasting and a final generous shower after is perfect.
- Black Pepper: Freshly ground black pepper adds a touch of warmth and spice.
- Fresh Herbs: Rosemary and thyme are classic companions for roast potatoes. I like to throw in a few sprigs during the last 30-40 minutes of roasting. They infuse the fat and potatoes with their aromatic goodness.
- Garlic: A few smashed, unpeeled garlic cloves tossed into the tray will soften and impart a beautiful, subtle garlic flavour without overpowering the potatoes.
Step-by-Step Instructions
Alright, let’s get those spuds ready for their starring role! Making perfect homemade roast potatoes is less about magic and more about a few critical steps that ensure that glorious crunch and fluffy interior.
Step 1: Preparation – Peel and Chop
- First things first, I peel my chosen floury potatoes. Once peeled, I cut them into roughly even-sized pieces, aiming for about 1.5 to 2 inches (4-5 cm). Consistency in size is key here for even cooking. If some are much smaller, they’ll burn before the larger ones are done.
Step 2: The Crucial Par-Boil
- Place your chopped potatoes into a large saucepan and cover them with cold, salted water. I bring them to a rolling boil over high heat, then reduce the heat and simmer gently.
- This is a critical step: I par-boil them until they are just tender on the outside but still firm in the centre. This usually takes about 8-10 minutes, depending on the potato size. You should be able to easily pierce them with a fork, but they shouldn’t be falling apart. Over-boiling will make them mushy and difficult to crisp.
Step 3: Drain and Rough Up
- Once par-boiled, I very carefully drain the potatoes in a colander. Here’s where the magic happens: I immediately return the drained potatoes to the empty hot saucepan.
- Place the lid back on the saucepan and, holding the lid firmly, shake the pan vigorously for about 30 seconds. This ‘roughs up’ the edges of the potatoes, creating a wonderfully starchy, almost mashed surface that is absolutely essential for maximum crispiness. You’ll see them looking fluffy and slightly crumbly on the surface.
- After roughing them up, I leave them in the colander or spread them on a wire rack for a few minutes to steam dry completely. This helps remove any excess moisture, which is the enemy of crispiness.
Step 4: Preheat the Oven and Fat
- While the potatoes are steaming, I preheat my oven to a high temperature, typically around 200°C (390°F) or even 220°C (425°F) if my oven runs a little cool.
- Crucially, I add my chosen fat (goose fat, duck fat, beef dripping, or high-smoke-point vegetable oil) to a large roasting tray and place it into the preheating oven. I want that fat to be absolutely scorching hot when the potatoes go in. This usually takes about 10-15 minutes in the hot oven.
Step 5: Roast to Golden Perfection
- Once the fat is shimmering hot, I carefully remove the tray from the oven. This next part requires a bit of care! I gently add the rough-up, dried potatoes to the hot fat. Be careful, as the hot fat will sizzle.
- Using tongs, I toss the potatoes gently to ensure each piece is thoroughly coated in the hot fat. This is also the point where I often add a good sprinkling of coarse sea salt, freshly ground black pepper, and any herbs like rosemary or thyme, or even a few smashed garlic cloves.
- Return the tray to the hot oven and roast for an initial 20-30 minutes. Then, I flip the potatoes to ensure all sides are browning evenly. Continue roasting for another 30-60 minutes, or until the potatoes are deeply golden brown and wonderfully crispy all over. I usually flip them once or twice more during this final stage to get that all-over crisp.
- When they’re ready, they should sound incredibly crispy when you nudge them and have a beautiful, uniform golden crust. Serve them immediately and enjoy the cheers!
Tips & Suggestions
Achieving truly epic homemade roast potatoes is an art, but it’s an accessible one! Over the years, I’ve picked up a few tricks that make all the difference between a good roastie and an unforgettable one. Here are my best tips and suggestions:
The Golden Rules for Ultimate Crispiness
- Get That Surface Rough: I cannot stress enough the importance of roughing up the par-boiled potatoes. This creates countless tiny imperfections and a starchy, floury surface that crisps up phenomenally. Don’t be shy with that pan shake!
- Steam Dry Thoroughly: Moisture is the enemy of crispiness. After par-boiling and roughing up, let your potatoes air-dry for a good 5-10 minutes. Spreading them on a wire rack can help immensely, allowing air to circulate around them. A truly dry potato will crisp up better.
- Scorching Hot Fat: The fat MUST be shimmering hot when the potatoes go in. If it’s not hot enough, the potatoes will absorb the fat rather than crisp up in it, leading to soggy, greasy roasties. Don’t be afraid to let your roasting tray and fat heat up for a good 10-15 minutes in the oven.
- Don’t Overcrowd the Pan: Give those potatoes space! If you cram too many onto one tray, they’ll steam rather than roast, leading to a disappointing lack of crisp. Use two trays if necessary, and ensure they are in a single layer.
Flavour Enhancements
- Fat Choice Matters: As mentioned in ingredients, goose fat, duck fat, or beef dripping truly deliver on flavour and texture. They have a depth that vegetable oils can’t quite match.
- Herbs and Aromatics: Fresh rosemary and thyme are my go-to’s. I often strip the leaves from a few sprigs and toss them in with the potatoes halfway through roasting, or just throw whole sprigs and a few smashed garlic cloves (skin on!) into the tray at the same time as the potatoes. The garlic will soften and impart a sweet, mellow flavour.
- Spice It Up: For a different twist, try adding a pinch of smoked paprika, onion powder, or even a tiny bit of cayenne pepper along with your salt and pepper. This adds another layer of flavour.
Serving Suggestions
- The Sunday Roast Staple: Naturally, roast potatoes are the quintessential accompaniment to any Sunday roast – whether it’s with roasted chicken, a lovely beef joint, or even a hearty vegetarian nut roast.
- Beyond the Roast: Don’t limit them! They’re fantastic alongside a perfectly cooked steak, pan-fried fish, or even just as a satisfying side dish with a simple salad. Sometimes, I just crave a bowl of them on their own with a dip!
Smart Preparation
- Par-boil Ahead: If you’re hosting or just want to save time, you can par-boil and rough up your potatoes a few hours in advance. Once they’re roughed up, spread them out on a baking tray or wire rack to cool and dry completely, then cover lightly or just leave them exposed (they’ll dry out nicely) at room temperature until you’re ready to roast. Just make sure they’re completely dry before hitting the hot fat.
- Don’t Be Afraid to Flip: Regular turning, perhaps every 20-30 minutes, ensures even browning and crisping on all sides.
Storage
While homemade roast potatoes are always best devoured straight from the oven, still sizzling and crisp, sometimes we make a little extra, or life simply happens! Here’s how I handle storing and reheating them to keep them as delicious as possible.
Cooling Down Properly
- Before storing, it’s really important to let your roast potatoes cool down completely. If you pack them away while they’re still warm, condensation will form, making them soggy and potentially unsafe.
- I usually spread them out on a wire rack or a clean baking sheet, ensuring they’re in a single layer, to allow air to circulate and help them cool down quickly to room temperature. This usually takes about an hour or so.
Refrigeration
- Once thoroughly cooled, I transfer the roast potatoes to an airtight container. This helps prevent them from drying out or absorbing any odours from your fridge.
- They will happily keep in the refrigerator for up to 3-4 days. While they won’t retain their initial crispiness in the fridge, the flavour will still be excellent.
Freezing
- Freezing roast potatoes is technically possible, but I’ll be honest, it’s not ideal for maintaining their texture. The freezing and thawing process can make them a bit watery and mealy, losing that lovely fluffy interior.
- If you do choose to freeze them, ensure they are completely cool. You can flash-freeze them first by spreading them in a single layer on a baking sheet until solid, then transfer them to a freezer-safe bag or container. This prevents them from clumping together.
- They can be kept in the freezer for up to 2-3 months.
Reheating for Best Results
This is where it gets critical. You want to bring back as much of that glorious crispness as possible!
- Oven (My Top Recommendation): This is hands down the best way to reheat roast potatoes and restore their crispy glory.
- Preheat your oven to a high temperature, around 200°C (390°F).
- Spread the potatoes in a single layer on a baking sheet. You can add a tiny drizzle of fresh oil or fat if they look a bit dry, but usually, there’s enough residual fat.
- Heat for about 15-25 minutes, turning occasionally, until they are piping hot all the way through and have crisped up again.
- Air Fryer: An excellent alternative to the oven, especially for smaller batches.
- Preheat your air fryer to 180-200°C (350-390°F).
- Place the potatoes in a single layer in the air fryer basket (you might need to do this in batches).
- Cook for 10-15 minutes, shaking the basket halfway through, until hot and crispy.
- Frying Pan: For a quick reheat, you can use a sturdy frying pan.
- Heat a tablespoon of oil or fat in a non-stick pan over medium-high heat.
- Add the potatoes and pan-fry, turning frequently, until they are heated through and have re-crisped on the outside. This usually takes about 8-12 minutes.
- Microwave (Not Recommended for Texture): While you can technically microwave them to heat them through, this method will make them soft and soggy. I only use this if I absolutely prioritize speed over texture and plan to finish them quickly in a pan or oven to get some crispness back. It’s best avoided for truly satisfying roast potatoes.
Whichever method you choose, always ensure the potatoes are piping hot in the centre before serving.
Final Thoughts
There’s something truly special about a perfect side dish, and for me, these Homemade Roast Potatoes hit every single note. Forget any preconceived notions you have about roast potatoes because this recipe elevates them to a whole new level. The incredible crispy exterior, achieved with our specific method, shatters beautifully with each bite, giving way to a wonderfully fluffy, tender interior bursting with savory flavor.
I promise you, once you’ve tried these, you’ll understand why they are an absolute must-try. They’re not just a side; they’re a star attraction that complements everything from a hearty beef roast – perhaps seasoned with some delightful non-alcohol alternatives for extra depth – to a simple weeknight meal. The effort is minimal for the spectacular reward you get. So, go ahead, gather your ingredients, and prepare to make the best Homemade Roast Potatoes you’ve ever tasted. Your taste buds will thank you!

Homemade Roast Potatoes: Crispy, Fluffy & Easy Recipe
- Total Time: 1 hour 15 minutes
- Yield: 4 servings
Description
Discover the secret to perfect homemade roast potatoes with a crispy golden-brown crust and a fluffy interior. This easy recipe transforms humble potatoes into a delightful side dish that will elevate any meal.
Ingredients
- Floury Potatoes (Maris Piper, King Edward, Russet, or Yukon Gold)
- Goose Fat or Duck Fat
- Beef Dripping
- Vegetable Oil or Sunflower Oil
- Coarse Sea Salt
- Freshly Ground Black Pepper
- Fresh Herbs (Rosemary and Thyme)
- Garlic (smashed, unpeeled cloves)
Instructions
- Step 1: Preparation – Peel and chop the floury potatoes into roughly even-sized pieces, about 1.5 to 2 inches (4-5 cm).
- Step 2: The Crucial Par-Boil – Place the chopped potatoes into a large saucepan and cover with cold, salted water. Bring to a rolling boil over high heat, then reduce and simmer gently for about 8-10 minutes until just tender but still firm.
- Step 3: Drain and Rough Up – Carefully drain the par-boiled potatoes in a colander. Return them to the empty hot saucepan, cover with the lid, and shake vigorously for about 30 seconds to rough up the edges.
- Step 4: Preheat the Oven and Fat – Preheat the oven to a high temperature (around 200°C or 390°F). Add your chosen fat to a large roasting tray and place it in the preheating oven for about 10-15 minutes until scorching hot.
- Step 5: Roast to Golden Perfection – Carefully remove the hot tray from the oven and gently add the rough-up, dried potatoes. Toss them to coat in the hot fat, then sprinkle with coarse sea salt, black pepper, and herbs or garlic. Roast for an initial 20-30 minutes, then flip and continue roasting for another 30-60 minutes until deeply golden brown and crispy.
- Prep Time: 15 mins
- Cook Time: 60 mins
- Category: Side Dish
- Method: Roasting
- Cuisine: British
Nutrition
- Serving Size: 1 serving
- Calories: 250
- Sugar: 1 g
- Sodium: 300 mg
- Fat: 15 g
- Saturated Fat: 5 g
- Unsaturated Fat: 10 g
- Trans Fat: 0 g
- Carbohydrates: 30 g
- Fiber: 3 g
- Protein: 4 g
- Cholesterol: 0 mg
Keywords: For ultimate crispiness, ensure the fat is very hot before adding the potatoes. Don't overcrowd the pan, and consider using goose fat or beef dripping for the best flavor.