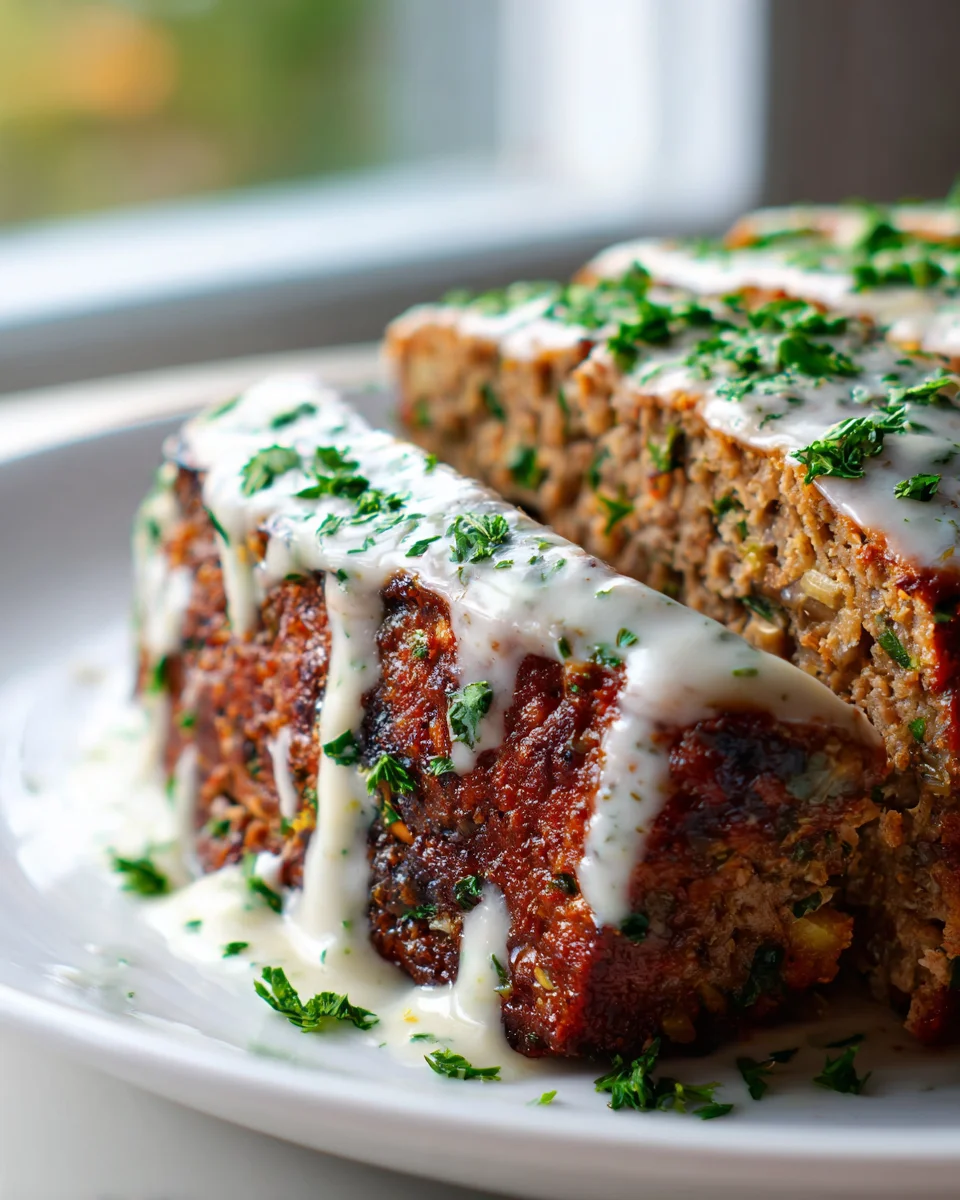
Mediterranean Meatloaf With Garlic Herb Sauce
Oh boy, do I have a treat for you today! Mediterranean Meatloaf With Garlic Herb Sauce is not your grandma’s meatloaf – unless your grandma was a secret culinary genius with a passport to the Mediterranean, of course! I’ve taken that beloved comfort food classic and given it a vibrant, sun-kissed makeover that I just know you’re going to adore.
What makes this recipe so special, you ask? Well, imagine a tender, perfectly seasoned beef meatloaf (that’s right, we’re using delicious beef here!) infused with all those aromatic, fresh flavors you love from Mediterranean cuisine – think herbs, garlic, and perhaps a little something extra that adds a bright, zesty touch. But the real showstopper, the thing that truly elevates this dish, is that incredible Garlic Herb Sauce. It’s not a heavy gravy; instead, it’s a light, zesty, and incredibly fragrant concoction that perfectly complements the rich meatloaf, adding a burst of freshness with every bite. You’ll want to drizzle it over everything!
I genuinely believe you’ll love this recipe because it strikes that perfect balance: it’s hearty and satisfying, yet feels fresh and exciting. It’s comfort food, elevated. It’s perfect for a cozy family dinner, impressive enough for guests, and makes fantastic leftovers (if there are any!). Get ready to transform your dinner table into a Mediterranean escape – without needing a plane ticket. Let’s get cooking!
Ingredient Notes
Creating this Mediterranean Meatloaf With Garlic Herb Sauce is a true culinary delight, and it all starts with understanding the key components. I’ve designed this recipe to bring vibrant, fresh flavors to your table, with plenty of room for your personal touch.
- Ground Beef: I always recommend using a lean ground beef, around 85-90% lean, for the meatloaf. This ensures it’s flavorful without being overly greasy. If you’re looking for an even richer taste, you could certainly use a blend of ground beef and ground lamb, which really enhances that Mediterranean profile.
- Breadcrumbs: These are essential for binding the meatloaf and keeping it moist. I typically use plain panko breadcrumbs for a lighter texture, but regular dry breadcrumbs work perfectly too. For a gluten-free option, simply swap in your favorite gluten-free breadcrumbs.
- Feta Cheese: Crumbled feta is a star here, adding a wonderful salty tang that defines Mediterranean cuisine. If feta isn’t your preference, or you’re looking for a dairy-free alternative, you can omit it or use a plant-based feta substitute. Goat cheese could also offer a similar creamy, tangy note.
- Sun-Dried Tomatoes & Kalamata Olives: These two ingredients are flavor powerhouses. The sun-dried tomatoes provide a sweet, concentrated tomato flavor, while the Kalamata olives add a briny, savory depth. Make sure to drain and chop them finely so they distribute evenly throughout the meatloaf. If you don’t have sun-dried tomatoes, roasted red peppers (drained and chopped) would be a lovely substitute.
- Fresh Spinach: I love the slight earthiness and color that fresh spinach brings. Make sure to roughly chop it before adding it to the mixture. If you only have frozen spinach, thaw it completely and squeeze out as much excess water as possible to prevent a watery meatloaf.
- Aromatics & Herbs: Fresh onion, garlic, dried oregano, and fresh parsley are non-negotiable for me in this recipe. They build the foundational Mediterranean flavor. Don’t skimp on the fresh garlic for both the meatloaf and especially the sauce – it’s critical!
- Greek Yogurt: For the Garlic Herb Sauce, thick, plain Greek yogurt is my top choice. It provides a creamy, tangy base that pairs beautifully with the savory meatloaf. Full-fat sour cream is a fantastic alternative if you prefer, or for a dairy-free sauce, use a thick plant-based unsweetened yogurt.
- Fresh Herbs for Sauce: A medley of fresh dill, mint, and parsley truly makes this sauce sing. These bright, herbaceous flavors are what elevate it from good to absolutely incredible. While dried herbs can be used in a pinch (use about a third of the amount), fresh is always, always best here.
- Lemon Juice & Olive Oil: These two are crucial for adding brightness, acidity, and a smooth finish to the sauce. Always use fresh lemon juice for the best flavor.
Step-by-Step Instructions
Making this Mediterranean Meatloaf With Garlic Herb Sauce is a straightforward and rewarding process. I’ll walk you through each step to ensure your dish is perfect.
1. Prepare for Baking
- First things first, preheat your oven to 375°F (190°C). This ensures your oven is at the right temperature when your meatloaf is ready to go in.
- Line a baking sheet with parchment paper or foil for easier cleanup. If you have a wire rack that fits inside, place it on top of the lined baking sheet; this allows fat to drip away, promoting a beautifully browned exterior.
2. Mix the Meatloaf Ingredients
- In a large mixing bowl, gently combine all of your meatloaf ingredients: the ground beef, breadcrumbs, egg, finely chopped onion, minced garlic, crumbled feta cheese, chopped sun-dried tomatoes, chopped Kalamata olives, fresh spinach, dried oregano, and fresh parsley.
- The key here is to mix gently! I like to use my hands for this, ensuring everything is just combined without overworking the meat. Overmixing can lead to a tough meatloaf, and we want ours tender and juicy.
3. Form and Bake the Meatloaf
- Shape the meat mixture into a compact loaf, about 9×5 inches, on your prepared baking sheet (or on the wire rack).
- Bake for 50-60 minutes, or until an internal temperature of 160°F (71°C) is reached when measured with a meat thermometer inserted into the thickest part. The cooking time can vary based on your oven and the thickness of your loaf, so trust your thermometer!
4. Prepare the Garlic Herb Sauce
- While the meatloaf is baking, let’s get that incredible Garlic Herb Sauce ready. In a medium bowl, combine the Greek yogurt (or sour cream/dairy-free alternative).
- Add your finely minced garlic, chopped fresh dill, chopped fresh mint, and chopped fresh parsley.
- Pour in the fresh lemon juice and a drizzle of olive oil. Season generously with salt and freshly ground black pepper.
- Stir everything together until well combined. Taste and adjust the seasonings if needed – you might want a little more lemon, salt, or pepper to suit your preference. This sauce is best when the flavors have a few minutes to meld, so making it while the meatloaf cooks is perfect timing.
5. Rest and Serve
- Once your Mediterranean Meatloaf is done baking, remove it from the oven and let it rest for at least 10-15 minutes before slicing. This resting period is crucial; it allows the juices to redistribute throughout the loaf, ensuring every slice is moist and flavorful.
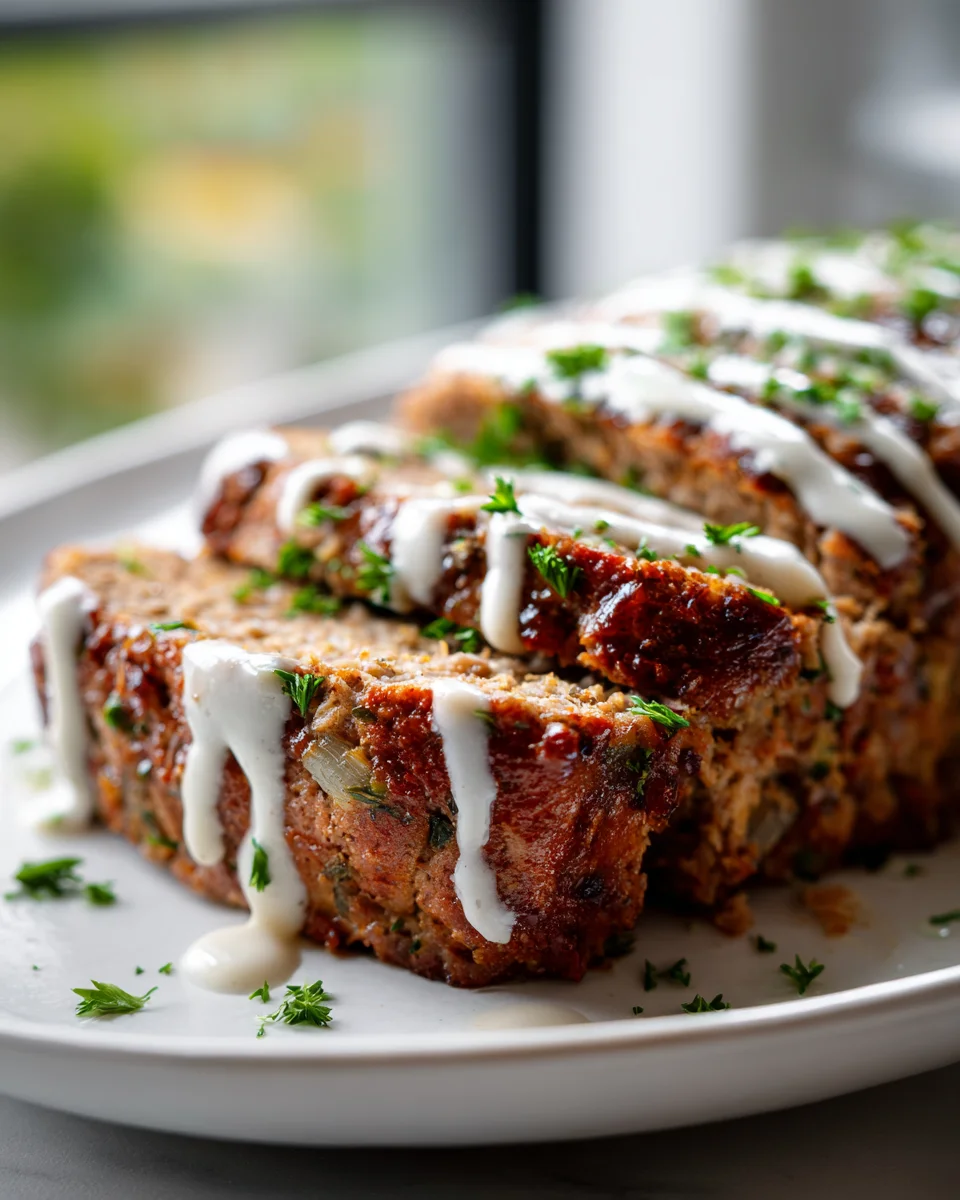
- Slice the meatloaf into generous portions and serve immediately with a generous dollop (or two!) of the fresh Garlic Herb Sauce.
Tips & Suggestions
I’ve found that a few simple tricks can really elevate your Mediterranean Meatloaf With Garlic Herb Sauce from good to absolutely amazing. Here are some of my go-to suggestions:
- Don’t Overmix: I can’t stress this enough! When combining your meatloaf ingredients, mix just until everything is incorporated. Overworking the ground beef will compress the proteins, resulting in a dense, tough meatloaf rather than the tender, juicy texture we’re aiming for. Use a light hand, or even gloves, for the best results.
- Use a Meat Thermometer: For perfectly cooked meatloaf every time, a reliable meat thermometer is your best friend. The ideal internal temperature for ground beef is 160°F (71°C). This ensures it’s safe to eat without being overcooked and dry. Insert the thermometer into the thickest part of the loaf.
- Resting is Key: Once your meatloaf comes out of the oven, resist the urge to slice into it immediately. Letting it rest for 10-15 minutes allows the juices to redistribute throughout the loaf. This makes for a much juicier, more flavorful slice and helps the meatloaf hold its shape better.
- Enhance the Sauce: While the Garlic Herb Sauce is fantastic as is, feel free to experiment with other fresh herbs. A touch of fresh oregano or even some finely chopped chives could add another layer of flavor. For a little kick, a tiny pinch of red pepper flakes in the sauce can be wonderful.
- Serving Suggestions: This meatloaf and sauce pairing is incredibly versatile. I love serving it alongside some fluffy couscous or quinoa to soak up any extra juices. Roasted Mediterranean vegetables like bell peppers, zucchini, and cherry tomatoes make a perfect side. A simple green salad with a lemon-oregano vinaigrette also complements the flavors beautifully. Don’t forget some warm pita bread for dipping in that luscious sauce!
- Make Extra Sauce: Trust me on this one – you’ll want extra Garlic Herb Sauce! It’s not just for the meatloaf; it makes a fantastic dip for vegetables, a spread for sandwiches, or a dressing for salads. You won’t regret having more on hand.
Storage
I always find that this Mediterranean Meatloaf With Garlic Herb Sauce makes for fantastic leftovers, and knowing how to store it properly ensures you can enjoy it for days to come.
- Cool Completely: Before storing either the meatloaf or the sauce, it’s absolutely essential to let them cool down to room temperature. Storing warm food can create condensation, which can lead to sogginess and a shorter shelf life.
- Meatloaf Storage (Refrigerator):
- Once the meatloaf has completely cooled, transfer any leftovers to an airtight container.
- It will keep well in the refrigerator for 3-4 days.
- I often slice the leftover meatloaf before storing; this makes it easier to grab a single portion for reheating.
- Meatloaf Storage (Freezer):
- Mediterranean Meatloaf freezes beautifully! After cooling, you can either wrap the entire remaining loaf tightly in plastic wrap and then foil, or slice it into individual portions and wrap each slice.
- Place the wrapped portions in a freezer-safe bag or airtight container.
- It can be frozen for up to 2-3 months.
- To reheat from frozen, you can either thaw it in the refrigerator overnight and then reheat, or reheat directly from frozen in the oven at a lower temperature (around 300°F / 150°C) until warmed through, often covered to prevent drying out.
- Garlic Herb Sauce Storage:
- The Garlic Herb Sauce, being dairy-based, has a slightly different storage requirement. Transfer any leftover sauce to a clean, airtight container.
- Store it in the refrigerator for 3-5 days.
- I do not recommend freezing the sauce. Dairy-based sauces tend to separate and become grainy or watery when thawed, losing their creamy texture. It’s best enjoyed fresh or within a few days from the fridge.
- Reheating Meatloaf:
- For slices of meatloaf, I find reheating in a microwave works well for quick individual servings.
- For larger portions or a whole leftover loaf, reheating in a preheated oven (around 300-325°F / 150-160°C) covered with foil, until heated through, helps maintain moisture.
- Always serve reheated meatloaf with fresh or chilled sauce.
Final Thoughts
I truly hope you’ve enjoyed preparing and tasting this exquisite Mediterranean Meatloaf With Garlic Herb Sauce. It’s a dish that truly delivers on flavor, taking the beloved comfort of meatloaf and infusing it with the bright, aromatic essence of the Mediterranean.
What makes the Mediterranean Meatloaf With Garlic Herb Sauce an absolute must-try is the perfect harmony between the tender, herb-infused beef and that unbelievably fresh, vibrant garlic herb sauce. It’s a combination that elevates a classic to something truly special, bringing a burst of sun-drenched flavors to your dinner table.
Trust me, once you experience the unique depth and zest of this incredible Mediterranean Meatloaf With Garlic Herb Sauce, you’ll understand why it’s destined to become a cherished favorite in your culinary collection. Get ready to impress your taste buds and your loved ones!
Savory Mediterranean Beef Meatloaf with Garlic Herb Sauce
- Total Time: 1 hour 15 minutes
- Yield: 4 servings 1x
Description
This Mediterranean Meatloaf With Garlic Herb Sauce is a vibrant twist on a classic comfort food. Infused with fresh herbs and flavors, it’s perfect for family dinners and impressing guests.
Ingredients
- 1 lb lean ground beef (85-90% lean)
- 1 cup plain panko breadcrumbs (or regular dry breadcrumbs)
- 1 large egg
- 1 medium onion, finely chopped
- 3 cloves garlic, minced
- 1/2 cup crumbled feta cheese
- 1/2 cup chopped sun-dried tomatoes
- 1/2 cup chopped Kalamata olives
- 1 cup fresh spinach, roughly chopped
- 1 tsp dried oregano
- 1/4 cup fresh parsley, chopped
- 1 cup thick plain Greek yogurt (or full-fat sour cream)
- 3 cloves garlic, finely minced (for sauce)
- 1/4 cup fresh dill, chopped
- 1/4 cup fresh mint, chopped
- 1/4 cup fresh parsley, chopped (for sauce)
- 2 tbsp fresh lemon juice
- 1–2 tbsp olive oil
- Salt and freshly ground black pepper to taste
Instructions
- Preheat your oven to 375°F (190°C).
- Line a baking sheet with parchment paper or foil. If using a wire rack, place it on top of the lined baking sheet.
- In a large mixing bowl, gently combine all meatloaf ingredients: ground beef, breadcrumbs, egg, onion, garlic, feta cheese, sun-dried tomatoes, Kalamata olives, spinach, oregano, and parsley.
- Mix gently to avoid overworking the meat.
- Shape the mixture into a compact loaf, about 9×5 inches, on the prepared baking sheet.
- Bake for 50-60 minutes, or until the internal temperature reaches 160°F (71°C).
- While the meatloaf is baking, prepare the Garlic Herb Sauce by combining Greek yogurt, minced garlic, dill, mint, parsley, lemon juice, and olive oil in a medium bowl.
- Season the sauce with salt and pepper, and stir until well combined.
- Let the meatloaf rest for 10-15 minutes after baking before slicing.
- Serve the meatloaf with a generous dollop of Garlic Herb Sauce.
- Prep Time: 15 mins
- Cook Time: 60 mins
- Category: Dinner
- Method: Baking
- Cuisine: Mediterranean
Nutrition
- Serving Size: 1 slice
- Calories: 350
- Sugar: 2 g
- Sodium: 600 mg
- Fat: 20 g
- Saturated Fat: 8 g
- Unsaturated Fat: 10 g
- Trans Fat: 0 g
- Carbohydrates: 15 g
- Fiber: 2 g
- Protein: 25 g
- Cholesterol: 80 mg
Keywords: Avoid overmixing the meatloaf ingredients to keep it tender. Use a meat thermometer for accurate cooking, and let the meatloaf rest before slicing for the best texture.