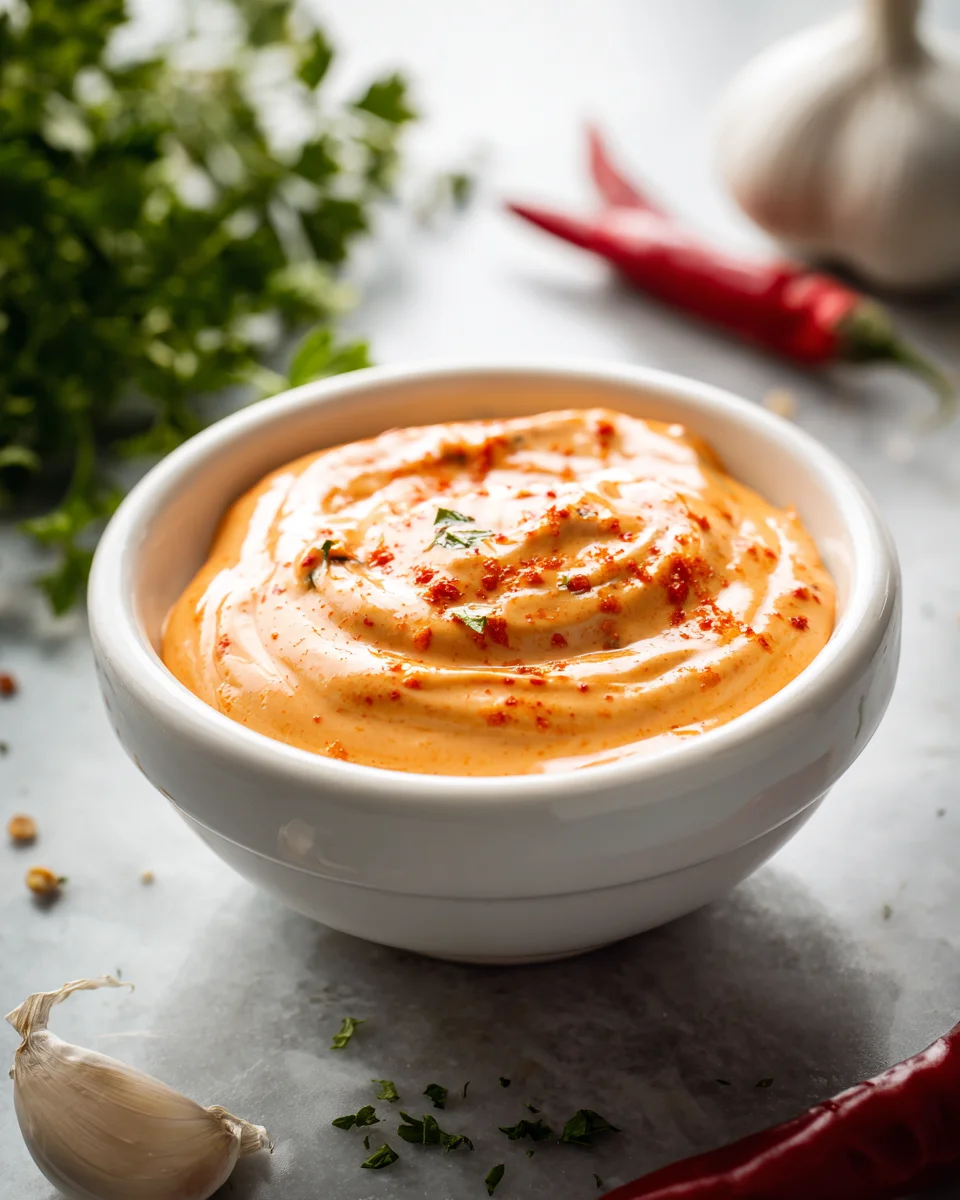
Spicy Sriracha Homemade Mayonnaise
Oh, prepare yourselves, because I am about to share one of my absolute kitchen game-changers: my recipe for Spicy Sriracha Homemade Mayonnaise. If you’re anything like me, you probably have a deep appreciation for mayonnaise and an even deeper love for the fiery kick of Sriracha. Well, what if I told you that combining these two titans results in something truly magical, and incredibly easy to whip up right in your own kitchen?
What makes this recipe so special, you ask? It’s the incredible fresh taste you simply can’t get from a jarred version. We’re talking about a vibrant, creamy base that melts in your mouth, perfectly balanced with the garlic-chili punch of Sriracha. You control the spice level, making it as mild or as bold as your taste buds desire. This isn’t just mayo; it’s an elevated condiment, a culinary exclamation point that will transform any dish it touches.
You, my friend, are going to absolutely adore making and devouring this Sriracha mayo. Why? Because it’s unbelievably versatile, turning humble sandwiches into gourmet experiences, making your fries sing, and elevating grilled beef, fish tacos, or even just a simple hard-boiled egg. It’s quick to make, using just a few common ingredients and coming together in minutes with the help of a food processor or immersion blender. The satisfaction of knowing you’ve created such a delicious, preservative-free condiment from scratch is immense, and the flavor? Simply addictive. Get ready to ditch the store-bought versions forever and embrace a new world of spicy, creamy goodness!

Ingredient Notes
Making your own mayonnaise, especially a spicy Sriracha version, is incredibly rewarding and surprisingly simple. The key to success lies in using good quality, fresh ingredients and having them all at the right temperature. Here’s a breakdown of what you’ll need and why:
- Eggs: I always recommend using a large, fresh, pasteurized whole egg (or just the yolk if you prefer a richer, slightly thicker consistency). Freshness is important not just for safety but also for the emulsifying power of the egg. Make sure your egg is at room temperature; this is absolutely crucial for a successful emulsion. Cold eggs struggle to bind with the oil, increasing the risk of your mayonnaise breaking.
- Neutral Oil: For mayonnaise, a neutral-flavored oil is your best friend. I typically reach for light olive oil (not extra virgin, which can be too strong and bitter), canola oil, grapeseed oil, or sunflower oil. These oils have a high smoke point and won’t overpower the delicate flavors of the egg and Sriracha. You want the Sriracha to be the star, not the oil! Avoid strong-flavored oils like extra virgin olive oil unless you specifically want that robust flavor profile, as it can often turn the mayonnaise bitter.
- Sriracha: This is where the magic happens and the “spicy” comes in! Use your favorite brand of Sriracha hot sauce. The amount you add is entirely up to your personal heat preference. Start with a conservative amount, as you can always add more at the end. I love how Sriracha brings not just heat but also a lovely garlic undertone and a touch of sweetness.
- Acid (Lemon Juice or Vinegar): A splash of acid is essential for both flavor balance and for helping the emulsion process. Freshly squeezed lemon juice is my top choice, as it adds a bright, zesty note that complements the Sriracha beautifully. Alternatively, white wine vinegar or apple cider vinegar also work well. Again, ensure it’s at room temperature.
- Dijon Mustard (Optional, but Recommended): While not strictly necessary, a teaspoon of Dijon mustard is a secret weapon for homemade mayonnaise. It acts as an excellent emulsifier, helping to stabilize the mixture and prevent it from breaking. Plus, it adds a lovely depth of flavor that pairs wonderfully with the Sriracha.
- Salt: Essential for seasoning! Start with a pinch and adjust to taste at the end. Mayonnaise can taste a bit bland without adequate salt.
- Sugar (Optional): Sometimes, a tiny pinch of granulated sugar can help balance the heat and acidity, especially if your Sriracha is very spicy or your lemon juice is particularly tart. It’s not about making it sweet, but about rounding out the flavors.
Step-by-Step Instructions
There are a few ways to make homemade mayonnaise, but for Spicy Sriracha Homemade Mayonnaise, the immersion blender method is by far the easiest and most foolproof. I’ll also briefly touch on other methods.
Immersion Blender Method (My Go-To!)
- Prepare Your Ingredients: First and foremost, ensure all your ingredients (egg, oil, Sriracha, lemon juice, mustard) are at room temperature. This is the single most important step for a successful emulsion. I usually let them sit out for 30-60 minutes before I start.
- Combine in a Jar: Get a wide-mouth jar that’s just slightly wider than the head of your immersion blender. Crack your room temperature egg into the bottom of the jar. Add the lemon juice (or vinegar), Dijon mustard (if using), your desired amount of Sriracha (start with 1-2 tablespoons and adjust later), and a pinch of salt.
- Add the Oil: Carefully pour the neutral oil directly on top of the other ingredients in the jar. Don’t stir! The oil will form a layer on top.
- Blend to Emulsify: Insert your immersion blender into the jar, pushing it all the way down to the bottom, covering the egg yolk. Turn the blender on high and keep it absolutely still at the bottom for about 15-20 seconds. You’ll see a thick, white emulsion start to form at the bottom.
- Slowly Lift: Once a good portion of the mayonnaise has formed at the bottom, very slowly start to lift the immersion blender upwards through the oil layer, continuing to blend. This allows the remaining oil to be gradually incorporated into the emulsion. Move the blender up and down gently a few times until all the oil is fully incorporated and you have a thick, creamy Sriracha mayonnaise.
- Taste and Adjust: Remove the immersion blender. Give your Sriracha mayonnaise a taste. Is it spicy enough? Add more Sriracha. Does it need more salt? A little more tang? Adjust with more salt, lemon juice, or Sriracha until it’s perfect for your palate.
Food Processor or Blender Method
- Combine Wet Ingredients: In the bowl of your food processor or blender, combine the room temperature egg, lemon juice (or vinegar), Dijon mustard (if using), Sriracha, and salt. Process for about 10-15 seconds to ensure everything is well combined.
- Slowly Drizzle in Oil: With the food processor or blender running on low speed, begin to very, very slowly drizzle in the neutral oil through the feed tube. The key here is patience; a thin, steady stream is crucial. If you add the oil too quickly, your mayonnaise will break.
- Continue Blending: Keep the machine running until all the oil has been incorporated and the mixture has thickened into a creamy mayonnaise. This can take a few minutes.
- Taste and Adjust: Stop the machine, scrape down the sides, and taste. Adjust seasonings (Sriracha, salt, lemon juice) as needed.
Manual Whisk Method (The Arm Workout!)
- Prepare a Stable Bowl: Place your room temperature egg yolk (manual method often uses just yolk for more stability), lemon juice (or vinegar), Dijon mustard (definitely use it here for stability!), Sriracha, and salt in a medium-sized bowl. Place the bowl on a damp towel to keep it from sliding around.
- Start Whisking: Vigorously whisk the egg mixture until it’s light and slightly frothy.
- Slow Oil Drizzle: Begin adding the oil, literally drop by drop at first, while continuously whisking with your other hand. Once a stable emulsion starts to form (after about 1/4 cup of oil), you can switch to a very thin, steady stream of oil, but never stop whisking!
- Continue Until Thick: Keep whisking until all the oil is incorporated and the mayonnaise is thick and creamy. This method requires significant arm strength and patience.
- Taste and Adjust: Season to your liking with more Sriracha, salt, or lemon juice.
Tips & Suggestions
Making homemade Sriracha mayonnaise is a fantastic culinary skill to master, and a few key tips can ensure your success every time:
- Room Temperature is Non-Negotiable: I cannot stress this enough. If your ingredients are cold, the fat in the oil and the proteins in the egg won’t emulsify properly, and you’ll end up with a broken, oily mess. Plan ahead and let everything sit out for at least 30-60 minutes before you start.
- Patience with the Oil (if not using immersion blender): If you’re using a food processor, blender, or whisk, the speed at which you add the oil is absolutely critical. A slow, steady, thin stream is paramount. Think of it as a gentle drizzle, not a pour. Adding it too fast is the number one reason homemade mayonnaise breaks.
- Troubleshooting a Broken Mayonnaise: Don’t despair if your mayonnaise separates! It happens to the best of us. To fix it, grab a clean bowl (or the food processor/blender) and add one fresh egg yolk (room temperature) and a teaspoon of Dijon mustard. Start whisking (or blending) this mixture, and then very slowly begin to add your broken mayonnaise, a teaspoon at a time, just as you would add oil. The new yolk will help re-emulsify the mixture.
- Adjusting the Heat: The beauty of making your own Sriracha mayonnaise is customization. My recipe suggests starting with a moderate amount of Sriracha, but feel free to add more or less to suit your preference. You can also mix in a tiny pinch of cayenne pepper for an extra kick without diluting the Sriracha flavor.
- Flavor Enhancements: While Sriracha is the star, don’t hesitate to experiment with other additions once you’ve mastered the basic recipe. A finely minced clove of garlic, a touch of lime juice instead of lemon for a more Southeast Asian twist, or even a sprinkle of dried herbs like cilantro or chives could elevate your Sriracha mayo further.
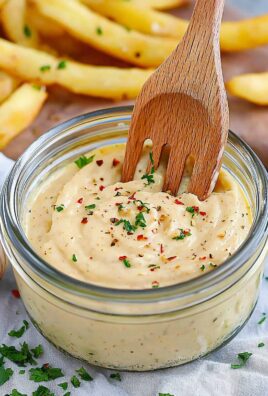
- How to Use Your Sriracha Mayo: This spicy condiment is incredibly versatile! I love it slathered on sandwiches, beef burgers, fish tacos, or wraps. It’s fantastic as a dipping sauce for fries, sweet potato fries, crispy chicken, or even fresh vegetables. You can also use it to dress a coleslaw for a zesty kick or dollop it onto grilled seafood or corn on the cob. It truly elevates any dish needing a creamy, spicy boost.
- The Benefits of Homemade: Beyond the amazing taste, making your own mayonnaise means you control the ingredients. No artificial preservatives, unwanted sugars, or questionable oils. It’s fresher, healthier, and tastes miles better than anything store-bought.
Storage
Since your Spicy Sriracha Homemade Mayonnaise contains raw egg, proper storage is crucial for both safety and freshness.
- Refrigeration is Key: Always transfer your freshly made Sriracha mayonnaise to a clean, airtight container immediately after making it. Store it in the coldest part of your refrigerator.
- Shelf Life: Due to the raw egg, homemade mayonnaise has a much shorter shelf life than its store-bought counterparts. I recommend consuming your Sriracha mayonnaise within 1 to 2 weeks for optimal freshness and safety. Trust your senses – if it smells off, looks discolored, or separates significantly beyond initial slight settlement, it’s best to discard it.
- Airtight Container: Ensure the container is truly airtight. Exposure to air can cause the mayonnaise to oxidize, change flavor, and potentially spoil faster.
- Never Freeze: Mayonnaise does not freeze well. The emulsion will break, resulting in an oily, separated mess upon thawing. Stick to refrigeration.
Final Thoughts
And there you have it! I truly believe that once you’ve experienced the vibrant, creamy, and wonderfully fiery kick of your very own Spicy Sriracha Homemade Mayonnaise, there’s no going back. This isn’t just any condiment; it’s a game-changer that elevates everything it touches.
The beauty of making Spicy Sriracha Homemade Mayonnaise yourself lies in the unparalleled freshness and the ability to customize that perfect heat level. It’s so much more flavorful than anything store-bought, with that unmistakable homemade touch. You’ll find yourself reaching for it to slather on sandwiches, dip your fries, dollop onto grilled beef, or even stir into a zesty salad dressing. It’s incredibly versatile and adds a thrilling dimension to countless dishes.
So, go ahead and give this recipe a try. I promise you’ll be delighted by how easy it is to create such a spectacular condiment. Your taste buds (and your meals!) will thank you for introducing them to the magic of Spicy Sriracha Homemade Mayonnaise!

Best Spicy Sriracha Homemade Mayo – Flavor Explosion!
- Total Time: 15 minutes
- Yield: 1 cup 1x
Description
Experience the vibrant and creamy goodness of Spicy Sriracha Homemade Mayonnaise, a game-changing condiment that elevates any dish. With just a few simple ingredients, you can create a delicious and customizable mayo that adds a fiery kick to your meals.
Ingredients
- 1 large fresh pasteurized whole egg (or just the yolk)
- 1 cup neutral oil (light olive oil, canola oil, grapeseed oil, or sunflower oil)
- 1–2 tablespoons Sriracha (adjust to taste)
- 1 tablespoon freshly squeezed lemon juice (or white wine vinegar or apple cider vinegar)
- 1 teaspoon Dijon mustard (optional, but recommended)
- Salt (to taste)
- A tiny pinch of granulated sugar (optional)
Instructions
- Prepare Your Ingredients: Ensure all your ingredients (egg, oil, Sriracha, lemon juice, mustard) are at room temperature.
- Combine in a Jar: Crack your room temperature egg into the bottom of a wide-mouth jar. Add the lemon juice (or vinegar), Dijon mustard (if using), your desired amount of Sriracha, and a pinch of salt.
- Add the Oil: Carefully pour the neutral oil directly on top of the other ingredients in the jar. Don't stir!
- Blend to Emulsify: Insert your immersion blender into the jar, pushing it all the way down to the bottom. Turn the blender on high and keep it still at the bottom for about 15-20 seconds.
- Slowly Lift: Once a good portion of the mayonnaise has formed at the bottom, slowly lift the immersion blender upwards through the oil layer, continuing to blend.
- Taste and Adjust: Remove the immersion blender. Taste your Sriracha mayonnaise and adjust with more Sriracha, salt, or lemon juice as needed.
- Prep Time: 15 mins
- Cook Time: 0 mins
- Category: Condiment
- Method: Blending
- Cuisine: American
Nutrition
- Serving Size: 1 tablespoon
- Calories: 100
- Sugar: 0 g
- Sodium: 50 mg
- Fat: 11 g
- Saturated Fat: 1 g
- Unsaturated Fat: 10 g
- Trans Fat: 0 g
- Carbohydrates: 0 g
- Fiber: 0 g
- Protein: 0 g
- Cholesterol: 30 mg
Keywords: Ensure all ingredients are at room temperature for a successful emulsion. Adjust the amount of Sriracha to suit your heat preference, and consider adding a pinch of cayenne pepper for extra kick.