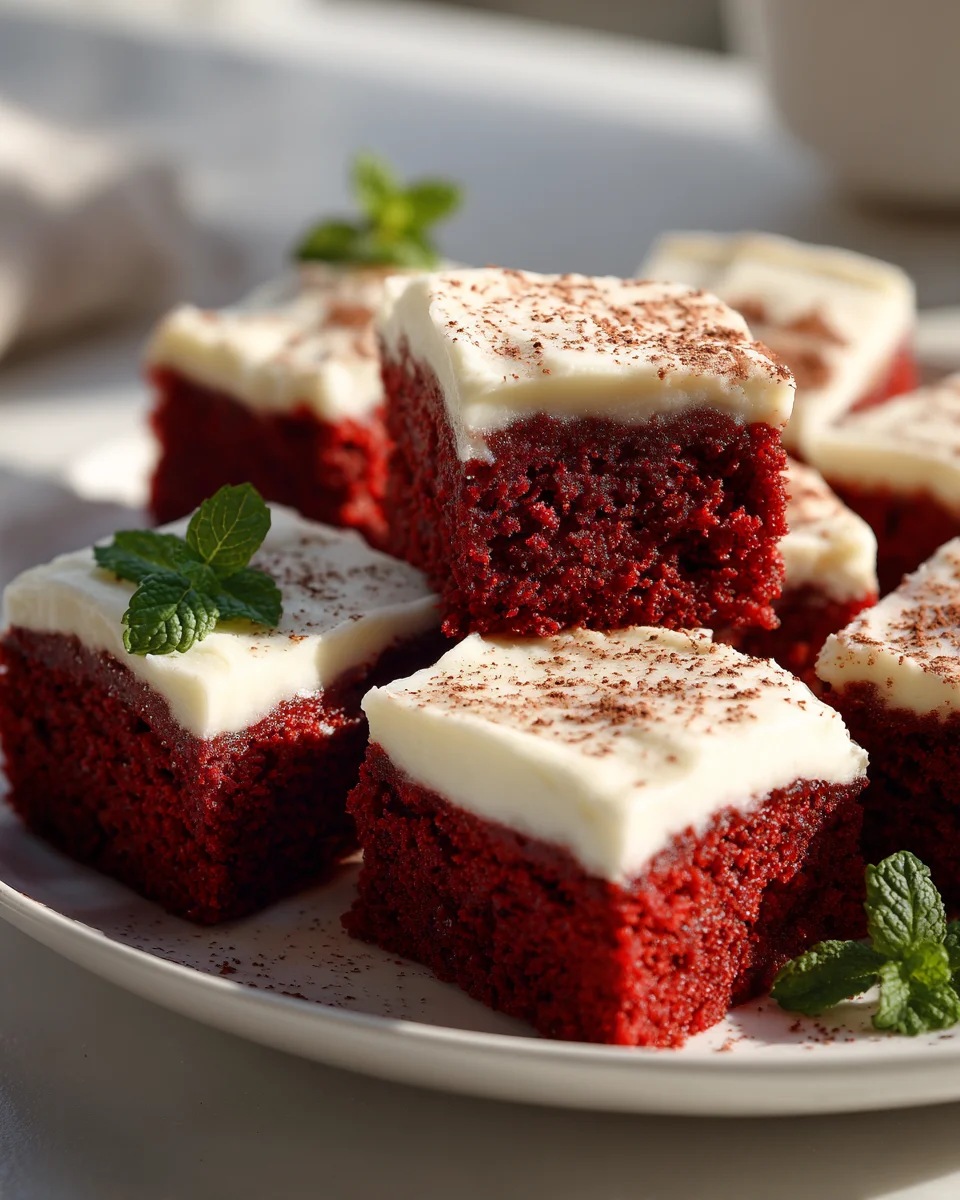
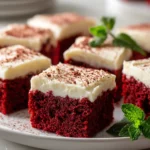
Red Velvet Brownies are not just a dessert; they’re an experience. I mean, seriously, what’s better than taking two iconic treats – the rich, slightly tangy allure of red velvet and the dense, fudgy perfection of a brownie – and smashing them together into one glorious bite? This isn’t your average brownie recipe; it’s a vibrant, show-stopping twist that will have everyone asking for your secret. You’re going to absolutely adore how these brownies look, with their stunning deep red color contrasting beautifully with that creamy, tangy swirl of cheesecake magic on top. Every bite delivers a symphony of flavors and textures: the intense cocoa notes of a classic red velvet, a heavenly moist and chewy brownie base, and that signature cream cheese tang that just ties it all together. They’re perfect for impressing guests, jazzing up a holiday spread, or simply treating yourself to something truly special. Get ready to bake a batch of pure joy!

Ingredient Notes
Hello, fellow baking enthusiasts! Before we dive into making these utterly delightful Red Velvet Brownies, let’s chat a bit about the stars of our show – the ingredients. Getting these right is key to achieving that perfect fudgy texture, vibrant red hue, and classic red velvet flavor. Here’s what you’ll need and some thoughts on why each is important:
The Essentials for Fudginess & Flavor
- Unsalted Butter: I always go for unsalted butter so I can control the salt content myself. Melted butter is crucial here because it contributes significantly to that super fudgy, dense brownie texture we’re aiming for. If you only have salted butter, just reduce the added salt in the recipe by about ¼ teaspoon.
- Granulated Sugar: This provides the primary sweetness and also helps achieve that desirable crinkly top on your brownies. It melts beautifully into the butter, creating a glossy base.
- Large Eggs: Make sure your eggs are at room temperature. This helps them incorporate more smoothly into the batter, leading to a more homogenous mixture and a better overall texture. They provide structure and richness.
- Vanilla Extract: Don’t skimp on good quality vanilla! It’s a flavor enhancer and perfectly complements the cocoa.
- Unsweetened Natural Cocoa Powder: This is a key player in our red velvet story. We’re looking for natural cocoa powder here, not Dutch-processed, as its natural acidity interacts wonderfully with the baking soda and vinegar to achieve that signature red velvet tang and helps the red color truly pop. It provides a subtle chocolatey base, not an overpowering one.
- All-Purpose Flour: Measure this carefully, preferably by weight if you have a kitchen scale, to avoid dense or dry brownies. Just enough flour to bind everything together without making them cakey.
- Baking Soda: Absolutely essential for red velvet! It reacts with the acidic ingredients (buttermilk and vinegar) to create tenderness and contributes to the beautiful texture. Don’t confuse it with baking powder for this recipe!
- Salt: A little pinch of salt elevates all the other flavors, balancing the sweetness and enhancing the chocolate and vanilla notes.
The “Red Velvet” Signature
- Buttermilk: This is where the “velvet” in red velvet comes from! Its acidity and thickness contribute to the tender crumb. If you don’t have buttermilk on hand, don’t worry! You can easily make your own: simply pour 1 tablespoon of white vinegar (or lemon juice) into a liquid measuring cup, then fill the rest of the way to 1/2 cup with regular milk (dairy or non-dairy works). Let it sit for 5-10 minutes until it curdles slightly. Voila, homemade buttermilk!
- White Vinegar: Beyond helping to create homemade buttermilk, a small amount of white vinegar added directly to the batter enhances the red color and reacts with the baking soda, contributing to that characteristic tender crumb and slight tang.
- Red Food Coloring: For that iconic red hue! I highly recommend using a good quality gel food coloring over liquid. Gel provides a much more vibrant and concentrated color without adding excess liquid to your batter, which can affect the texture. Start with a good amount, but you can always add a touch more until you’re happy with the depth of color.
Optional Decadence
- Chocolate Chips or Chunks: While not strictly traditional for the brownie base of red velvet, a handful of white chocolate chips or even some semi-sweet chocolate chunks folded into the batter can add another layer of deliciousness and textural contrast.
Step-by-Step Instructions
Alright, let’s get those hands dirty and create some magic! Follow these steps closely for the best Red Velvet Brownies you’ve ever tasted:
- Prepare Your Pan & Oven: First things first, preheat your oven to 350°F (175°C). Then, line an 8×8-inch (20×20 cm) baking pan with parchment paper, leaving an overhang on two sides. This overhang acts as handles, making it super easy to lift your brownies out once they’re baked and cooled. Lightly grease the parchment paper with baking spray or a little butter.
- Melt Butter & Sugar: In a medium microwave-safe bowl or a saucepan over low heat, melt your unsalted butter. Once melted, pour it into a large mixing bowl. Add the granulated sugar to the melted butter and whisk them together until well combined and glossy. This mixture should be smooth and a bit thick.
- Add Wet Ingredients: Now, let’s incorporate our wet stars. Add the eggs to the butter-sugar mixture one at a time, whisking well after each addition until fully incorporated. You’ll notice the mixture becoming lighter in color and fluffier. Stir in the vanilla extract, buttermilk, and white vinegar. Finally, add your red food coloring. I like to start with a good tablespoon of gel color and mix until I achieve a deep, vibrant red. Don’t be shy with the color; it can fade slightly during baking.
- Combine Dry Ingredients: In a separate medium bowl, whisk together your all-purpose flour, unsweetened natural cocoa powder, baking soda, and salt. Make sure there are no lumps and everything is evenly distributed.
- Marry Wet & Dry: Gradually add the dry ingredient mixture to the wet mixture. Using a rubber spatula or wooden spoon, fold them together gently until just combined. This is critical: do not overmix! Overmixing develops the gluten in the flour too much, leading to tough, cakey brownies instead of fudgy ones. A few streaks of flour are perfectly fine. If you’re adding chocolate chips or chunks, fold them in now.
- Pour & Bake: Pour the luscious red batter evenly into your prepared baking pan. Gently spread it to the corners with your spatula. Pop the pan into your preheated oven and bake for 25-30 minutes. You’re looking for the edges to be set, and a toothpick inserted into the center should come out with moist crumbs attached, but not wet batter. Remember, brownies continue to cook slightly as they cool.
- Cool Completely: This is perhaps the hardest but most important step! Once out of the oven, let your Red Velvet Brownies cool completely in the pan on a wire rack. Resist the urge to cut into them while they’re warm; they need time to set up properly, becoming perfectly fudgy and easy to slice. Cooling can take 1-2 hours.
- Slice & Serve: Once completely cool, use the parchment paper overhang to lift the entire slab of brownies out of the pan. Place on a cutting board and slice into squares. Serve plain, or even better, topped with a tangy cream cheese frosting for the ultimate red velvet experience!
Tips & Suggestions
To help you nail these Red Velvet Brownies every single time, I’ve gathered some of my favorite tips and suggestions. These little pointers can make a big difference in the final outcome:
- Do Not Overmix the Batter: I can’t stress this enough! Overmixing develops gluten, which is great for chewy bread but terrible for fudgy brownies. Mix until just combined – a few streaks of flour are okay.
- Don’t Overbake: This is the golden rule for brownies. Overbaked brownies turn dry and cakey instead of rich and fudgy. Keep an eye on them, and remember that they continue to cook a little as they cool. When a toothpick inserted in the center comes out with moist crumbs, they’re done.
- Use Gel Food Coloring for Best Color: As mentioned in the ingredient notes, gel food coloring provides a much more vibrant and true red without altering the consistency of your batter. Liquid food coloring often requires a lot more to achieve the same vibrancy and can thin your batter.
- Room Temperature Eggs: Seriously, this makes a difference. Room temperature eggs emulsify better with the butter and sugar, leading to a smoother, more uniform batter and a better texture in your finished brownies.
- Measure Flour Correctly: If you don’t have a kitchen scale, use the “spoon and level” method. Spoon the flour into your measuring cup, then level it off with the back of a knife. Don’t scoop directly from the bag, as this compacts the flour and you’ll end up using too much.
- Consider a Cream Cheese Frosting: While these brownies are fantastic on their own, a classic cream cheese frosting elevates them to another level of red velvet decadence. The tangy frosting perfectly complements the sweet, fudgy brownies.
- Chill for Cleaner Slices: If you want super clean, sharp slices, place the cooled brownies in the refrigerator for about 30 minutes before cutting. Use a large, sharp knife, wiping it clean between each cut.
- Add-ins: Feel free to experiment! White chocolate chips are a natural pairing, but chopped pecans or walnuts can add a lovely crunch. Just fold them in gently at the end of mixing the batter.
- Pan Size Matters: Using a different size pan will affect baking time and thickness. An 8×8-inch pan yields thicker brownies, while a 9×13-inch pan will result in thinner brownies requiring less baking time. Adjust accordingly!
Storage
So you’ve baked a glorious batch of Red Velvet Brownies, and now you’re wondering how to keep them fresh? Here’s my advice for storing these beauties:
- Room Temperature: For maximum freshness and that classic fudgy texture, store your Red Velvet Brownies in an airtight container at room temperature. They will stay fresh and delicious for 3-4 days. If you’ve added a cream cheese frosting, however, you’ll need to refrigerate them.
- Refrigerator: If your brownies are frosted with cream cheese frosting, or if you simply prefer them chilled, store them in an airtight container in the refrigerator. They’ll last for about 5-7 days this way. Just be aware that refrigeration can make them a bit firmer, so I often let them sit out for 10-15 minutes before serving to soften up slightly.
- Freezer: Yes, you can freeze brownies! This is a fantastic option if you want to make a batch ahead of time or save some for later.
- To Freeze Unfrosted Brownies: Once the brownies are completely cooled, cut them into individual squares. Wrap each square tightly in plastic wrap, then place them in a freezer-safe airtight container or a heavy-duty freezer bag. They’ll keep well in the freezer for up to 2-3 months.
- To Freeze Frosted Brownies: If your brownies are frosted, first freeze them uncovered on a baking sheet for about an hour, or until the frosting is firm. Then, wrap each frozen brownie tightly in plastic wrap and place in a freezer-safe container or bag. This prevents the frosting from smearing.
- To Thaw: When you’re ready to enjoy them, simply take them out of the freezer and let them thaw at room temperature for an hour or two (or overnight in the refrigerator).
Final Thoughts
And there you have it! My absolute favorite way to create a truly delightful and visually stunning treat. These Red Velvet Brownies are more than just a dessert; they are a celebration in every single bite. The deep, luxurious cocoa taste perfectly balanced with that signature velvety tang, combined with an unbelievably fudgy and chewy texture, makes them utterly irresistible.
I genuinely believe these Red Velvet Brownies are a must-try for any baking enthusiast or anyone simply looking to bring a little extra joy to their day. They’re perfect for sharing with loved ones, making a memorable impression at any gathering, or simply indulging in a moment of pure bliss. I promise, once you experience their magic, you’ll understand why they hold such a special place in my heart. Happy baking!
Irresistible Red Velvet Brownies: A Must-Try Dessert
- Total Time: 45 minutes
- Yield: 16 servings 1x
Description
These Red Velvet Brownies combine the rich, tangy allure of red velvet with the fudgy perfection of a brownie. Each bite delivers a symphony of flavors and textures, making them a perfect treat for any occasion.
Ingredients
- 1/2 cup Unsalted Butter
- 1 cup Granulated Sugar
- 2 Large Eggs
- 1 teaspoon Vanilla Extract
- 1/2 cup Buttermilk
- 1 tablespoon White Vinegar
- 1 tablespoon Red Food Coloring
- 1 cup All-Purpose Flour
- 1/2 cup Unsweetened Natural Cocoa Powder
- 1 teaspoon Baking Soda
- 1/4 teaspoon Salt
- Optional: 1/2 cup Chocolate Chips or Chunks
Instructions
- Preheat your oven to 350°F (175°C) and line an 8×8-inch baking pan with parchment paper, leaving an overhang on two sides.
- Melt the unsalted butter in a medium microwave-safe bowl or a saucepan over low heat, then pour it into a large mixing bowl.
- Add the granulated sugar to the melted butter and whisk until well combined and glossy.
- Add the eggs one at a time, whisking well after each addition. Stir in the vanilla extract, buttermilk, white vinegar, and red food coloring until well mixed.
- In a separate bowl, whisk together the all-purpose flour, unsweetened natural cocoa powder, baking soda, and salt.
- Gradually add the dry ingredients to the wet mixture, folding gently until just combined. If using, fold in the chocolate chips or chunks.
- Pour the batter into the prepared baking pan and spread it evenly. Bake for 25-30 minutes until the edges are set and a toothpick inserted into the center comes out with moist crumbs.
- Let the brownies cool completely in the pan on a wire rack before slicing into squares.
- Prep Time: 15 mins
- Cook Time: 30 mins
- Category: Dessert
- Method: Baking
- Cuisine: American
Nutrition
- Serving Size: 1 brownie
- Calories: 200
- Sugar: 18 g
- Sodium: 150 mg
- Fat: 10 g
- Saturated Fat: 5 g
- Unsaturated Fat: 4 g
- Trans Fat: 0 g
- Carbohydrates: 25 g
- Fiber: 1 g
- Protein: 2 g
- Cholesterol: 40 mg
Keywords: Do not overmix the batter to keep the brownies fudgy. For best results, use gel food coloring for a vibrant red hue and ensure your eggs are at room temperature for better emulsification.