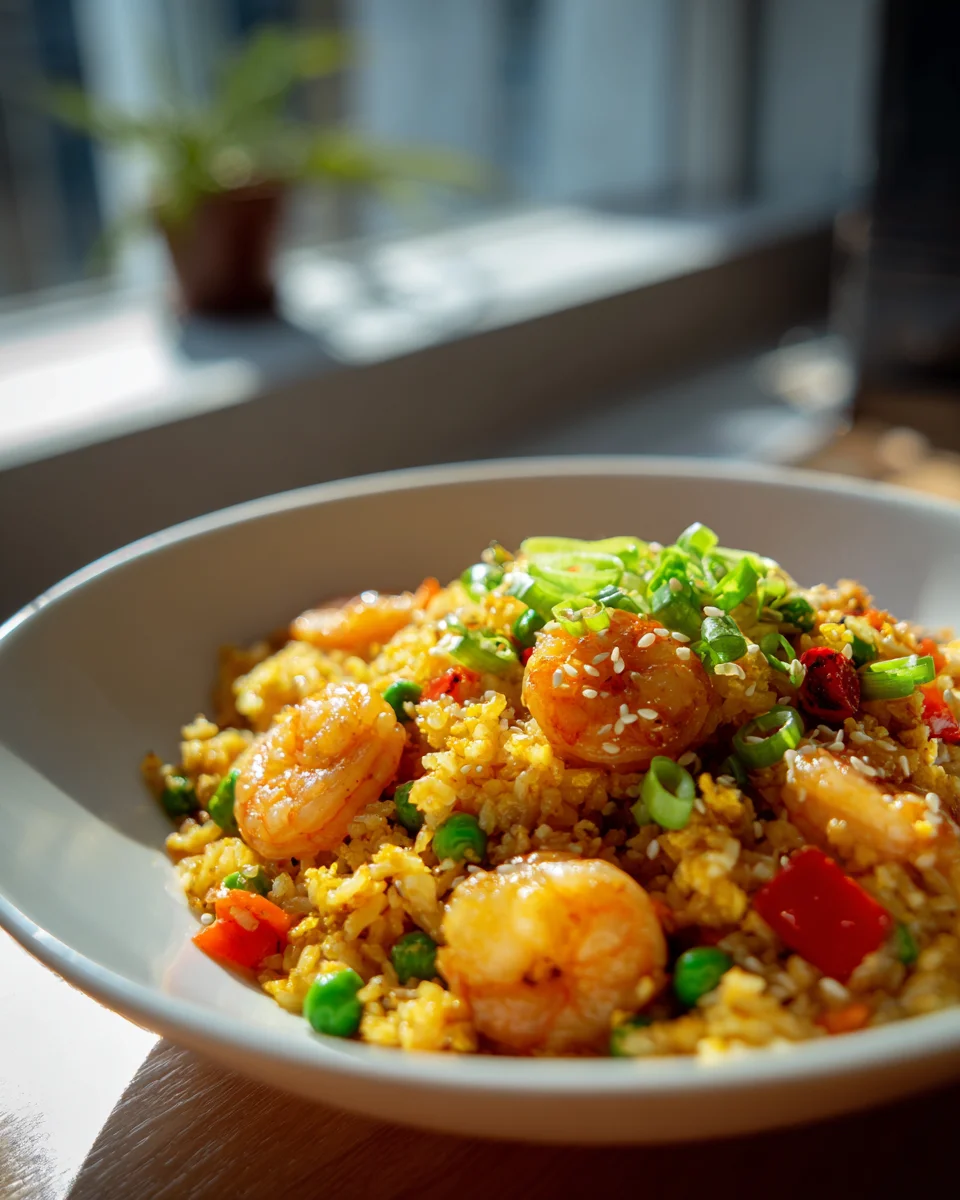
Authentic Shrimp Fried Rice
Authentic Shrimp Fried Rice isn’t just another dinner; it’s the dinner you’ve been dreaming of – the kind that banishes takeout menus forever! I’m so excited to share my go-to recipe for this absolute classic because, honestly, once you taste how incredible homemade authentic shrimp fried rice can be, there’s no going back. What makes this recipe special, you ask? It’s all about achieving that perfect balance: tender, juicy shrimp that snap with every bite, perfectly seasoned day-old rice that’s fluffy yet slightly chewy, and a savory, umami-rich sauce that coats every single grain without making it greasy. We’re talking restaurant-quality flavor, right in your own kitchen!
You are going to absolutely love how satisfying and flavorful this dish is. It’s comforting, incredibly easy to whip up on a weeknight, and always a huge hit with everyone at the table. Seriously, prepare for compliments! This isn’t just a simple stir-fry; it’s a complete, hearty meal where succulent shrimp take center stage, mingling beautifully with crisp vegetables and that signature savory flavor that makes authentic fried rice so utterly irresistible. Get ready to elevate your home cooking game and discover the true joy of perfectly made shrimp fried rice!

Ingredient Notes
Crafting truly authentic Shrimp Fried Rice begins with selecting the right ingredients. Each component plays a vital role in achieving that perfect balance of flavor and texture that makes this dish so universally loved. While some substitutions are possible, sticking close to these recommendations will yield the best results.
- Day-Old Cooked Rice: This is non-negotiable for authentic fried rice! Freshly cooked rice is too moist and will lead to a sticky, clumpy mess rather than separate, perfectly fried grains. I always recommend using jasmine rice, as its fragrant aroma and slightly firmer texture are ideal. If jasmine isn’t available, a good quality long-grain white rice or even basmati can work, provided it’s cooked a day in advance and chilled.
- Shrimp: The star of our show! I prefer using medium to large shrimp, peeled and deveined, with the tails on or off depending on your preference. Fresh shrimp offers the best flavor and texture, but high-quality frozen shrimp (thawed completely and patted very dry) works wonderfully too. Look for plump, firm shrimp.
- Eggs: Lightly beaten eggs add a lovely richness and speckled texture throughout the rice. They’re a classic component that shouldn’t be skipped.
- Aromatics: Fresh garlic and ginger are crucial for building the foundational flavors. Finely minced is key to distributing their pungent, warm notes evenly.
- Vegetables: Frozen peas and diced carrots are the traditional choices, offering pops of color and subtle sweetness. They cook quickly and integrate beautifully. If you wish to add more, a small amount of finely diced bell pepper or corn can also be included, but remember to keep the vegetable ratio balanced so as not to overwhelm the shrimp and rice.
- Green Onions (Scallions): Both the white and green parts are used. The white parts are often sautéed with the aromatics for deeper flavor, while the green parts are added at the very end for a fresh, oniony bite and vibrant garnish.
- Soy Sauce (Light & Dark): This is where the magic happens for authentic flavor.
- Light Soy Sauce: This is your primary seasoning for saltiness and umami. I recommend a good quality, naturally brewed light soy sauce.
- Dark Soy Sauce: This is less salty than light soy sauce and is primarily used for its rich, deep color and a slightly sweeter, more complex flavor profile. It gives fried rice that characteristic golden-brown hue.
- Sesame Oil: A drizzle of toasted sesame oil at the end is absolutely essential. It adds a wonderfully nutty, aromatic finish that elevates the entire dish. A little goes a long way!
- Non-Alcoholic Alternative (for Cooking Wine): Many traditional recipes call for Shaoxing wine. To keep this recipe accessible and non-alcoholic, I recommend using an equal amount of good quality chicken broth or vegetable broth. A pinch of sugar can be added to the broth to mimic some of the subtle sweetness of cooking wine.
- Oil for Frying: A neutral-flavored oil with a high smoke point, such as canola, grapeseed, or peanut oil, is best for high-heat cooking.
- Substitution Note: While this is an “Authentic Shrimp Fried Rice” recipe, if you wish to experiment with other proteins, beef can be a delicious alternative. Ensure it is thinly sliced or finely diced and cooked quickly before adding to the rice to maintain tenderness.
Step-by-Step Instructions
Getting your ingredients prepped and ready before you start cooking is key to successful fried rice – it moves quickly!
- Prep Your Ingredients:
- If using frozen shrimp, thaw them completely and pat them very dry with paper towels.
- Lightly beat the eggs in a small bowl.
- Mince your garlic and ginger.
- Dice your carrots and measure out your peas. Slice the white and green parts of the green onions separately.
- Break up any clumps in your day-old rice.
- Have your soy sauces, non-alcoholic alternative, and sesame oil measured and ready by your stove.
- Cook the Eggs: Heat 1 tablespoon of cooking oil in a large wok or skillet over medium-high heat. Pour in the beaten eggs and scramble them until just set but still soft. Remove the eggs from the wok and set aside.
- Cook the Shrimp: Add another 1-2 tablespoons of cooking oil to the same wok over high heat. Once the oil is shimmering, add the patted-dry shrimp in a single layer. Cook for 1-2 minutes per side, until pink and just cooked through. Be careful not to overcrowd the pan; cook in batches if necessary. Remove the shrimp from the wok and set aside with the eggs.
- Sauté Aromatics and Vegetables: Add a final tablespoon of oil to the wok. Add the minced garlic, ginger, and the white parts of the green onions. Stir-fry for about 30 seconds until fragrant. Add the diced carrots and peas, stir-frying for 2-3 minutes until they start to soften slightly.
- Add the Rice: Push the vegetables to one side of the wok. Add the day-old rice to the empty side, breaking up any remaining clumps with your spatula. Let the rice sit undisturbed for about a minute to get some char, then begin to toss and stir-fry, incorporating it with the vegetables. Continue to stir-fry for 3-5 minutes, allowing the rice to heat through and dry out a bit.
- Season the Rice: Create a well in the center of the rice. Pour in the light soy sauce, dark soy sauce, and the non-alcoholic alternative. Stir quickly to mix the liquids, then toss everything together with the rice, ensuring all grains are evenly coated and colored. Continue to stir-fry for another 1-2 minutes.
- Combine and Finish: Return the cooked shrimp and scrambled eggs to the wok. Add the green parts of the green onions. Toss everything together vigorously for about 1 minute, ensuring all ingredients are well combined and heated through.
- Serve: Remove from heat. Drizzle with sesame oil and give it one final toss. Taste and adjust seasoning if needed (a little more light soy sauce if it needs salt). Serve immediately and enjoy your authentic Shrimp Fried Rice!
Tips & Suggestions
Achieving restaurant-quality Authentic Shrimp Fried Rice at home is entirely possible with a few key techniques. Here are my best tips to ensure your dish is a resounding success every time:
- Use a Wok, If Possible: While a large, heavy-bottomed skillet can work, a wok is ideal. Its sloped sides and high heat retention allow for even cooking and tossing, which are crucial for fried rice. If using a skillet, ensure it’s large enough to avoid overcrowding.
- High Heat is Your Friend: Fried rice needs to be cooked quickly over high heat to achieve that slightly smoky flavor (“wok hei”) and prevent the rice from steaming rather than frying. Don’t be shy with the heat!
- Don’t Overcrowd the Pan: This is a common mistake. If you add too many ingredients at once, the temperature of your wok will drop, and your ingredients will steam instead of fry. Cook the shrimp and eggs in batches if necessary, and ensure there’s enough space for the rice to move freely. For larger quantities, consider cooking the rice in two batches.
- Pat Ingredients Dry: Excess moisture is the enemy of good fried rice. Ensure your shrimp are thoroughly patted dry before cooking. Even slightly damp day-old rice can lead to a less-than-ideal texture.
- Have Everything Prepped (Mise en Place): Fried rice cooks very quickly, so there’s no time to chop vegetables or measure sauces once you start. Have all your ingredients prepped, measured, and within arm’s reach before you turn on the heat.
- The Importance of Day-Old Rice: I can’t stress this enough! The drier, firmer grains of chilled day-old rice are absolutely essential for preventing a mushy outcome. If you only have freshly cooked rice, spread it out on a baking sheet and pop it in the freezer for 15-20 minutes, then into the fridge for an hour to quickly dry it out.
- Taste and Adjust: Always taste your fried rice before serving. You might want to add a tiny splash more light soy sauce for saltiness, or a pinch of sugar for balance, especially if you’re using unsalted broth as a non-alcoholic alternative.
- Serving Suggestions: Authentic Shrimp Fried Rice is a fantastic meal on its own. For an extra kick, a drizzle of chili oil or Sriracha at the table is wonderful. It also pairs perfectly with other Chinese-inspired dishes like General Tso’s chicken or beef and broccoli.
Storage
Authentic Shrimp Fried Rice, like most fried rice dishes, is best enjoyed fresh from the wok when the textures are perfectly crisp and the flavors are at their peak. However, if you find yourself with leftovers, here’s how to store and reheat them safely and deliciously:
- Refrigeration: Allow the fried rice to cool completely to room temperature (this should take no more than an hour) before storing. Transfer it to an airtight container and refrigerate promptly. Properly stored, it will maintain its quality for 3 to 4 days.
- Freezing: While not ideal for the absolute best texture, you can freeze fried rice. Spread the cooled fried rice in a single layer on a baking sheet and flash-freeze for about 1-2 hours until solid. Then, transfer it to a freezer-safe airtight container or heavy-duty freezer bag. This prevents the rice grains from clumping together. It can be frozen for up to 1 month. The texture of the rice and shrimp might become a bit softer upon thawing and reheating.
- Reheating:
- Stovetop (Recommended): This method provides the best results for reviving the fried rice’s texture. Heat a tablespoon of neutral oil in a large skillet or wok over medium-high heat. Add the cold fried rice and break up any clumps with your spatula. Stir-fry for 5-7 minutes, tossing frequently, until the rice is heated through and some grains become slightly crispy again. If the rice seems a bit dry, you can sprinkle in a tablespoon or two of water or chicken broth during reheating.
- Microwave: For a quicker option, place the fried rice in a microwave-safe dish. You might want to sprinkle a tablespoon of water over it to help prevent it from drying out, then cover it loosely with a lid or damp paper towel. Microwave on high for 1-2 minutes, stirring halfway through, until thoroughly heated. Be aware that microwave reheating might not yield the same crispy texture as stovetop reheating.
- Safety Note: Always ensure leftovers are reheated to an internal temperature of 165°F (74°C) to ensure food safety. Avoid reheating fried rice more than once.
Final Thoughts
And there you have it – the incredible journey to creating your very own Authentic Shrimp Fried Rice! I truly believe this recipe is a must-try because it delivers on its promise of authentic flavor and texture, far surpassing what you might find elsewhere. It’s a dish that perfectly balances savory notes with the delicate sweetness of the shrimp, all tied together with fluffy, perfectly seasoned rice. There’s a true magic in the way each ingredient comes together, creating a comforting yet vibrant meal that’s both simple to master and incredibly rewarding. I encourage you to dive in and experience the delicious satisfaction of this homemade Authentic Shrimp Fried Rice. I know you’ll be glad you did!
Authentic Shrimp Fried Rice Recipe – Easy & Delicious!
- Total Time: 45 minutes
- Yield: 4 servings
Description
This Authentic Shrimp Fried Rice is a comforting and flavorful dish that will banish takeout menus forever! Enjoy restaurant-quality flavor right in your own kitchen with this easy-to-follow recipe.
Ingredients
- Day-Old Cooked Rice
- Medium to large shrimp, peeled and deveined
- Eggs, lightly beaten
- Fresh garlic, minced
- Fresh ginger, minced
- Frozen peas
- Diced carrots
- Diced bell pepper (optional)
- Corn (optional)
- Green onions (scallions), sliced (both white and green parts)
- Light soy sauce
- Dark soy sauce
- Sesame oil
- Non-alcoholic alternative (chicken broth or vegetable broth)
- Oil for frying (canola, grapeseed, or peanut oil)
Instructions
- Prep Your Ingredients: If using frozen shrimp, thaw them completely and pat them very dry with paper towels. Lightly beat the eggs in a small bowl. Mince your garlic and ginger. Dice your carrots and measure out your peas. Slice the white and green parts of the green onions separately. Break up any clumps in your day-old rice. Have your soy sauces, non-alcoholic alternative, and sesame oil measured and ready by your stove.
- Cook the Eggs: Heat 1 tablespoon of cooking oil in a large wok or skillet over medium-high heat. Pour in the beaten eggs and scramble them until just set but still soft. Remove the eggs from the wok and set aside.
- Cook the Shrimp: Add another 1-2 tablespoons of cooking oil to the same wok over high heat. Once the oil is shimmering, add the patted-dry shrimp in a single layer. Cook for 1-2 minutes per side, until pink and just cooked through. Be careful not to overcrowd the pan; cook in batches if necessary. Remove the shrimp from the wok and set aside with the eggs.
- Sauté Aromatics and Vegetables: Add a final tablespoon of oil to the wok. Add the minced garlic, ginger, and the white parts of the green onions. Stir-fry for about 30 seconds until fragrant. Add the diced carrots and peas, stir-frying for 2-3 minutes until they start to soften slightly.
- Add the Rice: Push the vegetables to one side of the wok. Add the day-old rice to the empty side, breaking up any remaining clumps with your spatula. Let the rice sit undisturbed for about a minute to get some char, then begin to toss and stir-fry, incorporating it with the vegetables. Continue to stir-fry for 3-5 minutes, allowing the rice to heat through and dry out a bit.
- Season the Rice: Create a well in the center of the rice. Pour in the light soy sauce, dark soy sauce, and the non-alcoholic alternative. Stir quickly to mix the liquids, then toss everything together with the rice, ensuring all grains are evenly coated and colored. Continue to stir-fry for another 1-2 minutes.
- Combine and Finish: Return the cooked shrimp and scrambled eggs to the wok. Add the green parts of the green onions. Toss everything together vigorously for about 1 minute, ensuring all ingredients are well combined and heated through.
- Serve: Remove from heat. Drizzle with sesame oil and give it one final toss. Taste and adjust seasoning if needed. Serve immediately and enjoy your authentic Shrimp Fried Rice!
- Prep Time: 15 mins
- Cook Time: 30 mins
- Category: Dinner
- Method: Stir-frying
- Cuisine: Chinese
Nutrition
- Serving Size: 1 bowl
- Calories: 450
- Sugar: 3 g
- Sodium: 800 mg
- Fat: 15 g
- Saturated Fat: 2 g
- Unsaturated Fat: 10 g
- Trans Fat: 0 g
- Carbohydrates: 60 g
- Fiber: 3 g
- Protein: 20 g
- Cholesterol: 200 mg
Keywords: Use a wok for even cooking and high heat. Ensure shrimp and rice are patted dry to prevent sogginess. Have all ingredients prepped before cooking for best results.