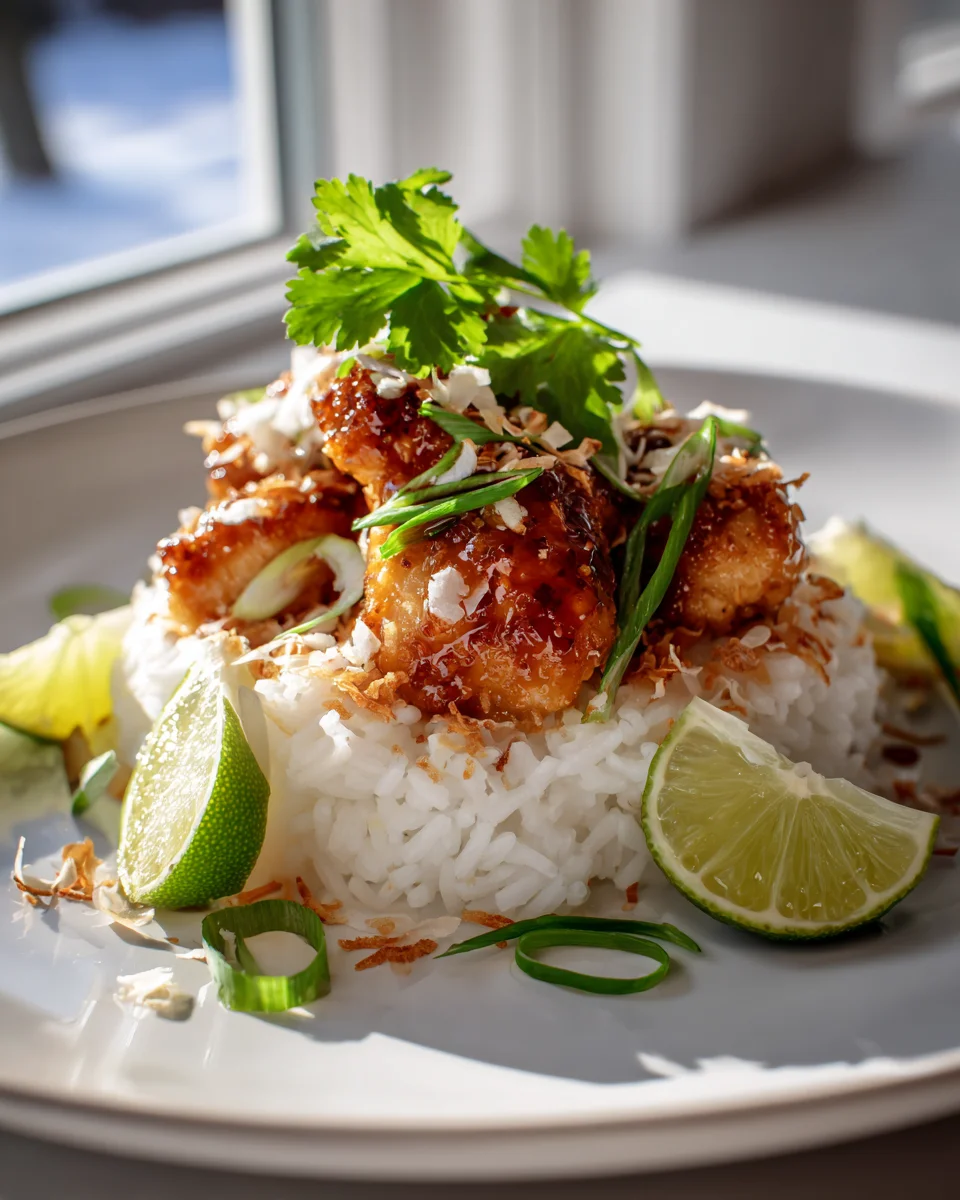
Spicy Maple Chicken And Coconut Rice
Oh boy, do I have a treat for you! We’re diving into the incredibly delicious world of Spicy Maple Chicken And Coconut Rice today. This isn’t just another chicken dish; it’s a vibrant explosion of flavors that will seriously make your taste buds sing. What makes it so special, you ask? Well, imagine perfectly cooked, tender chicken coated in a glaze that’s the ideal balance of sweet maple syrup and a warming, zesty kick of spice. It’s sticky, it’s savory, and it’s utterly addictive!
But wait, there’s more! This phenomenal chicken isn’t riding solo. It’s paired with fluffy, aromatic coconut rice that adds a beautiful, creamy counterpoint to the bold flavors of the chicken. The subtle sweetness and richness of the coconut rice cut through the spice and complement the maple glaze in a way that truly elevates every single bite. You, my friend, are going to absolutely love this recipe because it brings together comfort food vibes with an exciting, exotic twist. It’s a complete meal that feels gourmet enough for a special occasion but is wonderfully easy to whip up for a weeknight dinner. Get ready for a new family favorite!

Ingredient Notes
Crafting the perfect Spicy Maple Chicken and Coconut Rice starts with understanding a few key ingredients. I’ve found that using quality components truly elevates this dish, making it a standout weeknight meal or a fantastic option for entertaining.
- Chicken Thighs: For the chicken component, I strongly recommend boneless, skinless chicken thighs. They are inherently more forgiving than chicken breasts, remaining wonderfully juicy and tender even when cooked to a beautiful glaze. Their fat content also lends itself perfectly to absorbing the rich maple-soy marinade. If you prefer, boneless, skinless chicken breasts can be used, but I suggest cutting them into 1-inch thick pieces to ensure they cook quickly and evenly without drying out.
- Pure Maple Syrup: This is non-negotiable for the ‘maple’ in our dish! Please, opt for pure maple syrup, not pancake syrup or artificial maple-flavored sweeteners. The depth of flavor, natural sweetness, and sticky texture of real maple syrup are crucial for developing that beautiful, glossy, and slightly caramelized glaze on our chicken.
- Soy Sauce: I typically reach for a good quality low-sodium soy sauce. This allows me to control the saltiness of the marinade and the overall dish more precisely. It provides the essential umami and savory base that balances the sweetness of the maple. If you need a gluten-free option, tamari works perfectly as a 1:1 substitute.
- Chili Flakes/Sriracha: Here’s where the ‘spicy’ comes in! Dried red chili flakes are my go-to for an easily adjustable heat. You can add more or less to your preference. For a different kind of heat and a touch of tang, a dash of Sriracha in the marinade or drizzled over the finished dish is also fantastic. Fresh finely chopped red chilies would also work if you prefer a brighter, more immediate heat.
- Fresh Ginger & Garlic: These aromatics are the backbone of so many delicious Asian-inspired dishes, and they are essential here. Freshly grated or minced ginger and garlic will infuse the chicken with an incredible fragrant warmth and pungency that dried alternatives simply can’t replicate. Trust me, the extra minute it takes to mince them is well worth it!
- Jasmine Rice: For our coconut rice, jasmine rice is the star. Its delicate floral aroma and slightly sticky texture when cooked are ideal for soaking up the creamy coconut milk. You could use basmati rice in a pinch, but the unique qualities of jasmine rice truly make the coconut rice shine.
- Full-Fat Coconut Milk: This is the secret to rich, creamy, and flavorful coconut rice. Don’t skimp and go for light coconut milk here, as you’ll miss out on that luxurious texture and deep coconut flavor. I use canned full-fat coconut milk; just give the can a good shake before opening to ensure everything is well combined.
- Lime: A squeeze of fresh lime juice at the end is like magic! It cuts through the richness of the chicken glaze and the coconut rice, adding a bright, zesty finish that really makes all the flavors pop. Don’t skip it!
- Garnishes: Fresh cilantro, sliced green onions, and a sprinkle of sesame seeds not only add visual appeal but also provide layers of freshness, texture, and a nutty finish.
Step-by-Step Instructions
Get ready to cook up some seriously delicious Spicy Maple Chicken and Coconut Rice! This recipe is designed to be straightforward, so even if you’re a newer cook, you’ll find success. Just follow these steps, and you’ll have a wonderfully flavorful meal on your table.
- Prepare the Chicken: First, let’s get our chicken ready. If you’re using boneless, skinless chicken thighs, I like to trim any excess fat. If using chicken breasts, cut them into roughly 1-inch thick pieces. Pat the chicken dry with paper towels; this helps it brown beautifully later. Season the chicken all over with a pinch of salt and black pepper.
- Make the Maple Marinade: In a medium bowl, whisk together the pure maple syrup, low-sodium soy sauce, minced fresh ginger, minced fresh garlic, and red chili flakes (or Sriracha, to taste). Taste a tiny bit of the marinade and adjust the chili flakes if you want more heat.
- Marinate the Chicken: Add the seasoned chicken pieces to the bowl with the marinade, tossing to ensure every piece is thoroughly coated. Cover the bowl and let the chicken marinate at room temperature for at least 15-20 minutes while you prepare the rice. If you have more time, you can marinate it in the refrigerator for up to 2 hours.
- Prepare the Coconut Rice: While the chicken is marinating, let’s start on the rice. Rinse the jasmine rice thoroughly under cold running water in a fine-mesh sieve until the water runs clear. This step is important for preventing gummy rice. In a medium saucepan with a tight-fitting lid, combine the rinsed jasmine rice, full-fat coconut milk, water, and a pinch of salt.
- Cook the Coconut Rice: Bring the rice mixture to a boil over medium-high heat. Once boiling, give it a quick stir, then immediately reduce the heat to the lowest setting, cover the saucepan tightly, and let it simmer undisturbed for 15-18 minutes. Resist the urge to lift the lid! Once the time is up, remove the saucepan from the heat and let it rest, still covered, for another 10 minutes. This steaming period is crucial for perfect fluffy rice.
- Cook the Maple Chicken: While the rice is resting, heat 1-2 tablespoons of a neutral oil (like canola or vegetable oil) in a large skillet or frying pan over medium-high heat. Once the oil is shimmering, carefully add the marinated chicken pieces to the hot skillet in a single layer, making sure not to overcrowd the pan (you may need to work in batches). Reserve any leftover marinade in the bowl.
- Sear and Glaze the Chicken: Sear the chicken for about 3-4 minutes per side, until nicely browned. Once browned, pour the reserved marinade into the skillet with the chicken. Bring the sauce to a gentle simmer and continue to cook, stirring occasionally, for another 5-7 minutes, or until the sauce has thickened into a glossy glaze and the chicken is cooked through (internal temperature should be 165°F or 74°C). The sauce should cling beautifully to the chicken.
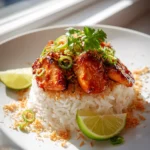
- Finish and Serve: Once the chicken is cooked and glazed, remove it from the heat. Fluff the coconut rice gently with a fork. Divide the coconut rice among serving bowls, then top with the glorious Spicy Maple Chicken. Drizzle any extra glaze from the pan over the chicken and rice. Garnish generously with fresh cilantro, sliced green onions, and a sprinkle of sesame seeds, and don’t forget that essential squeeze of fresh lime juice!
Tips & Suggestions
I’ve made this Spicy Maple Chicken and Coconut Rice countless times, and I’ve picked up a few tricks along the way that I think will really help you get the best results. These tips are all about maximizing flavor and ensuring your cooking experience is a smooth one!
- Don’t Overcrowd the Pan: This is a big one for the chicken! When you’re searing the chicken, it’s really tempting to throw all the pieces into the skillet at once. However, if the pan is too crowded, the chicken will steam instead of sear, and you won’t get that beautiful golden-brown crust and flavorful caramelization. Cook in batches if necessary, allowing each batch enough space to brown properly.
- Control Your Spice: The beauty of the ‘spicy’ in this dish is that it’s completely customizable. If you’re sensitive to heat, start with just a pinch of chili flakes or a tiny drop of Sriracha, and you can always add more at the table. For a bolder kick, feel free to double the amount! If you have fresh red chilies on hand, a finely minced bird’s eye chili can add a fantastic fresh heat.
- Rest Your Rice: The resting period for the coconut rice (after you turn off the heat but keep the lid on) is absolutely crucial. It allows the remaining steam to gently finish cooking the rice, resulting in perfectly tender, fluffy grains rather than dry or mushy ones. Please resist the urge to peek or stir during this time!
- Balance is Key with Lime: That squeeze of fresh lime juice at the end is more than just a garnish; it’s a flavor enhancer. The acidity of the lime cuts through the richness of the maple glaze and the creamy coconut rice, brightening all the flavors and making the dish taste incredibly fresh and vibrant. Don’t skip it, even if you just have a small wedge!
- Consider Your Sides: While this dish is a complete meal on its own, it pairs wonderfully with some simple steamed or roasted vegetables. I often serve it with steamed broccoli, green beans, or even a quick cucumber salad to add some fresh crunch and greenery to the plate.
- Marinade Magic: If you’re short on time, even 15-20 minutes of marinating at room temperature will impart good flavor. However, if you have the luxury of time, marinating the chicken in the refrigerator for an hour or two (or even overnight!) will deepen the flavor profile considerably, making the chicken even more tender and infused with that incredible maple-ginger goodness.
Storage
It’s always great to know how to properly store your delicious leftovers, and this Spicy Maple Chicken and Coconut Rice holds up quite well! Here’s how I usually handle storage to keep it fresh and tasty for another meal.
- Refrigeration: Once your meal has completely cooled down to room temperature (this usually takes about an hour, but don’t leave it out for longer than two hours), transfer the chicken and coconut rice into separate airtight containers. Storing them separately helps maintain their individual textures and flavors. When properly stored in the refrigerator, the chicken and rice will stay fresh for up to 3-4 days. I often find the flavors even meld and deepen a bit on the second day, which is a lovely bonus!
- Freezing: You can absolutely freeze the Spicy Maple Chicken, and it freezes quite well. Place the cooled chicken pieces and any remaining glaze in a freezer-safe airtight container or a heavy-duty freezer bag. It will last for up to 2-3 months in the freezer. The texture of the coconut rice, however, can change slightly upon freezing and thawing, sometimes becoming a bit drier or gummier. While it’s safe to freeze, I personally prefer to make fresh coconut rice if I’m planning to freeze the chicken. If you do freeze the rice, make sure it’s in an airtight container to prevent freezer burn and loss of moisture.
- Reheating:
- For the Chicken: From the refrigerator, the chicken can be reheated in the microwave until warmed through (start with 1-2 minutes, then stir and continue in 30-second intervals). For a stovetop method, place the chicken and a splash of water or chicken broth in a skillet over medium-low heat, covering it to help it steam and warm through without drying out, until heated.
- For the Rice: Reheating coconut rice in the microwave is usually the easiest method. Add a tablespoon or two of water or a tiny splash of coconut milk to the rice before microwaving. Cover it with a damp paper towel or a microwave-safe lid and heat in 1-minute intervals, stirring in between, until it’s hot and steamy. This extra liquid helps to restore some of its moisture and prevent it from drying out.
- From Frozen: Thaw frozen chicken overnight in the refrigerator before reheating as above. You can also reheat from frozen by adding it to a covered skillet with a bit of liquid over low heat, allowing it to thaw and warm slowly.
Final Thoughts
Well, there you have it! My hope is that you’re now ready to bring the incredible flavors of Spicy Maple Chicken And Coconut Rice into your kitchen. This dish truly is a symphony for the senses, where the rich, sweet heat of the maple-glazed chicken perfectly complements the fragrant, creamy coconut rice. It’s that wonderful balance of sweet, spicy, and savory that makes every bite so utterly satisfying and uniquely delicious.
I promise you, whether you’re looking for a new weeknight favorite or something special to impress guests, Spicy Maple Chicken And Coconut Rice delivers on all fronts. It’s comforting yet exciting, familiar yet exotic, and an absolute joy to prepare and share. Go ahead, give it a try – your taste buds will thank you for discovering this unforgettable meal!
Spicy Maple Chicken & Coconut Rice: A Flavorful Feast
- Total Time: 45 minutes
- Yield: 4 servings
Description
Dive into the vibrant explosion of flavors with this Spicy Maple Chicken and Coconut Rice. This dish combines tender chicken glazed with sweet maple syrup and spices, paired with creamy coconut rice for a complete meal.
Ingredients
- Boneless, skinless chicken thighs
- Pure maple syrup
- Low-sodium soy sauce
- Dried red chili flakes or Sriracha
- Fresh ginger, minced
- Fresh garlic, minced
- Jasmine rice
- Full-fat coconut milk
- Water
- Lime, for juice
- Salt
- Black pepper
- Neutral oil (like canola or vegetable oil)
- Fresh cilantro, for garnish
- Sliced green onions, for garnish
- Sesame seeds, for garnish
Instructions
- Prepare the Chicken: Trim any excess fat from the chicken thighs or cut chicken breasts into 1-inch thick pieces. Pat the chicken dry with paper towels and season with salt and black pepper.
- Make the Maple Marinade: In a medium bowl, whisk together the pure maple syrup, low-sodium soy sauce, minced fresh ginger, minced fresh garlic, and red chili flakes (or Sriracha, to taste). Taste and adjust the chili flakes for heat.
- Marinate the Chicken: Add the seasoned chicken to the marinade, tossing to coat thoroughly. Cover and let marinate at room temperature for 15-20 minutes or in the refrigerator for up to 2 hours.
- Prepare the Coconut Rice: Rinse the jasmine rice under cold running water until the water runs clear. In a medium saucepan, combine the rinsed rice, full-fat coconut milk, water, and a pinch of salt.
- Cook the Coconut Rice: Bring the mixture to a boil over medium-high heat. Stir, then reduce to the lowest heat, cover, and simmer for 15-18 minutes. Let it rest, covered, for another 10 minutes.
- Cook the Maple Chicken: Heat 1-2 tablespoons of neutral oil in a large skillet over medium-high heat. Add the marinated chicken in a single layer, reserving any leftover marinade.
- Sear and Glaze the Chicken: Sear the chicken for 3-4 minutes per side until browned. Pour the reserved marinade into the skillet, bring to a simmer, and cook for another 5-7 minutes until the sauce thickens and the chicken is cooked through.
- Finish and Serve: Remove the chicken from heat and fluff the coconut rice. Divide the rice among bowls, top with chicken, drizzle extra glaze, and garnish with cilantro, green onions, sesame seeds, and a squeeze of lime juice.
- Prep Time: 15 mins
- Cook Time: 30 mins
- Category: Dinner
- Method: Stovetop
- Cuisine: Asian
Nutrition
- Serving Size: 1 bowl
- Calories: 600
- Sugar: 10 g
- Sodium: 800 mg
- Fat: 30 g
- Saturated Fat: 15 g
- Unsaturated Fat: 10 g
- Trans Fat: 0 g
- Carbohydrates: 60 g
- Fiber: 3 g
- Protein: 25 g
- Cholesterol: 100 mg
Keywords: Don't overcrowd the pan when searing the chicken for a nice golden-brown crust. Adjust the spice level to your preference, and remember to let the coconut rice rest for perfect fluffiness.