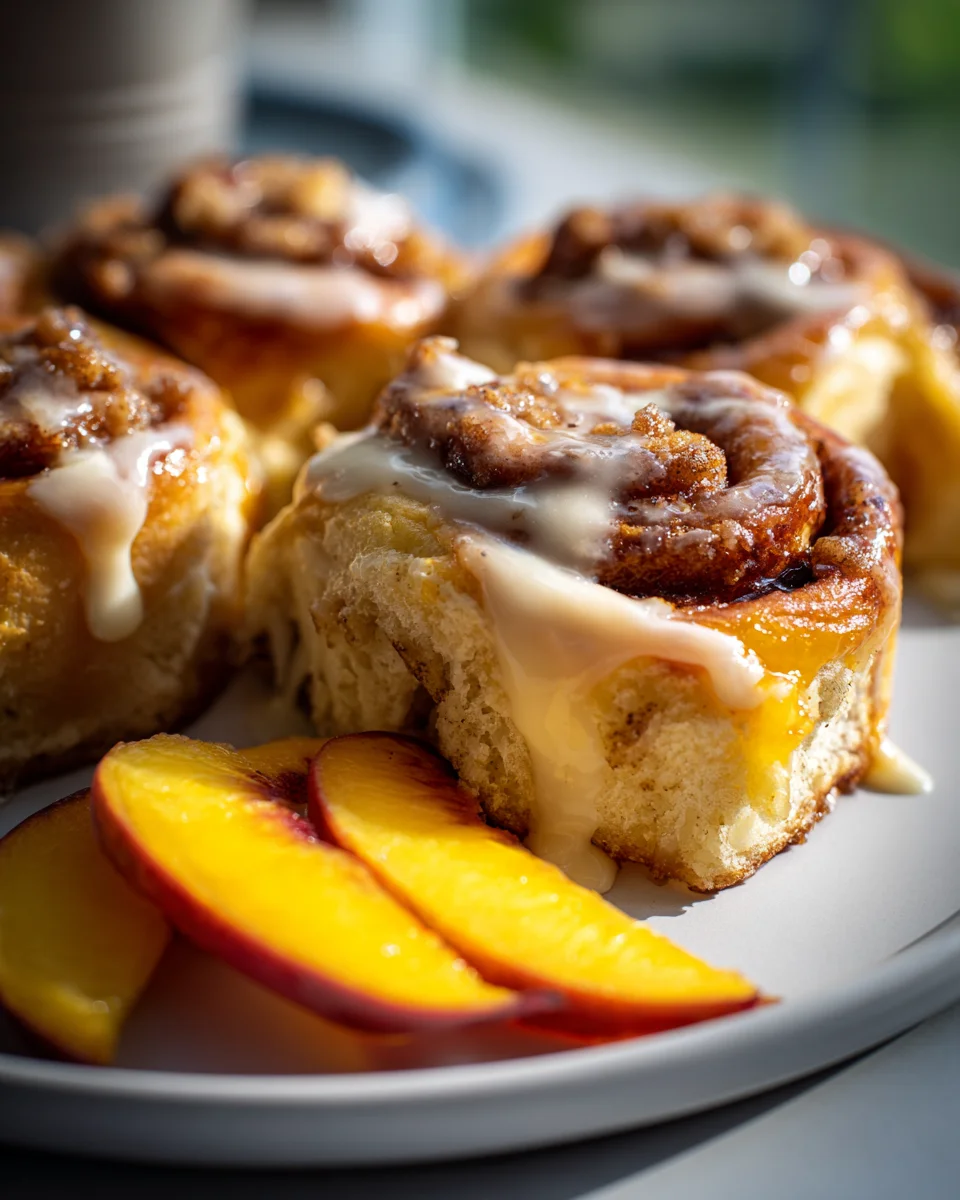
Peach Cobbler With Cinnamon Swirl Biscuits
Get ready to experience a dessert that’s truly out of this world! My Peach Cobbler With Cinnamon Swirl Biscuits isn’t just any cobbler; it’s a celebration of summer’s bounty with a cozy, comforting twist that will make your taste buds sing.
What makes this particular recipe so incredibly special? It’s all about those glorious, homemade cinnamon swirl biscuits! Instead of a simple drop biscuit or crumble, we’re crafting tender, buttery biscuits with a ribbon of cinnamon sugar swirled right through them. As they bake, they puff up beautifully, creating a golden-brown crown over the bubbling, sweet, and slightly tart peaches. The aroma alone will have everyone rushing to the kitchen!
Imagine sinking your spoon into a warm serving: you get the juicy, sun-kissed peaches, perfectly spiced with a hint of nutmeg, mingling with the soft, sweet, and subtly spiced biscuit topping. It’s comfort food elevated to an art form, perfect for a cozy family dinner, a lively potluck, or simply when you’re craving something truly irresistible. I promise you, once you try this unique twist, you’ll never go back to plain old cobbler again. Get ready to bake some magic!

Ingredient Notes
Crafting the perfect Peach Cobbler with Cinnamon Swirl Biscuits relies on a few key ingredients, each playing a vital role in achieving that comforting, home-baked flavor and texture. Here’s a rundown of what you’ll need and some handy substitutions I’ve discovered along the way.
For the Peach Filling:
- Peaches: For a truly show-stopping cobbler, I always reach for fresh, ripe peaches when they’re in season. They offer unparalleled flavor and juiciness. You’ll want about 6-8 medium peaches, peeled, pitted, and sliced. If fresh isn’t an option, high-quality canned peaches (drained, preferably in juice, not heavy syrup) or frozen peach slices work wonderfully. If using frozen, there’s no need to thaw them; just toss them straight into the pot.
- Sugar: Granulated sugar balances the tartness of the peaches. I usually use about ¾ cup, but you can adjust this to your peaches’ sweetness and your personal preference. A little brown sugar can add a deeper, caramel-like note too.
- Cornstarch: This is my secret weapon for a perfectly thick and glossy filling. It ensures the peaches aren’t too runny, creating that luscious texture we all love. All-purpose flour can be used as a substitute, but you might need slightly more (about 1.5-2 tablespoons per tablespoon of cornstarch) and it might make the filling a little cloudier.
- Unsalted Butter: A tablespoon or two of butter adds richness and a silky mouthfeel to the filling. I always use unsalted so I can control the overall saltiness of the dish. If you only have salted, just reduce any added salt in the biscuits slightly. For a dairy-free option, a good quality plant-based butter alternative works great here.
- Vanilla Extract: Pure vanilla extract really enhances the peachy flavor. Don’t skip it!
- Spices: A good dash of ground cinnamon and a pinch of nutmeg are non-negotiable for that classic cobbler warmth. Feel free to add a tiny pinch of ground ginger or cardamom if you like an extra layer of spice.
For the Cinnamon Swirl Biscuits:
- All-Purpose Flour: The foundation of our tender biscuits. For a gluten-free version, I’ve had success with a 1-to-1 gluten-free baking flour blend that contains xanthan gum.
- Granulated Sugar: Just a touch in the biscuit dough for a hint of sweetness and to aid in browning.
- Baking Powder: This is what gives our biscuits their beautiful rise and light texture. Make sure yours isn’t expired!
- Salt: Essential for balancing flavors.
- Unsalted Butter (cold): This is CRITICAL for flaky biscuits. Cold butter creates pockets of steam as it bakes, resulting in those irresistible layers. I always cut mine into small cubes and chill it in the freezer for 10-15 minutes before mixing. Again, plant-based butter alternatives work if kept very cold.
- Milk: Whole milk gives the richest biscuits, but 2% or even a non-dairy milk (like almond or soy) will work too. Just ensure it’s cold!
- Brown Sugar & Cinnamon (for the swirl): This simple combination creates that delightful, aromatic swirl. A little extra melted butter helps bind it.
Step-by-Step Instructions
Let’s get baking! This recipe is a delightful journey, combining a juicy peach filling with tender, cinnamon-laced biscuits. Here’s how I bring it all together:
1. Prepare the Peach Filling:
- Preheat Oven & Prep Dish: First things first, preheat your oven to 375°F (190°C). Grab a 9×13-inch baking dish and set it aside; no need to grease it.
- Combine Ingredients: In a large saucepan or Dutch oven, combine your peeled and sliced peaches, granulated sugar, cornstarch, ground cinnamon, nutmeg, and vanilla extract. Toss gently to coat the peaches evenly.
- Cook the Filling: Place the saucepan over medium heat. Bring the mixture to a gentle simmer, stirring occasionally. Cook for about 5-7 minutes, or until the peaches have softened slightly and the sauce has thickened to a syrupy consistency. Remove from heat and stir in the unsalted butter until melted. Pour the warm peach filling evenly into your prepared baking dish.
2. Make the Biscuit Dough:
- Whisk Dry Ingredients: In a large mixing bowl, whisk together the all-purpose flour, granulated sugar, baking powder, and salt.
- Cut in Cold Butter: Add the cold, cubed unsalted butter to the dry ingredients. Using a pastry blender, two knives, or your fingertips, cut the butter into the flour mixture until it resembles coarse crumbs with some pea-sized pieces of butter remaining. This is key for flaky biscuits!
- Add Cold Milk: Make a well in the center of the flour mixture and pour in the cold milk. Stir with a wooden spoon or spatula just until the dough comes together. Be careful not to overmix; a few dry streaks are perfectly fine.
3. Create the Cinnamon Swirl:
- Roll Out Dough: Lightly flour a clean surface. Turn the biscuit dough out onto it and gently knead it a few times (no more than 5-6 times) to bring it together. Roll the dough into a rectangle, about 12×8 inches and ¼-inch thick.
- Spread Swirl Mixture: In a small bowl, combine the brown sugar and ground cinnamon for the swirl. You can also add a tablespoon of melted butter to this mixture to make it spreadable, or simply brush melted butter over the dough first, then sprinkle the sugar and cinnamon. Spread this cinnamon-sugar mixture evenly over the entire surface of the rolled-out dough, leaving a small border on one of the long edges.
- Roll and Slice: Starting from the long edge opposite the border, carefully roll the dough into a tight log. Once rolled, use a sharp knife to slice the log into 12 equal rounds (about 1 inch thick).
4. Assemble and Bake:
- Arrange Biscuits: Gently place the cinnamon swirl biscuit rounds on top of the warm peach filling in the baking dish. Arrange them in an even layer, slightly overlapping if necessary.
- Bake: Transfer the baking dish to your preheated oven. Bake for 30-40 minutes, or until the biscuits are golden brown on top, puffed up, and the peach filling is bubbling around the edges.
- Cool Slightly: Once baked, remove the cobbler from the oven. Let it cool on a wire rack for at least 15-20 minutes before serving. This allows the filling to set a bit and prevents burns from the molten fruit!
Tips & Suggestions
To ensure your Peach Cobbler with Cinnamon Swirl Biscuits turns out perfectly every time, I’ve gathered some of my favorite tips and suggestions:
- Don’t Overmix the Biscuits: This is arguably the most important tip for tender, flaky biscuits. Overmixing develops the gluten in the flour, leading to tough, chewy biscuits. Mix just until the ingredients are combined, even if there are a few dry patches of flour.
- Keep Ingredients Cold: For the flakiest biscuits, make sure your butter and milk are as cold as possible. Cold butter creates pockets of steam in the oven, giving you those wonderful layers. You can even cube your butter and pop it in the freezer for 10-15 minutes before mixing.
- Adjust Sweetness to Taste: The sweetness of peaches can vary greatly. Taste your peaches before you start! If they’re very sweet, you might reduce the sugar in the filling slightly. If they’re a bit tart, you might add a touch more.
- Perfect Cinnamon Swirl: When rolling out your biscuit dough for the swirl, try to keep it as even a rectangle as possible. For the cinnamon-sugar spread, I sometimes add a small amount of melted butter (1-2 tablespoons) to the brown sugar and cinnamon mixture to make a paste. This helps it adhere better to the dough and prevents the cinnamon sugar from falling out when you slice.
- How to Tell When It’s Done: Look for visual cues! The biscuits should be beautifully golden brown and puffed up. The peach filling should be visibly bubbling around the edges of the dish, indicating it’s hot and thickened. If the biscuits are browning too quickly, you can loosely tent the cobbler with foil for the last 10-15 minutes of baking.
- Serving Suggestions: While this cobbler is absolutely divine on its own, it truly shines when served warm with a scoop of vanilla bean ice cream that slowly melts into the warm peaches and biscuits. A dollop of freshly whipped cream or a drizzle of heavy cream also makes for a luxurious treat.
- Make Ahead Option: You can prepare the peach filling up to a day in advance and store it covered in the refrigerator. When you’re ready to bake, prepare the biscuit dough, assemble the cobbler, and bake as directed (you might need a few extra minutes since the filling will be cold). I don’t recommend making the biscuit dough too far in advance, as the leavening can lose potency.
- Clean Slices: When slicing the cinnamon swirl log, use a very sharp knife and clean it between each slice to get neat, defined swirls.
Storage
Once you’ve savored your first serving of this incredible Peach Cobbler with Cinnamon Swirl Biscuits, you’ll want to make sure you know how to properly store any leftovers to enjoy later. Here’s how I handle it:
- Cool Completely: Before storing, it’s crucial to let the cobbler cool down to room temperature. Covering it while still warm can trap steam, which makes the biscuits soggy. I usually let it sit on a wire rack for at least 1-2 hours.
- Room Temperature (Short Term): If you plan to eat the cobbler within a day or so, you can store it covered loosely with plastic wrap or aluminum foil at room temperature. This is best for maintaining the biscuit texture for the shortest duration.
- Refrigeration (Longer Term): For anything beyond 1-2 days, or if your kitchen is particularly warm, I always recommend refrigerating the cobbler. Cover the baking dish tightly with plastic wrap or aluminum foil. It will keep well in the refrigerator for up to 3-4 days. The biscuits may soften slightly over time, but the flavor will still be fantastic.
- Freezing: If you want to keep your cobbler for an extended period, freezing is a great option.
- Whole Cobbler: Once cooled completely, wrap the entire baking dish (if freezer-safe) tightly with several layers of plastic wrap, then a layer of aluminum foil. Label it with the date. It can be frozen for up to 2-3 months.
- Individual Portions: For convenience, you can scoop individual portions into freezer-safe containers, cover them tightly, and freeze. This makes for quick, single-serving desserts later on.
- Reheating:
- From Refrigeration: To reheat, remove the cover and place the cobbler in an oven preheated to 350°F (175°C) for about 15-25 minutes, or until warmed through and the filling is bubbling. If reheating individual portions, you can also microwave them for 1-2 minutes until hot.
- From Frozen (Whole Cobbler): If reheating a whole frozen cobbler, you can bake it directly from frozen, loosely covered with foil, at 350°F (175°C) for about 45-60 minutes, or until hot and bubbly. Remove the foil for the last 10-15 minutes if you want to crisp up the biscuits.
- From Frozen (Individual Portions): Thaw in the refrigerator overnight, then reheat in the oven or microwave as above. Or, microwave directly from frozen on a lower power setting until heated through.
Final Thoughts
So, there you have it – my recipe for Peach Cobbler With Cinnamon Swirl Biscuits. I truly believe this isn’t just any ordinary cobbler; it’s a culinary experience waiting to happen. The way the warm, tender peaches burst with sweet, sun-kissed flavor, perfectly complemented by those incredibly soft and fragrant biscuits, each with its own delightful ribbon of cinnamon, is just divine. This dish offers a comforting hug in every spoonful, making it an absolute must-try for any occasion, from a cozy family dinner to a lively gathering of friends. I promise you, once you taste the unique magic of Peach Cobbler With Cinnamon Swirl Biscuits, you’ll want to make it again and again. It’s simply irresistible!

Irresistible Peach Cobbler with Cinnamon Swirl Biscuits
- Total Time: 1 hour 10 minutes
- Yield: 8 servings 1x
Description
Experience a dessert that’s a celebration of summer’s bounty with a cozy twist. This Peach Cobbler with Cinnamon Swirl Biscuits features tender, buttery biscuits and juicy, spiced peaches.
Ingredients
- 6–8 medium peaches, peeled, pitted, and sliced
- ¾ cup granulated sugar
- Cornstarch
- 1–2 tablespoons unsalted butter
- 1 teaspoon vanilla extract
- Ground cinnamon
- Pinch of nutmeg
- All-purpose flour
- Granulated sugar (for biscuits)
- Baking powder
- Salt
- Cold unsalted butter (cubed)
- Cold whole milk
- Brown sugar & cinnamon (for the swirl)
Instructions
- Preheat your oven to 375°F (190°C) and set aside a 9×13-inch baking dish.
- In a large saucepan or Dutch oven, combine peeled and sliced peaches, granulated sugar, cornstarch, ground cinnamon, nutmeg, and vanilla extract. Toss gently to coat the peaches evenly.
- Place the saucepan over medium heat and bring the mixture to a gentle simmer, stirring occasionally. Cook for about 5-7 minutes until the peaches have softened slightly and the sauce has thickened. Remove from heat and stir in the unsalted butter until melted. Pour the warm peach filling into your prepared baking dish.
- In a large mixing bowl, whisk together the all-purpose flour, granulated sugar, baking powder, and salt.
- Add the cold, cubed unsalted butter to the dry ingredients and cut it in until it resembles coarse crumbs with some pea-sized pieces remaining.
- Make a well in the center of the flour mixture and pour in the cold milk. Stir just until the dough comes together, being careful not to overmix.
- Lightly flour a clean surface and turn the biscuit dough out onto it. Knead it a few times to bring it together, then roll into a rectangle about 12×8 inches and ¼-inch thick.
- In a small bowl, combine brown sugar and ground cinnamon for the swirl. Spread this mixture evenly over the rolled-out dough, leaving a small border on one long edge.
- Starting from the long edge opposite the border, roll the dough into a tight log. Slice the log into 12 equal rounds.
- Gently place the cinnamon swirl biscuit rounds on top of the warm peach filling in the baking dish, arranging them in an even layer.
- Transfer the baking dish to your preheated oven and bake for 30-40 minutes, or until the biscuits are golden brown and the peach filling is bubbling.
- Remove the cobbler from the oven and let it cool on a wire rack for at least 15-20 minutes before serving.
- Prep Time: 30 mins
- Cook Time: 40 mins
- Category: Dessert
- Method: Baking
- Cuisine: American
Nutrition
- Serving Size: 1 serving
- Calories: 350
- Sugar: 25 g
- Sodium: 150 mg
- Fat: 15 g
- Saturated Fat: 8 g
- Unsaturated Fat: 5 g
- Trans Fat: 0 g
- Carbohydrates: 50 g
- Fiber: 2 g
- Protein: 4 g
- Cholesterol: 30 mg
Keywords: Don't overmix the biscuits to keep them tender and flaky. Keep ingredients cold for the best texture, and adjust sweetness based on the peaches' ripeness.