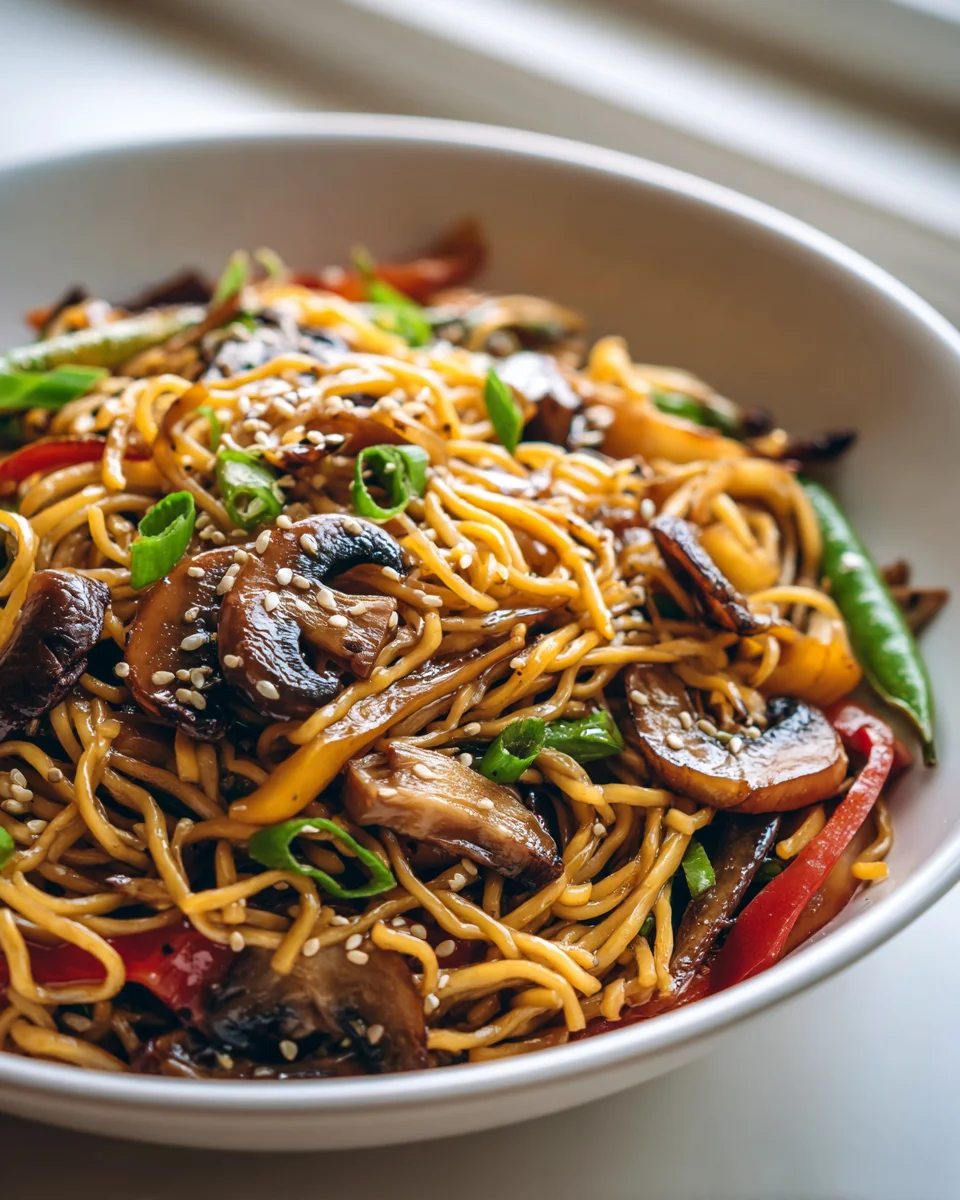
Garlic Mushroom Chow Mein (vegetarian Favorite)
Oh, Garlic Mushroom Chow Mein (vegetarian Favorite)! Get ready, because I am absolutely thrilled to share this recipe with you. If you’re anything like me, you sometimes crave that unbelievably satisfying, saucy noodle dish that just hits all the right spots – but without the meat. Well, my friends, this is it! What makes this particular chow mein so special is its incredible depth of flavor, all achieved without any animal products. We’re talking an umami explosion from the garlic and mushrooms, perfectly balanced with tender noodles and crisp-tender veggies, all coated in a rich, savory sauce that will have you licking the plate clean.
I genuinely believe you’re going to love this recipe because it proves that vegetarian meals can be just as, if not more, vibrant and delicious than their meat-based counterparts. It’s incredibly quick to whip up, making it an absolute lifesaver for those busy weeknights when you want something homemade and hearty, but don’t have hours to spend in the kitchen. Forget about greasy takeout; this homemade version is not only fresher and healthier, but it also tastes authentically amazing. You’ll be amazed at how easily you can create a dish that’s bursting with garlicky, earthy goodness, making it a true vegetarian favorite in any household. It’s simply a bowl of delightful stir-fried noodles, generously packed with sautéed mushrooms, plenty of fresh garlic, and your choice of colorful vegetables, all brought together with an irresistible sauce that’s pure comfort.

Ingredient Notes
Crafting a truly delicious Garlic Mushroom Chow Mein starts with selecting the right ingredients. As a vegetarian favorite, the mushrooms are definitely the stars, but every component plays a crucial role in building those irresistible flavors and textures. Here’s a closer look at what you’ll need and some helpful tips.
Mushrooms: For this dish, I love using a mix of cremini (baby bellas) and shiitake mushrooms. Cremini offer a fantastic earthy flavor and firm texture that holds up well to stir-frying, while shiitake mushrooms bring an umami depth that is simply irreplaceable. If you can only find one type, cremini or even white button mushrooms will work, but try to seek out shiitake for that authentic Asian flavor profile. Always ensure your mushrooms are fresh; give them a quick wipe with a damp cloth instead of rinsing heavily, as they can absorb too much water.
Fresh Garlic & Ginger: These two aromatics are non-negotiable! You’ll notice “Garlic” is right in the name of this dish, and for good reason. Freshly minced garlic and ginger provide the vibrant, pungent base that elevates the entire chow mein. Powdered versions just don’t offer the same punch. I usually double up on the garlic for that extra kick!
Chow Mein Noodles: The heart of any chow mein! I prefer using fresh, pre-cooked chow mein noodles, often found in the refrigerated section of Asian supermarkets. They have a wonderful chewy texture and cook up quickly. If fresh isn’t available, dried egg noodles or even thin spaghetti can be a decent substitute in a pinch, just be sure to cook them according to package directions until al dente before adding them to the stir-fry.
Vegetables: Beyond the mushrooms, a colorful mix of veggies adds crunch, nutrition, and visual appeal. I typically include shredded green cabbage, julienned carrots, thinly sliced bell peppers (any color works, but red adds a nice sweetness), and sliced onions. Bean sprouts and scallions (green onions) are also fantastic additions, especially added towards the end for freshness and a slight bite. Feel free to adjust these based on what you have on hand or what you enjoy most!
The Sauce: This is where the magic happens! My go-to chow mein sauce includes a combination of light soy sauce (for saltiness), dark soy sauce (for color and a richer, slightly sweeter flavor), vegetarian oyster sauce (often made from mushrooms, providing incredible umami), a touch of sugar (to balance the saltiness), sesame oil (for nutty aroma), and vegetable broth (to bring it all together). For a gluten-free version, simply swap out regular soy sauce for tamari.
Oil: A neutral-flavored oil with a high smoke point, like canola, vegetable, or grapeseed oil, is best for stir-frying. A dash of toasted sesame oil is added at the end for flavor, not for cooking.
Step-by-Step Instructions
Making Garlic Mushroom Chow Mein is a fast-paced and fun cooking experience, especially if you have everything prepped. The key to a great stir-fry is high heat and constant motion!
Step 1: Prep Everything (Mise en Place is Your Friend!)
This is the most crucial step for any stir-fry. Believe me, you don’t want to be chopping while your wok is blazing! Start by cooking your chow mein noodles according to package directions, typically for just 2-3 minutes in boiling water until al dente. Drain them well and toss with a tiny bit of oil to prevent sticking. Next, thinly slice your mushrooms, shred the cabbage, julienne the carrots, slice the bell peppers and onions, and mince your garlic and ginger. In a small bowl, whisk together all your sauce ingredients: light soy sauce, dark soy sauce, vegetarian oyster sauce, sugar, sesame oil, and vegetable broth. Set everything aside.
Step 2: Heat the Wok
Place a large wok or a heavy-bottomed skillet over high heat. Add about 1-2 tablespoons of your neutral cooking oil. Allow the oil to get very hot – you should see a slight shimmer or even a wisp of smoke. This high heat is essential for achieving that characteristic stir-fry char and preventing the vegetables from steaming.
Step 3: Sauté Aromatics and Mushrooms
Add the minced garlic and ginger to the hot oil. Stir-fry quickly for about 15-30 seconds until fragrant, being careful not to burn them. Immediately add your sliced mushrooms. Spread them out in a single layer as much as possible and let them cook undisturbed for 2-3 minutes to get a nice sear and release their moisture. Then, stir-fry them for another 2-3 minutes until they are beautifully browned and tender. Remove the mushrooms and aromatics from the wok and set aside, leaving any oil behind.
Step 4: Stir-Fry Vegetables
If the wok seems dry, add another tablespoon of oil. Add the sliced onions, carrots, and bell peppers. Stir-fry for 2-3 minutes until they start to soften but still retain a bit of crunch. Next, add the shredded cabbage and stir-fry for another 1-2 minutes until it wilts slightly.
Step 5: Combine Noodles and Sauce
Return the cooked mushrooms, garlic, and ginger to the wok with the other vegetables. Add your cooked and drained chow mein noodles to the wok. Pour the prepared sauce evenly over everything. Using tongs or two spatulas, toss vigorously to combine all the ingredients, ensuring the noodles are fully coated with the sauce and everything is evenly distributed. Continue to stir-fry for 2-4 minutes, allowing the sauce to thicken slightly and for the noodles to absorb the flavors and heat through.
Step 6: Serve Immediately
Once everything is hot, fragrant, and well combined, transfer the Garlic Mushroom Chow Mein to serving plates. Garnish with freshly chopped scallions and, if you like a little heat, a drizzle of chili oil. Enjoy this vegetarian favorite right away!
Tips & Suggestions
To truly master your Garlic Mushroom Chow Mein and make it a regular in your rotation, here are a few insider tips:
- Mise en Place is Key: I cannot stress this enough for stir-frying! Chop all your vegetables, mix your sauce, and cook your noodles before you even turn on the heat. The cooking process is incredibly fast, and you won’t have time to prep mid-cook.
- Don’t Overcrowd the Wok: This is a common mistake that leads to steamed, rather than stir-fried, vegetables. If your wok or pan isn’t large enough, cook the vegetables in batches. It’s better to take a few extra minutes than to end up with soggy chow mein.
- High Heat is Your Friend: A proper stir-fry needs intense heat. This helps to sear the ingredients quickly, locking in flavor and creating those delicious browned bits without making them mushy. Keep your heat source on high throughout the cooking process.
- Customize Your Veggies: While I’ve given a standard list, feel free to get creative! Broccoli florets, snap peas, bok choy, or even edamame would be lovely additions. Just remember to add vegetables according to their cooking time – harder vegetables first, quicker-cooking ones later.
- Add Extra Protein: If you want to boost the protein content, cubed firm tofu or tempeh, pan-fried or air-fried until crispy, would be a fantastic addition to this vegetarian dish. Add them in at the same time you add the cooked mushrooms back to the wok.
- Spice It Up: For those who love a bit of a kick, a pinch of red pepper flakes added with the garlic and ginger, or a drizzle of chili oil at the end, can really elevate the flavors.
- Taste and Adjust: Always taste your sauce before adding it, and again after the noodles have absorbed some of the flavors. You might want to add a tiny bit more soy sauce, sugar, or even a splash of rice vinegar for brightness.
Storage
Garlic Mushroom Chow Mein is best enjoyed fresh off the wok, when the noodles are perfectly chewy and the vegetables are still crisp-tender. However, I understand that sometimes you might have leftovers, or you might want to meal prep. Here’s how to handle it:
Refrigeration:
Allow any leftover chow mein to cool down completely to room temperature before storing. Transfer it to an airtight container and place it in the refrigerator. It will keep well for up to 3-4 days. The noodles may soften slightly, and the vegetables might lose a bit of their crispness, but the flavors will often deepen and still be delicious.
Reheating:
The best way to reheat Garlic Mushroom Chow Mein is on the stovetop. Place the leftovers in a non-stick skillet or wok over medium heat, adding a tablespoon or two of water or vegetable broth to help rehydrate the noodles and create a little steam. Stir-fry gently until heated through, about 5-7 minutes. This method helps to restore some of the texture. You can also reheat it in the microwave in short bursts, stirring in between, but the noodles might become a bit chewier and the vegetables softer.
Freezing:
I generally don’t recommend freezing chow mein. Noodles, especially fresh ones, can become very mushy and lose their desirable texture once thawed and reheated. The vegetables also tend to become overly soft and watery. While technically safe to freeze, the quality and enjoyment of the dish will significantly decrease. It’s truly a dish best made and eaten fresh, or enjoyed as leftovers within a few days from the fridge.
Final Thoughts
And there you have it! I truly believe this Garlic Mushroom Chow Mein (vegetarian Favorite) is more than just a recipe; it’s a culinary experience waiting to happen in your very own kitchen. I love how effortlessly this dish comes together, yet it delivers a depth of flavor that feels incredibly special. The perfect interplay of aromatic garlic, savory mushrooms, and beautifully stir-fried noodles creates a vibrant, satisfying meal that truly sings.
If you’re seeking a quick, incredibly delicious, and utterly comforting vegetarian option that will delight your senses and impress your family and friends, then I promise you, this Garlic Mushroom Chow Mein (vegetarian Favorite) is an absolute must-try. It’s a testament to how vibrant and irresistible vegetarian cooking can be. Give it a go – I’m confident it will become a new favorite in your recipe repertoire!
Garlic Mushroom Chow Mein: Easy Vegetarian Favorite!
- Total Time: 30 minutes
- Yield: 4 servings 1x
Description
This Garlic Mushroom Chow Mein is a vibrant and delicious vegetarian dish that combines tender noodles with sautéed mushrooms and fresh vegetables, all coated in a rich, savory sauce. Perfect for busy weeknights, it’s a quick and satisfying meal that proves vegetarian cooking can be incredibly flavorful.
Ingredients
- 8 oz chow mein noodles
- 1 cup cremini mushrooms, sliced
- 1 cup shiitake mushrooms, sliced
- 4 cloves fresh garlic, minced
- 1 inch fresh ginger, minced
- 1 cup shredded green cabbage
- 1 cup julienned carrots
- 1 cup thinly sliced bell peppers (any color)
- 1 cup sliced onions
- 1 cup bean sprouts
- 1/2 cup scallions (green onions), chopped
- 2 tablespoons light soy sauce
- 1 tablespoon dark soy sauce
- 1 tablespoon vegetarian oyster sauce
- 1 teaspoon sugar
- 1 tablespoon sesame oil
- 1/2 cup vegetable broth
- 2 tablespoons canola oil (or other neutral oil)
- 1 tablespoon toasted sesame oil (for finishing)
Instructions
- Step 1: Prep Everything (Mise en Place is Your Friend!) – Cook chow mein noodles according to package directions for 2-3 minutes until al dente. Drain and toss with a tiny bit of oil. Thinly slice mushrooms, shred cabbage, julienne carrots, slice bell peppers and onions, and mince garlic and ginger. In a small bowl, whisk together light soy sauce, dark soy sauce, vegetarian oyster sauce, sugar, sesame oil, and vegetable broth. Set aside.
- Step 2: Heat the Wok – Place a large wok or heavy-bottomed skillet over high heat. Add 1-2 tablespoons of neutral cooking oil and let it get very hot.
- Step 3: Sauté Aromatics and Mushrooms – Add minced garlic and ginger to the hot oil and stir-fry for 15-30 seconds until fragrant. Add sliced mushrooms and cook undisturbed for 2-3 minutes, then stir-fry for another 2-3 minutes until browned and tender. Remove from the wok and set aside.
- Step 4: Stir-Fry Vegetables – If the wok seems dry, add another tablespoon of oil. Add sliced onions, carrots, and bell peppers, stir-frying for 2-3 minutes. Then add shredded cabbage and stir-fry for another 1-2 minutes until slightly wilted.
- Step 5: Combine Noodles and Sauce – Return cooked mushrooms, garlic, and ginger to the wok. Add cooked chow mein noodles and pour the sauce over everything. Toss vigorously to combine and stir-fry for 2-4 minutes until heated through.
- Step 6: Serve Immediately – Transfer the chow mein to serving plates, garnish with chopped scallions and a drizzle of chili oil if desired. Enjoy!
- Prep Time: 15 mins
- Cook Time: 15 mins
- Category: Dinner
- Method: Stir-frying
- Cuisine: Asian
Nutrition
- Serving Size: 1 bowl
- Calories: 400
- Sugar: 5 g
- Sodium: 800 mg
- Fat: 12 g
- Saturated Fat: 1 g
- Unsaturated Fat: 10 g
- Trans Fat: 0 g
- Carbohydrates: 60 g
- Fiber: 5 g
- Protein: 12 g
- Cholesterol: 0 mg
Keywords: Mise en place is key for stir-frying; prep all ingredients before cooking. Don't overcrowd the wok to avoid steaming the vegetables. Customize your veggies based on preference and add extra protein like tofu if desired.