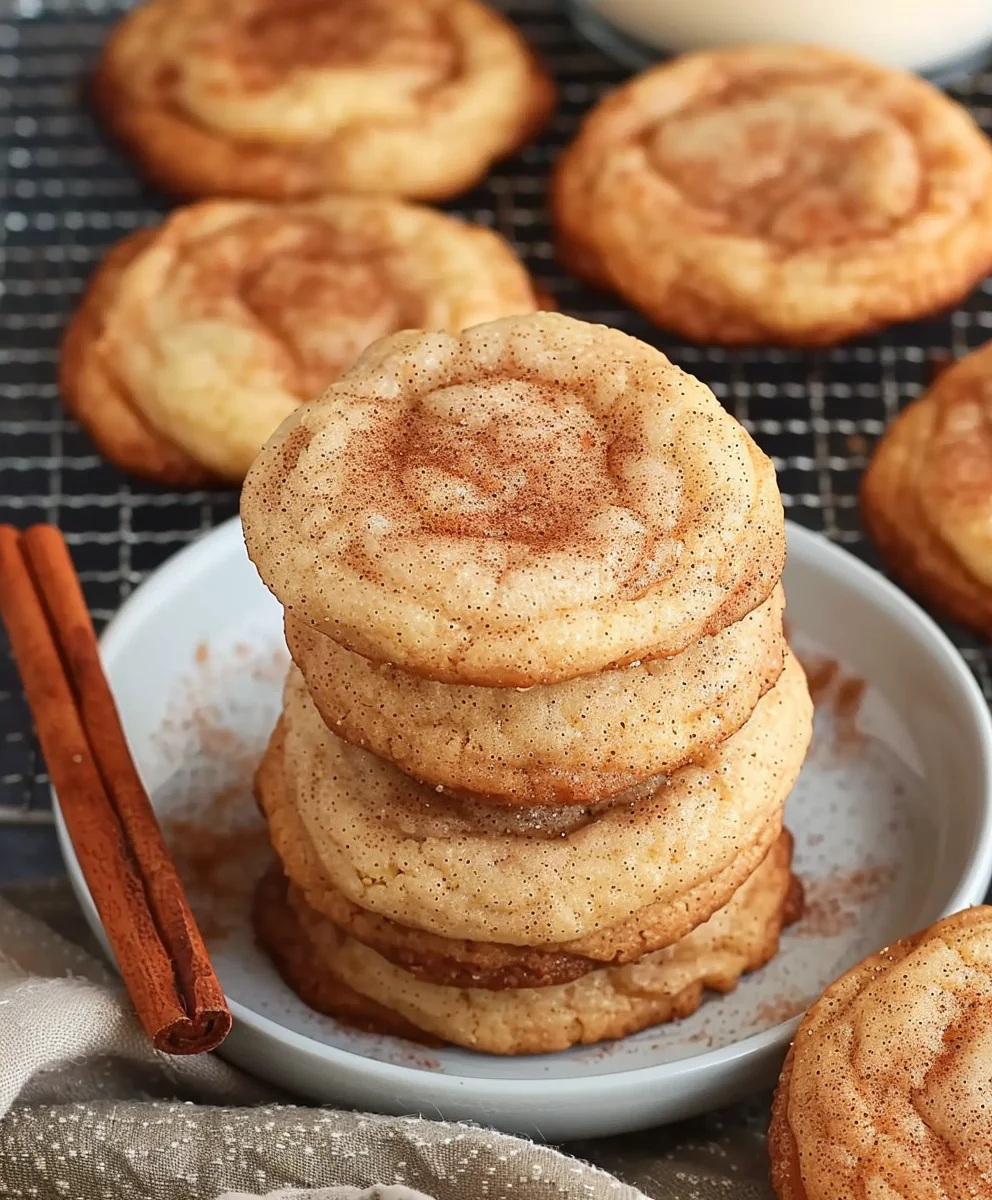
Apple Snickerdoodles offer a truly enchanting twist on a beloved classic, inviting us into a world where comforting tradition meets delightful seasonal innovation. Imagine biting into the soft, chewy texture of your favorite snickerdoodle, only to discover it’s beautifully complemented by pockets of tender, sweet apple. This isn’t just a cookie; it’s a warm hug in dessert form, perfect for those crisp autumn days or any moment you crave a taste of home-baked bliss.
A Beloved Classic Reimagined
The original snickerdoodle, with its distinctive crinkled top, tangy cream of tartar, and signature cinnamon-sugar coating, holds a cherished place in American baking history. It’s a simple pleasure, yet profoundly satisfying. Now, by incorporating fresh apple pieces, we elevate this timeless treat to new heights. The fruit not only infuses each bite with a wonderful natural sweetness and moistness but also adds a lovely textural contrast that makes these Apple Snickerdoodles absolutely irresistible. People adore this dish for its unique blend of familiar comfort and exciting new flavors, making it a standout addition to any cookie jar or dessert platter.
You’ll find yourself reaching for these delicious cookies again and again, savoring every delightful crumb.
Ingredients:
- For the Apple Snickerdoodle Dough:
- 2 ½ cups (300g) all-purpose flour, spooned and leveled
- 2 teaspoons cream of tartar
- 1 teaspoon baking soda
- ½ teaspoon fine sea salt
- 1 cup (226g) unsalted butter, softened to room temperature
- 1 ½ cups (300g) granulated sugar
- ¼ cup (50g) light brown sugar, packed
- 2 large eggs, at room temperature
- 2 teaspoons pure vanilla extract
- For the Apple Filling:
- 1 medium baking apple (e.g., Gala, Honeycrisp, Fuji), about 5-6 ounces, peeled, cored, and very finely diced
- 1 tablespoon unsalted butter
- 2 tablespoons light brown sugar, packed
- ½ teaspoon ground cinnamon
- ⅛ teaspoon ground nutmeg (optional, but highly recommended for warmth!)
- 1 teaspoon fresh lemon juice
- For the Cinnamon-Sugar Coating:
- ⅓ cup (65g) granulated sugar
- 1 tablespoon ground cinnamon
Preparing the Dough:
- First things first, we need to gather and prepare our dry ingredients. In a medium bowl, whisk together the 2 ½ cups of all-purpose flour, 2 teaspoons of cream of tartar, 1 teaspoon of baking soda, and ½ teaspoon of fine sea salt. I always recommend using a whisk here to ensure everything is thoroughly combined and there are no hidden clumps of baking soda or cream of tartar. This step is crucial for an even rise and consistent texture in our cookies. Set this bowl aside for a moment.
- Now, let’s move on to the heart of our cookie dough: creaming the butter and sugars. In a large bowl, using either a stand mixer fitted with the paddle attachment or a handheld electric mixer, beat the softened 1 cup of unsalted butter on medium speed until it’s lovely and creamy, about 1-2 minutes. The butter should be truly at room temperature – soft enough to leave an indent when you press it, but not melted or greasy. This really makes a difference in the final texture of the cookie.
- Once the butter is smooth, gradually add the 1 ½ cups of granulated sugar and the ¼ cup of packed light brown sugar. Continue beating on medium-high speed for about 3-4 minutes, scraping down the sides of the bowl periodically with a rubber spatula. You’re looking for a mixture that is light in color, fluffy, and looks almost aerated. This creaming process incorporates air into the butter and sugar, which contributes significantly to the cookies’ soft, chewy texture. Don’t rush this step! It’s a foundational element for a perfect snickerdoodle.
- Next, we’ll incorporate the eggs and vanilla. Add the 2 large eggs, one at a time, beating well after each addition until just combined. Scrape down the sides of the bowl once more to ensure everything is fully mixed. Then, stir in the 2 teaspoons of pure vanilla extract. The mixture might look a little curdled after adding the eggs, but don’t worry, it will come together as we add the dry ingredients. Make sure your eggs are also at room temperature; cold eggs can cause the butter mixture to seize up.
- Finally, it’s time to bring our wet and dry ingredients together. With the mixer on low speed, gradually add the dry ingredient mixture (from step 1) to the wet mixture, mixing only until just combined. Be very careful not to overmix here! Overmixing can develop the gluten in the flour too much, leading to tough, cake-like cookies instead of the soft, tender snickerdoodles we’re aiming for. Stop mixing as soon as you no longer see streaks of dry flour. The dough will be soft and a bit sticky, which is exactly what we want. Set this dough aside while we prepare our delightful apple filling.
Crafting the Apple Filling:
- This apple filling is what truly sets these Apple Snickerdoodles apart! Start by taking your medium baking apple (I love using Gala or Honeycrisp for their crispness and balanced sweetness) and peel, core, and very, very finely dice it. I emphasize “finely diced” because we want small, tender bits of apple distributed throughout our cookies, not large chunks that might make the cookie crumbly or introduce too much moisture. Aim for pieces no larger than ¼ inch.
- In a small non-stick skillet or saucepan, melt the 1 tablespoon of unsalted butter over medium heat. Once the butter is shimmering and fragrant, add your finely diced apples to the pan. Sauté them gently for about 3-4 minutes, stirring occasionally, just until they start to soften slightly. We don’t want them mushy, just a little tender.
- Now, let’s infuse them with some warm, cozy flavors. Add the 2 tablespoons of packed light brown sugar, ½ teaspoon of ground cinnamon, and, if you’re using it (and I truly hope you do!), ⅛ teaspoon of ground nutmeg. Give it a good stir to coat all the apple pieces evenly.
- Continue to cook for another 2-3 minutes, stirring constantly, until the brown sugar has melted and created a syrupy glaze around the apples. The apples should be tender but still hold their shape. Stir in the 1 teaspoon of fresh lemon juice – this not only brightens the flavor of the apples but also helps prevent them from browning too much.
- Once cooked, immediately remove the apple filling from the heat and transfer it to a small bowl or plate. It is absolutely crucial to let this apple filling cool completely to room temperature before adding it to your cookie dough. If you add warm filling, it will melt the butter in your dough, causing your cookies to spread excessively and lose their wonderful texture. You can pop it in the fridge for a few minutes to speed up the cooling process if you’re in a hurry, just be sure to spread it out thinly.
Assembling and Chilling the Cookies:
- With your cookie dough prepared and your apple filling fully cooled, it’s time to bring these two delicious components together. Gently fold the cooled apple filling into your prepared cookie dough. Use a rubber spatula and a light hand. You want to distribute the apple pieces evenly throughout the dough without overworking it. This is a moment of gentle persuasion, not aggressive mixing.
- Once the apple filling is nicely incorporated, cover the bowl tightly with plastic wrap. Now comes the hard part: patience! Refrigerate the cookie dough for at least 1-2 hours. For the best flavor development and easier handling, I often recommend chilling it overnight, or even up to 24 hours. Chilling allows the butter to firm up, which helps prevent the cookies from spreading too much in the oven. It also gives the flavors a chance to meld and deepen, resulting in a more complex and satisfying cookie. Don’t skip this step; it’s a game-changer for snickerdoodle texture!
The Cinnamon-Sugar Coating:
- While your dough is chilling, or right before you’re ready to bake, let’s prepare that iconic snickerdoodle coating. In a shallow bowl or a wide plate, combine the ⅓ cup of granulated sugar and 1 tablespoon of ground cinnamon. Whisk them together with a fork until they are perfectly blended. The aroma alone is enough to get your mouth watering! Make sure it’s in a wide enough dish so you can easily roll your cookie dough balls in it.
Baking Our Apple Snickerdoodles:
- Alright, the moment we’ve been waiting for! Preheat your oven to 375°F (190°C). Line two large baking sheets with parchment paper or silicone baking mats. This is essential for preventing sticking and ensuring even baking and easy cleanup.
- Remove your chilled cookie dough from the refrigerator. Using a 1.5-2 tablespoon cookie scoop (a standard medium-sized scoop), portion out the dough. If you don’t have a scoop, aim for about 1.5-inch diameter balls of dough. This size yields a perfectly chewy and substantial cookie.
- Roll each portion of dough between your palms to form a smooth, round ball. The warmth of your hands will help soften the dough slightly, making it easier to shape.
- Now for the signature snickerdoodle move: generously roll each dough ball in the cinnamon-sugar mixture you prepared. Make sure each ball is thoroughly coated on all sides. Don’t be shy here – a good coating is key to that classic snickerdoodle crinkly texture and sweet, spicy crust.
- Place the coated dough balls on your prepared baking sheets, leaving about 2 inches of space between each cookie. They will spread, so giving them ample room is important to prevent them from merging into one giant apple snickerdoodle slab. I typically fit 12 cookies per standard baking sheet.
- Bake one sheet at a time in the preheated oven for 10-12 minutes. The exact baking time can vary depending on your oven, so keep a close eye on them. You’re looking for cookies that have edges that are lightly set and just beginning to turn golden, while the centers still look slightly soft and puffed. They will also have that beautiful, characteristic crinkled surface. If they look raw in the middle, they need another minute or two. If they look too firm, they might be slightly overbaked, but will still be delicious! The cookies will continue to cook and set as they cool on the baking sheet.
- Once baked, remove the baking sheets from the oven. Resist the urge to move them immediately! This is another crucial step for maintaining their perfect texture. Let the cookies cool on the baking sheets for 5-7 minutes. During this time, they will firm up significantly, making them less prone to breaking when you move them. If you try to move them too soon, they might fall apart or lose their shape due to their soft centers.
Cooling and Serving:
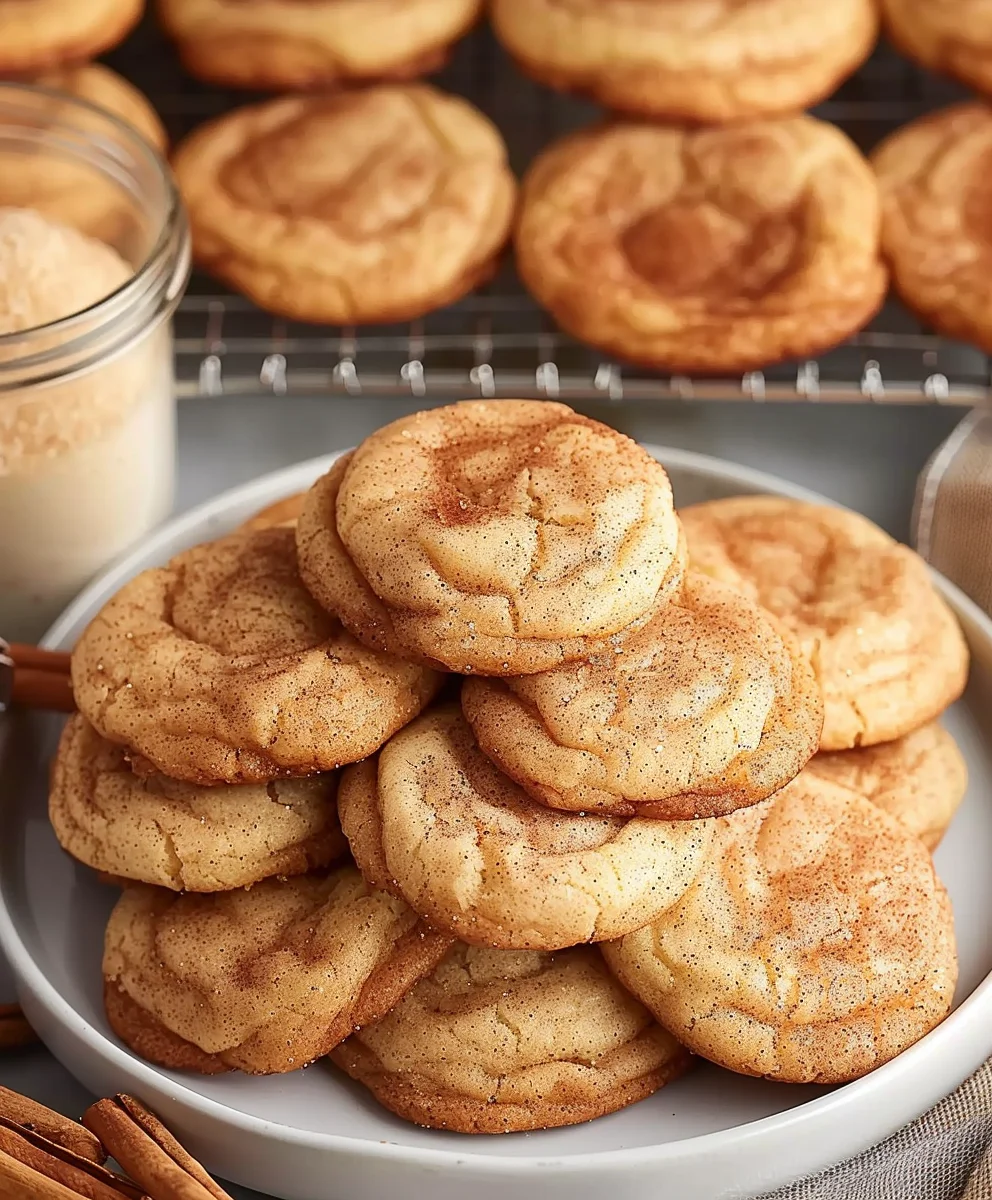
- After their initial rest on the baking sheets, carefully transfer the slightly cooled Apple Snickerdoodles to a wire rack to cool completely. This allows air to circulate around them, preventing them from becoming soggy on the bottom and ensuring they cool evenly. A completely cooled cookie will have the best chewy texture.
- Once fully cooled, these Apple Snickerdoodles are ready to be devoured! They are absolutely perfect served at room temperature, perhaps with a cup of hot coffee or tea. If you’re feeling extra indulgent, a slightly warm Apple Snickerdoodle with a scoop of vanilla bean ice cream is a truly divine experience, letting the warm apple notes and cinnamon spice shine through.
- Store any leftover cookies in an airtight container at room temperature for up to 3-4 days. They tend to stay delightfully soft and chewy for several days, making them a wonderful treat to have on hand. For longer storage, you can freeze the baked cookies in a freezer-safe bag or container for up to 3 months. Just let them thaw at room temperature when you’re ready to enjoy them again.
Conclusion:
Well, friends, we’ve reached the sweet end of our journey with these incredible treats, and I truly hope you’re as excited as I am about them! If there’s one recipe you absolutely must add to your baking repertoire this season, or frankly, any time of year when you crave a little comfort, it’s this one. These aren’t just any cookies; they are an experience. What makes these particular cookies so special, so undeniably must-try, is that they take everything we adore about the classic snickerdoodle—that delightful tang from cream of tartar, the chewy center, the crisp edges, and that iconic cinnamon-sugar coating—and elevate it to a whole new level with the warm, tender whisper of apple. It’s a symphony of textures and flavors that will captivate your senses from the very first bite.
I genuinely believe these Apple Snickerdoodles are destined to become a beloved staple in your home. They manage to be both incredibly comforting and surprisingly sophisticated, hitting that perfect balance between familiar warmth and exciting newness. The subtle apple pieces, softened and caramelized slightly during baking, add a beautiful depth and moisture that sets them apart from any other cookie you’ve had. They possess a remarkable ability to evoke feelings of autumn harvests and cozy evenings, yet they are light and bright enough to be enjoyed during a sunny spring afternoon or a cool summer night. Trust me, the aroma alone as they bake will have everyone gathered in the kitchen, eagerly awaiting their turn. This recipe isn’t just about making cookies; it’s about creating moments, sharing joy, and savoring the simple, delicious pleasures of life.
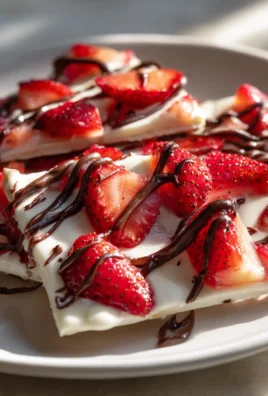
Serving Suggestions to Enhance Your Apple Snickerdoodle Experience
Now that you have a fresh batch of these beauties, let’s talk about how to enjoy them best. While they are absolutely divine on their own, especially when still slightly warm from the oven, there are a few ways to elevate your indulgence. Imagine pairing one of these soft, spiced cookies with a generous scoop of vanilla bean ice cream, allowing the cold creaminess to melt slightly into the warm cookie. A drizzle of homemade caramel sauce over the top would make for an unforgettable dessert. For a more casual treat, they are simply perfect alongside a steaming mug of coffee or a cup of spiced chai tea, making your afternoon break feel like a luxurious escape. They also make a fantastic addition to any dessert platter for gatherings, holiday parties, or potlucks—watch how quickly they disappear! And for the ultimate cozy morning, why not enjoy one (or two!) with your breakfast, perhaps even crumbling a slightly cooled cookie over a bowl of plain yogurt for a unique, sweet crunch. They also make incredibly thoughtful edible gifts, beautifully packaged for friends, neighbors, or teachers.
Creative Variations to Make Them Your Own
One of the most wonderful things about baking is the opportunity to experiment and personalize a recipe, and these Apple Snickerdoodles are no exception. While the original recipe is flawless, feel free to get creative! If you prefer a bolder apple flavor, consider grating a little more apple into the dough, ensuring you squeeze out any excess moisture beforehand to maintain the dough’s consistency. For an extra layer of spice, a pinch of ground ginger or cardamom can be added to the cinnamon-sugar coating, creating an even more complex aroma. You could also try incorporating different types of apples; Granny Smith will offer a tarter contrast, while Honeycrisp will provide more sweetness and a firmer texture. For those who love nuts, a handful of finely chopped pecans or walnuts folded into the dough would add a lovely textural element and nutty flavor. If you’re feeling particularly ambitious, a light cream cheese glaze drizzled over the cooled cookies would be absolutely exquisite, adding a touch of tangy sweetness that complements the apple and cinnamon perfectly. Don’t be afraid to make this recipe truly your own!
I can’t emphasize enough how much I encourage you to whip up a batch of these extraordinary cookies. They are straightforward to make, incredibly rewarding, and guaranteed to bring smiles to everyone who tries them. Go ahead, preheat that oven, gather your ingredients, and immerse yourself in the delightful process of creating these comforting Apple Snickerdoodles. Once you’ve experienced the magic, I would absolutely love to hear about it! Please come back and share your baking adventure, your serving suggestions, or any creative variations you’ve tried in the comments. Your feedback and stories inspire me and other bakers in our community. Happy baking, everyone!
Amazing Apple Snickerdoodles: Cinnamon Sugar Cookie Perfection
Apple Snickerdoodles offer a truly enchanting twist on a beloved classic, inviting us into a world where comforting tradition meets delightful seasonal innovation. Imagine biting into the soft, chewy texture of your favorite snickerdoodle, only to discover it’s beautifully complemented by pockets of tender, sweet apple. This isn’t just a cookie; it’s a warm hug in dessert form, perfect for those crisp autumn days or any moment you crave a taste of home-baked bliss.
Ingredients
-
250g Gala Apple, peeled and very finely diced (can substitute with Honeycrisp or Granny Smith)
-
50g Dark Brown Sugar (can substitute with light brown sugar)
-
1.5 tsp Ground Cinnamon
-
1 pinch Salt
-
1 tsp Fresh Lemon Juice
-
184g Unsalted Butter, softened
-
100g Granulated Sugar
-
2 tsp Vanilla Bean Paste or Pure Vanilla Extract
-
1 large Egg, at room temperature
-
250g All-Purpose Flour
-
1 tsp Baking Soda, fresh
-
1 tsp Cream of Tartar
-
0.5 tsp Fine Sea Salt
-
5g Cornstarch
-
66g Cinnamon Sugar Mixture (1/3 cup granulated sugar + 1 tbsp ground cinnamon)
Instructions
-
Step 1
In a medium bowl, whisk together 250g all-purpose flour, 1 tsp cream of tartar, 1 tsp baking soda, 0.5 tsp fine sea salt, and 5g cornstarch. Set aside. -
Step 2
In a large bowl, beat 184g softened unsalted butter until creamy (1-2 min). Gradually add 100g granulated sugar and 50g dark brown sugar; beat on medium-high for 3-4 min until light and fluffy, scraping bowl sides. -
Step 3
Add 1 large egg, beating well after addition until just combined. Stir in 2 tsp vanilla extract. Ensure egg is at room temperature. -
Step 4
With mixer on low speed, gradually add dry ingredient mixture to wet mixture. Mix only until just combined, stopping as soon as dry streaks disappear. Dough will be soft and sticky. -
Step 5
Peel, core, and very finely dice 250g Gala apple (aim for ¼ inch pieces). In a small non-stick skillet, add apples. Sauté for 3-4 min until slightly soft. Add 1.5 tsp ground cinnamon and 1 pinch salt. Cook for 2-3 min, stirring constantly, until apples are tender. Stir in 1 tsp fresh lemon juice. Transfer to a bowl and cool completely to room temperature. -
Step 6
Gently fold the completely cooled apple filling into the prepared cookie dough until evenly distributed. Cover the bowl and refrigerate the dough for at least 1-2 hours, or overnight, for best flavor and handling. -
Step 7
In a shallow bowl or wide plate, combine 66g cinnamon sugar mixture (1/3 cup granulated sugar + 1 tbsp ground cinnamon). Whisk until perfectly blended. -
Step 8
Preheat oven to 375°F (190°C). Line two large baking sheets with parchment paper. Scoop 1.5-2 tbsp portions of chilled dough, roll into smooth balls between your palms, and generously coat each ball in the cinnamon-sugar mixture. Place coated dough balls 2 inches apart on prepared baking sheets. Bake one sheet at a time for 10-12 minutes, until edges are lightly set and just beginning to turn golden, with centers still looking slightly soft and puffed. Cookies will have a crinkled surface. -
Step 9
Remove baking sheets from the oven and let cookies cool on the sheets for 5-7 minutes to firm up. Carefully transfer cookies to a wire rack to cool completely. Serve at room temperature, or warm with vanilla bean ice cream. Store leftovers in an airtight container at room temperature for up to 3-4 days, or freeze baked cookies for up to 3 months.
Important Information
Nutrition Facts (Per Serving)
It is important to consider this information as approximate and not to use it as definitive health advice.
Allergy Information
Please check ingredients for potential allergens and consult a health professional if in doubt.