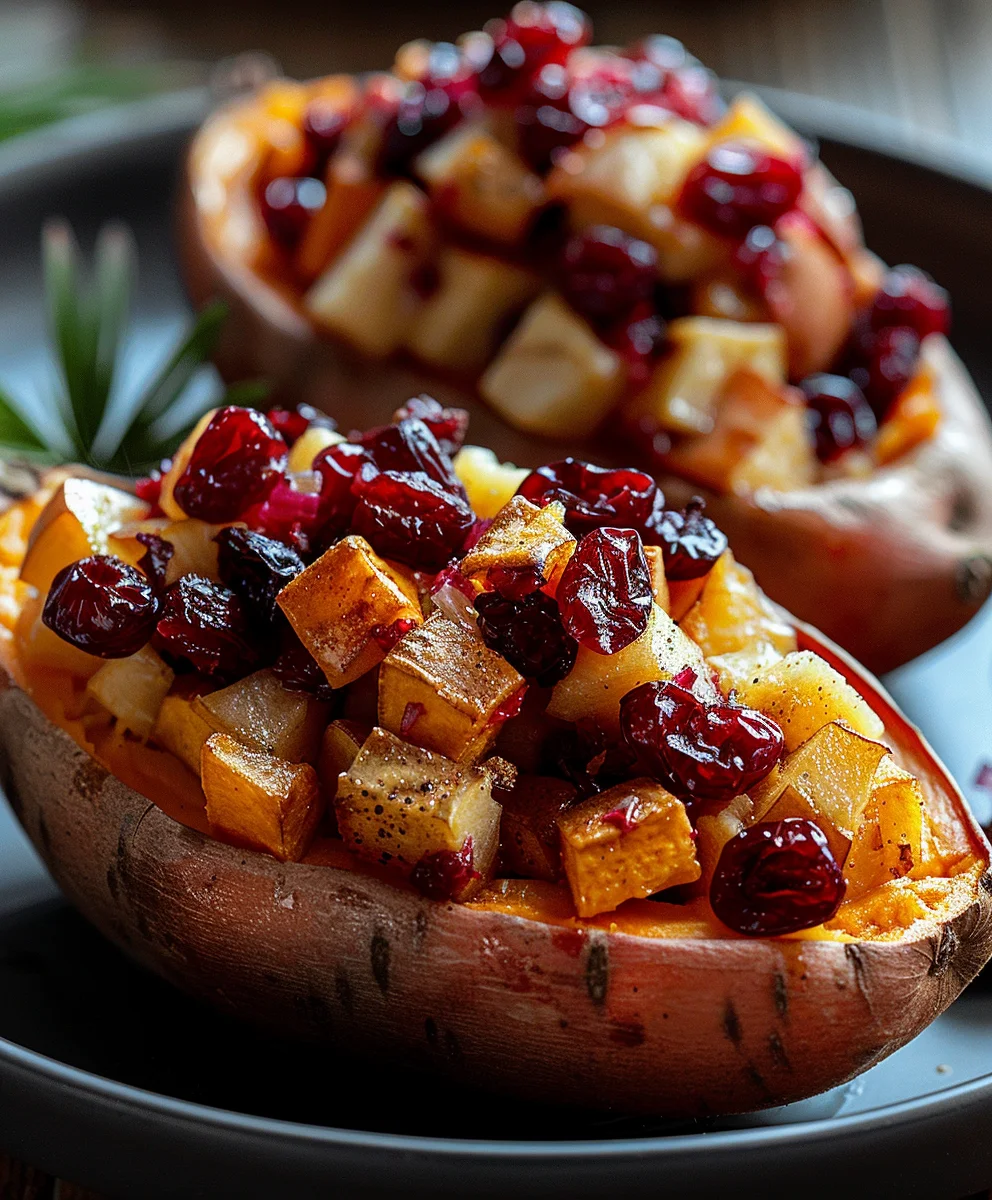
Cranberry Apple Twice Baked Sweet Potatoes are not merely a side dish; they are a show-stopping culinary experience that will undoubtedly become the star of your next gathering. Imagine the perfect harmony of creamy, naturally sweet baked sweet potato, infused with tender, tart cranberries and crisp, subtly sweet apples. While the concept of twice-baked potatoes offers a delightful twist on a classic, these sweet potato variations, particularly with autumnal fruits, evoke a comforting sense of tradition, reminiscent of cherished holiday meals and festive gatherings. It’s a modern, elegant take on beloved sweet potato casseroles, presented in convenient, individual portions.
This dish offers an unparalleled balance of flavors – the earthy sweetness of the potato, the vibrant tang of cranberries, and the gentle crispness of apples, all coming together in a velvety smooth filling. Beyond its exquisite taste, the brilliance of Cranberry Apple Twice Baked Sweet Potatoes lies in their make-ahead convenience, allowing you more time to enjoy your guests without sacrificing gourmet quality. I find that preparing these ahead of time truly transforms holiday cooking, making entertaining stress-free and truly enjoyable. Prepare to elevate your table with this truly unforgettable creation.
Ingredients:
- 4 medium-sized sweet potatoes (about 2.5 to 3 pounds total), choose ones that are similar in size for even cooking
- 6 tablespoons unsalted butter, divided (4 tablespoons for the filling, 2 tablespoons for the topping)
- 1/4 cup whole milk or heavy cream, plus more as needed
- 1/4 cup packed light brown sugar, plus 1 tablespoon for the topping
- 1/2 teaspoon ground cinnamon, divided (1/4 teaspoon for the filling, 1/4 teaspoon for the topping)
- 1/4 teaspoon ground nutmeg
- 1/2 teaspoon fine sea salt, plus a pinch for the topping
- 1/4 teaspoon black pepper (optional, but adds a nice depth)
- 1/2 cup dried cranberries, plump and juicy (plus extra for garnish, if desired)
- 1 small apple (such as Granny Smith or Honeycrisp), peeled, cored, and finely diced (about 3/4 cup)
- 1/2 cup chopped pecans, divided (1/4 cup for the filling, 1/4 cup for the topping, plus extra for garnish)
- 1 teaspoon orange zest (from about half an orange), optional but highly recommended for brightness
- 2 tablespoons all-purpose flour (for the topping)
- 2 tablespoons rolled oats (not instant, for the topping)
- 1 tablespoon maple syrup or honey (for drizzling over the finished dish, optional)
- A drizzle of olive oil or avocado oil (for roasting sweet potatoes)
Preparing the Sweet Potatoes for the First Bake
Let’s kick things off by getting our sweet potatoes ready for their initial bake, which is crucial for achieving that wonderfully creamy texture we’re aiming for in our Cranberry Apple Twice Baked Sweet Potatoes. It all starts with selecting the right sweet potatoes. I always look for ones that are relatively uniform in size. This isn’t just for aesthetic reasons; it ensures they cook evenly in the oven, preventing some from being undercooked while others are overdone.
- First, preheat your oven to 400°F (200°C). Getting the oven to the correct temperature beforehand is important for consistent baking.
- Next, give your sweet potatoes a good scrub under cold running water. We want them sparkling clean, as we’ll be handling them quite a bit and using their skins. Pat them completely dry with a clean kitchen towel. Any moisture on the skin can interfere with the roasting process, and we want that skin to be slightly crisp, not soggy.
- Using a fork or a small paring knife, carefully pierce each sweet potato several times all over. Think of it like giving them little vents. This allows steam to escape during baking, preventing them from bursting in the oven and helping them cook more thoroughly and quickly.
- Lightly rub each sweet potato with a small amount of olive oil or avocado oil. This isn’t just to prevent sticking; it also helps the skin crisp up beautifully and encourages a lovely caramelized flavor on the exterior. Place the oiled sweet potatoes directly on a baking sheet. I like to line my baking sheet with parchment paper for easy cleanup, but it’s not strictly necessary if you don’t mind a little scrubbing later.
- Bake in the preheated oven for about 50 to 70 minutes, or until they are very tender when pierced with a fork. The cooking time will vary depending on the size of your sweet potatoes. To check for doneness, gently squeeze a sweet potato with oven-mitted hands; if it yields easily and feels soft throughout, it’s ready. You want them to be extremely tender, almost to the point of collapse, as this makes scooping and mashing so much easier.
- Once baked, carefully remove the sweet potatoes from the oven and let them cool on the baking sheet until they are cool enough to handle comfortably. This usually takes about 15-20 minutes. Don’t rush this step, as trying to scoop hot sweet potato flesh can be quite difficult and messy. You can even let them cool completely if you’re planning to prepare them later in the day or make them ahead.
Crafting the Flavorful Filling for Cranberry Apple Twice Baked Sweet Potatoes
Now comes the heart of our dish: creating that incredible, sweet, and savory filling. This is where all the wonderful flavors of cranberry, apple, and warm spices truly shine, transforming simple sweet potatoes into a gourmet side dish perfect for any occasion. The key here is balance and ensuring everything is well incorporated for a smooth, rich texture.
- Once your sweet potatoes have cooled sufficiently, take each one and carefully slice it lengthwise down the middle. Be gentle so you don’t cut all the way through the bottom skin; we want to preserve the skins to use as our “bowls” for the stuffing.
- Using a spoon, carefully scoop out the tender sweet potato flesh from each half, leaving about a 1/4-inch border of flesh attached to the skin. This ensures the skins maintain their structural integrity and don’t collapse. Place all the scooped-out sweet potato flesh into a large mixing bowl. Try to get as much of the flesh as you can without tearing the skins.
- Add 4 tablespoons of unsalted butter to the warm sweet potato flesh. The residual heat from the sweet potatoes will help the butter melt beautifully and incorporate easily, adding a luxurious richness to our filling.
- Pour in 1/4 cup of whole milk or heavy cream. The fat from the milk or cream helps to create a wonderfully smooth and creamy texture. If your sweet potatoes seem a bit dry, don’t hesitate to add another tablespoon or two of milk until you reach your desired consistency.
- Sprinkle in 1/4 cup of packed light brown sugar, 1/4 teaspoon of ground cinnamon, 1/4 teaspoon of ground nutmeg, 1/2 teaspoon of fine sea salt, and optionally, 1/4 teaspoon of black pepper. These spices and seasonings are what elevate the flavor profile of our Cranberry Apple Twice Baked Sweet Potatoes from good to extraordinary. The brown sugar enhances the natural sweetness of the potatoes, while the cinnamon and nutmeg add a warm, comforting aroma and taste. The salt is crucial for balancing the sweetness and bringing out all the other flavors.
- Now, it’s mashing time! Using a potato masher, a large fork, or even an electric hand mixer on low speed, mash all the ingredients together until the mixture is smooth and creamy. Be careful not to overmix, especially if using an electric mixer, as sweet potatoes can become gummy if overworked. We’re looking for a velvety consistency, free of large lumps.
- Gently fold in 1/2 cup of dried cranberries, 1 small finely diced apple (about 3/4 cup), 1/4 cup of chopped pecans, and 1 teaspoon of orange zest (if using). This is where the “cranberry apple” part of our Cranberry Apple Twice Baked Sweet Potatoes truly comes alive! The cranberries add a burst of tartness and chewiness, the diced apple contributes a refreshing crispness and delicate sweetness, and the pecans offer a satisfying crunch and nutty flavor. The orange zest is a secret weapon here, providing a bright, aromatic lift that cuts through the richness and ties all the fruit flavors together beautifully.
- Taste the filling! This is perhaps the most important step. Sweet potatoes vary in sweetness, so you might find you want to add a little more brown sugar, a pinch more salt, or another dash of cinnamon. Adjust the seasonings to your personal preference until it tastes absolutely perfect to you. Remember, a well-seasoned dish is a happy dish!
Stuffing and the Initial Second Bake
With our incredibly delicious filling ready, it’s time to bring everything together and prepare our sweet potatoes for their first return to the oven. This step is about getting that flavorful mixture back into its natural vessel and allowing all those wonderful tastes to meld together and warm through.
- Carefully spoon the prepared sweet potato filling back into the hollowed-out sweet potato skins. Don’t be shy; mound the filling generously into each half, creating an appealing, slightly domed top. The goal is to fill them completely and perhaps even a little more, making them look abundant and inviting. I find using a large spoon or even an ice cream scoop works well for this.
- Place the stuffed sweet potato halves back onto your prepared baking sheet. Ensure they are arranged in a single layer, giving them a little space so they can heat evenly.
- Bake in the preheated 400°F (200°C) oven for about 15-20 minutes. The primary goal here is to heat the filling all the way through and allow the flavors to deepen. You’ll know they’re ready for the next step when the filling is hot to the touch and just starting to look slightly set on the surface. We’re not looking for browning yet, just a thorough warming.
- While the sweet potatoes are enjoying their first “second bake,” this is the perfect time to prepare our delectable topping. This crumble topping is what will add an amazing texture contrast and an extra layer of flavor to our already fantastic Cranberry Apple Twice Baked Sweet Potatoes.
Crafting the Irresistible Pecan Cranberry Crumble Topping
A truly magnificent twice-baked sweet potato isn’t complete without a delightful textural element on top. For these Cranberry Apple Twice Baked Sweet Potatoes, I’ve designed a simple yet incredibly flavorful pecan cranberry crumble that adds a buttery crunch and a hint of extra sweetness and spice. This topping is the crowning glory, making each bite an experience.
- In a medium-sized bowl, combine the remaining 2 tablespoons of unsalted butter (which should be softened or cut into small pieces for easier mixing), 1 tablespoon of packed light brown sugar, 1/4 teaspoon of ground cinnamon, a pinch of fine sea salt, 2 tablespoons of all-purpose flour, and 2 tablespoons of rolled oats.
- Using your fingertips, a pastry blender, or two knives, cut the butter into the dry ingredients until the mixture resembles coarse crumbs. You want small, pea-sized pieces of butter distributed throughout. The butter helps create that wonderful crispy, golden-brown texture when baked. Avoid overmixing; a slightly shaggy texture is ideal for a good crumble.
- Stir in the remaining 1/4 cup of chopped pecans. These pecans will toast beautifully in the oven, intensifying their nutty flavor and adding another layer of crunch to our already amazing Cranberry Apple Twice Baked Sweet Potatoes.
The Grand Finale: Topping and the Second Bake (The True “Twice Baked” Experience)
This is it – the moment where our Cranberry Apple Twice Baked Sweet Potatoes get their final transformation. The addition of the crumble topping and the final bake will bring out golden-brown perfection and meld all the flavors into a harmonious symphony. Get ready for some truly delicious aromas to fill your kitchen!
- Once the sweet potatoes have finished their initial “second bake” and the filling is hot, carefully remove the baking sheet from the oven.
- Evenly sprinkle the prepared pecan cranberry crumble topping over the top of each stuffed sweet potato half. Don’t be shy; ensure each potato gets a generous, even coating of the crumble. This isn’t just for looks; it’s for maximum flavor and texture in every single bite.
- Return the baking sheet with the topped sweet potatoes to the oven. Continue to bake for another 15-20 minutes, or until the topping is golden brown and delightfully crispy, and the filling is bubbly around the edges. Keep a close eye on them during the last few minutes, as ovens can vary and we don’t want the topping to burn. If you notice the topping browning too quickly, you can loosely tent the potatoes with aluminum foil.
- Once golden and bubbly, carefully remove the Cranberry Apple Twice Baked Sweet Potatoes from the oven. They will be very hot!
- If you desire, you can drizzle a small amount of maple syrup or honey over the top of the hot sweet potatoes immediately after removing them from the oven. This adds an extra layer of glistening sweetness and a beautiful sheen that makes them look even more appealing. It’s an optional step but one I highly recommend for that extra touch of gourmet flair.
- Allow the sweet potatoes to cool for 5-10 minutes before serving. This brief cooling period allows the filling to set slightly and prevents you from burning your tongue on the piping hot interior. It also makes them easier to handle.
- To elevate the presentation, you can garnish with a few extra dried cranberries and a sprinkle of fresh chopped pecans just before serving. This not only makes them look professionally prepared but also gives a visual cue to the delightful ingredients nestled within these magnificent Cranberry Apple Twice Baked Sweet Potatoes.
- Serve warm! These are best enjoyed fresh out of the oven when the topping is crisp and the filling is wonderfully creamy and aromatic. They make a fantastic side dish for holiday meals, a comforting weeknight dinner, or even a unique brunch item. Enjoy every single delicious, sweet, and savory bite!
Conclusion:
There are countless reasons why I absolutely adore this recipe, and I truly believe it deserves a spot on your table, whether for a special occasion or just a comforting weeknight dinner. What makes these Cranberry Apple Twice Baked Sweet Potatoes truly shine is their incredible balance of flavors and textures. Imagine the natural sweetness of baked sweet potato, perfectly complemented by the tart brightness of cranberries and the crisp, juicy bite of fresh apples. This isn’t just a side dish; it’s a culinary experience that brings together warmth, comfort, and an exciting burst of seasonal taste. It’s rich without being heavy, satisfying without being overwhelming, and undeniably elegant in its presentation. I’ve personally seen these disappear faster than any other dish at gatherings, and it’s all thanks to that harmonious blend that just sings on the palate. The preparation, while seemingly involved, is surprisingly straightforward, and the result is nothing short of spectacular, making all the effort truly worthwhile. It’s a dish that truly embodies the spirit of home cooking — thoughtful, delicious, and made with love. The subtle hints of spice, the creamy interior, and the slightly caramelized top crust make for an unforgettable bite every single time. Trust me when I say, once you try this, it’s going to become a cherished favorite.
A Symphony of Flavors and Textures
This particular rendition of twice-baked sweet potatoes takes a classic concept and elevates it to an art form. It transforms a humble vegetable into a show-stopping centerpiece that garners compliments effortlessly. The process of baking the potatoes first, scooping out their creamy insides, mixing them with delightful additions, and then baking them again ensures maximum flavor infusion and an unparalleled texture. You get that lovely caramelized exterior from the second bake, which adds a wonderful depth to the natural sweetness of the potato. Plus, the vibrant colors of the cranberries and apples peeking through make it incredibly appealing to the eye, inviting everyone to dig in. It’s truly a testament to how simple, wholesome ingredients can be transformed into something extraordinary with just a little creativity and care. The aroma alone as it bakes will fill your kitchen with warmth and anticipation, signaling that something truly special is on its way to the table. It’s a dish that manages to be both sophisticated and utterly comforting, a rare and beautiful combination that I find myself craving time and time again. This recipe is an embodiment of comfort food perfected, a delightful blend that consistently exceeds expectations and leaves a lasting impression on anyone fortunate enough to taste it.
Perfect Pairings for Every Occasion
One of the beauties of this recipe is its incredible versatility. While it’s absolutely perfect as a standout side dish for your holiday feasts—think Thanksgiving turkey, Christmas ham, or a festive roast chicken—it certainly isn’t limited to special occasions. I love serving these alongside a simple grilled salmon for a balanced and flavorful weeknight meal. They also make a fantastic vegetarian main course when paired with a fresh green salad, offering a substantial and satisfying option that doesn’t skimp on flavor. For a more casual setting, imagine them as a unique addition to a brunch spread, perhaps alongside some scrambled eggs and crispy bacon. The sweet and savory notes make it adaptable to so many different culinary landscapes. You could even scale down the individual portions and serve them as elegant appetizers at a dinner party, perhaps in smaller sweet potato halves for a charming touch. The possibilities truly are endless, and I encourage you to experiment with how you choose to present this delightful dish to your loved ones. Its adaptability means it can seamlessly fit into any menu, transforming an ordinary meal into something quite special.
Get Creative with Your Cranberry Apple Twice Baked Sweet Potatoes!
Don’t be afraid to put your own unique spin on this recipe! While the core flavors of sweet potato, cranberry, and apple are spectacular on their own, there’s always room for personalization. For an added textural crunch and nutty flavor, consider folding in a handful of toasted pecans or walnuts into the sweet potato mixture before the second bake. A sprinkle of crumbled goat cheese or feta cheese on top before serving can introduce a lovely savory tang that contrasts beautifully with the sweetness. If you’re looking to deepen the spice profile, a touch more cinnamon, a pinch of ground ginger, or even a tiny dash of allspice could work wonders. For a dairy-free or vegan version, simply swap out the butter for a plant-based alternative and use a non-dairy milk (almond or oat milk works great) in place of regular milk. You could even experiment with different types of apples; a Granny Smith will lend more tartness, while a Honeycrisp will amplify the sweetness. A tiny drizzle of maple syrup or a sprinkle of brown sugar over the top before the final bake can create an even more caramelized crust, adding another layer of irresistible flavor and texture. The beauty of cooking is in making a recipe truly your own, so feel free to play around with these suggestions and tailor it exactly to your taste preferences. Your kitchen is your canvas!
Your Culinary Adventure Awaits!
I’ve poured my heart into perfecting this recipe, and I am genuinely so excited for you to try it. I have no doubt that these Cranberry Apple Twice Baked Sweet Potatoes will impress your guests, comfort your family, and quickly become a cherished part of your culinary repertoire. The joy of cooking comes not just from creating something delicious, but also from sharing it and seeing the smiles it brings. So, please, gather your ingredients, set aside some time, and embark on this incredibly rewarding cooking adventure. Once you’ve had the chance to whip up a batch, I would absolutely love to hear about your experience. Did you add any unique twists? What did your family think? Share your successes, your serving suggestions, or even your questions in the comments below. Your feedback and stories inspire me and our entire community of food lovers. Don’t forget to snap a picture and share it with us – nothing makes me happier than seeing your creations come to life! Thank you for joining me on this delicious journey, and happy cooking!
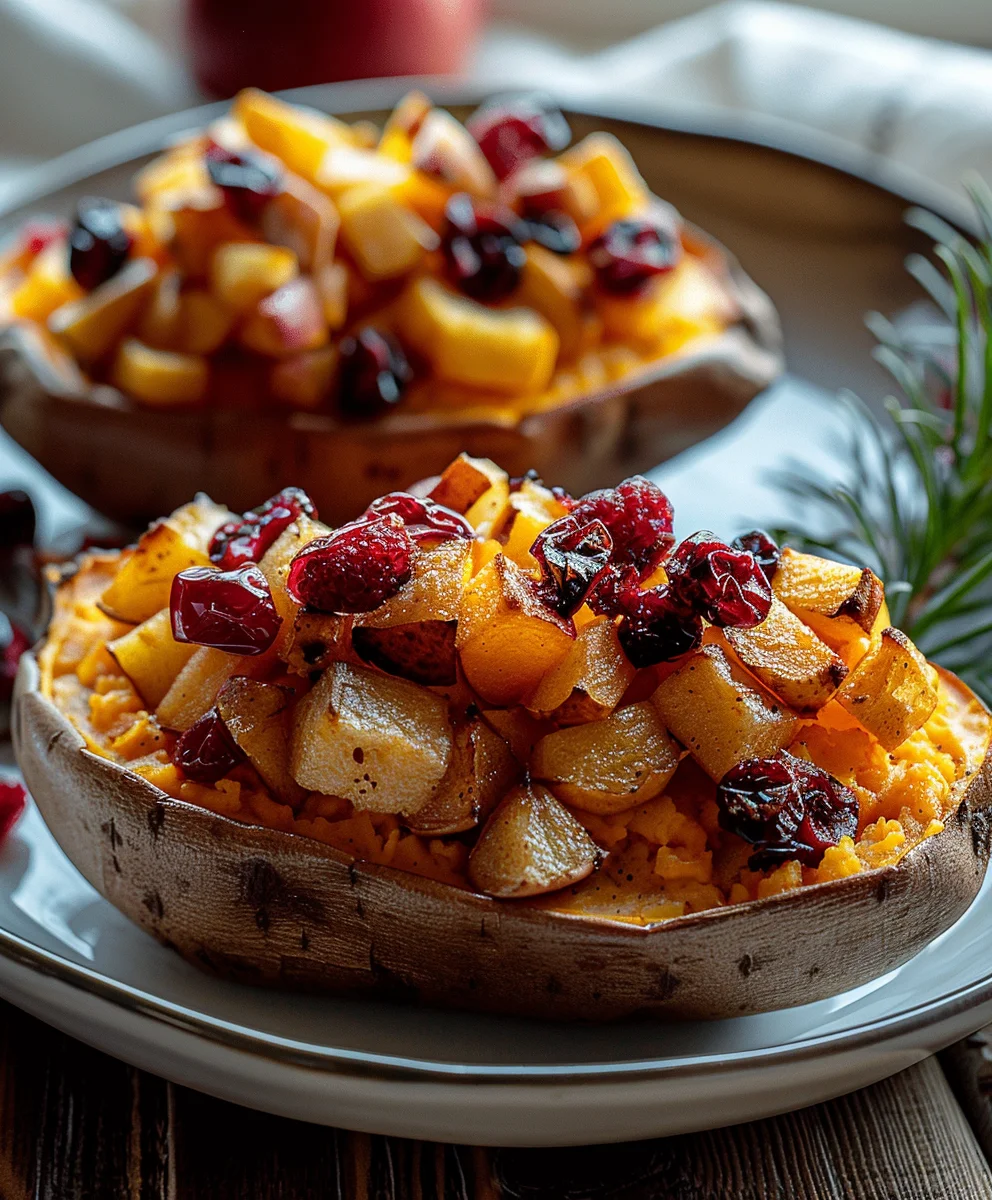
Cranberry Apple Twice Baked Sweet Potatoes
These Cranberry Apple Twice Baked Sweet Potatoes are a show-stopping side dish, offering a perfect harmony of creamy sweet potato, tart fresh cranberries, and crisp apples, topped with a buttery pecan crumble. It’s an elegant, make-ahead friendly twist on classic sweet potato casseroles, presented in individual portions.
Ingredients
-
4 medium sweet potatoes (2.5-3 lbs)
-
6 tbsp unsalted butter, divided
-
1/4 cup whole milk or heavy cream
-
1/4 cup brown sugar (for filling)
-
1 tbsp brown sugar (for topping)
-
1/2 tsp ground cinnamon, divided
-
1/4 tsp ground nutmeg
-
1/2 tsp fine sea salt, plus a pinch
-
1/4 tsp black pepper (optional)
-
1 cup fresh cranberries
-
1 small apple, peeled, cored, finely diced (about 3/4 cup)
-
1/2 cup chopped pecans, divided
-
1 tsp orange zest (optional)
-
2 tbsp all-purpose flour
-
2 tbsp rolled oats (not instant)
-
1 tbsp maple syrup or honey (optional)
-
Olive oil or avocado oil, for roasting
Instructions
-
Step 1
Preheat oven to 400°F (200°C). Scrub, dry, and pierce sweet potatoes. Lightly rub with olive oil and place on a baking sheet. Bake for 50-70 minutes, until very tender when pierced. Let cool for 15-20 minutes, or until cool enough to handle. -
Step 2
Once cooled, slice sweet potatoes lengthwise. Carefully scoop out the flesh, leaving a 1/4-inch border in the skins. Place flesh in a large mixing bowl. Add 4 tbsp butter, 1/4 cup milk or cream, 1/4 cup brown sugar, 1/4 tsp cinnamon, 1/4 tsp nutmeg, 1/2 tsp salt, and optional 1/4 tsp black pepper to the flesh. Mash until smooth and creamy. Gently fold in 1 cup fresh cranberries, 1 small finely diced apple, 1/4 cup chopped pecans, and 1 tsp orange zest (if using). Taste and adjust seasonings. -
Step 3
Spoon the prepared sweet potato filling back into the hollowed-out sweet potato skins, mounding generously. Place the stuffed halves back onto the baking sheet. Bake at 400°F (200°C) for 15-20 minutes, until the filling is hot through. -
Step 4
While sweet potatoes bake, combine the remaining 2 tbsp softened butter, 1 tbsp brown sugar, 1/4 tsp cinnamon, a pinch of salt, 2 tbsp all-purpose flour, and 2 tbsp rolled oats in a medium bowl. Use your fingertips or a pastry blender to cut the butter into the dry ingredients until coarse crumbs form. Stir in the remaining 1/4 cup chopped pecans. -
Step 5
Remove sweet potatoes from the oven. Evenly sprinkle the prepared pecan cranberry crumble topping over the top of each stuffed sweet potato half. Return to the oven and bake for another 15-20 minutes, or until the topping is golden brown and delightfully crispy, and the filling is bubbly. If topping browns too quickly, loosely tent with foil. Remove from oven. Optionally drizzle with maple syrup or honey. Allow to cool for 5-10 minutes before serving. Garnish with extra fresh cranberries and pecans if desired. Serve warm.
Important Information
Nutrition Facts (Per Serving)
It is important to consider this information as approximate and not to use it as definitive health advice.
Allergy Information
Please check ingredients for potential allergens and consult a health professional if in doubt.