• Skip to primary navigation
  • Skip to main content
  • Skip to primary sidebar
Homesmad

Homesmad

  • Home
  • Breakfast & Brunch
  • Appetizers & Snacks
  • Dinner
  • Dessert
  • About
  • Privacy Policy
  • Contact
Homesmad
  • Home
  • Breakfast & Brunch
  • Appetizers & Snacks
  • Dinner
  • Dessert
  • About
  • Privacy Policy
  • Contact

Cool Cucumbers in Spicy Peanut Sauce – Refreshing Side

October 24, 2025 by Lily author

Cucumbers In Spicy Peanut Sauce – doesn’t that just evoke a delightful dance of flavors and textures? I know for me, there are few things more satisfying than a dish that manages to be both incredibly refreshing and wonderfully complex at the same time. This particular recipe takes the humble cucumber and elevates it into something truly extraordinary, transforming it from a simple salad ingredient into a star-studded side dish that will captivate your palate and leave you craving more.

Originating from the vibrant culinary traditions found across various Asian cultures, where peanut-based sauces often accompany fresh vegetables and grilled meats, this dish has become a beloved staple for its remarkable ability to invigorate the senses. It’s a testament to how simple ingredients, when thoughtfully paired, can create an explosion of taste that feels both ancient and refreshingly modern.

Why do people absolutely adore these Cucumbers In Spicy Peanut Sauce?

Firstly, there’s the delightful crunch of the cool, crisp cucumber, which provides a perfect counterpoint to the luscious, creamy, and undeniably spicy peanut sauce. This sauce itself is a masterpiece of balance – a harmonious blend of nutty richness, a tantalizing kick of chili, a hint of sweetness, and a touch of tangy acidity that makes every bite an experience. It’s quick to prepare, incredibly versatile, and an ideal companion to almost any meal, especially on a warm day when you crave something light but utterly packed with flavor. I promise, one bite and you’ll understand the global obsession!

Cool Cucumbers in Spicy Peanut Sauce – Refreshing Side this RECIPE

Ingredients:

  • For the Cucumbers:

    • 3-4 large English or Persian cucumbers (about 2-2.5 lbs total)
    • 1 teaspoon sea salt (for draining cucumbers)
  • For the Spicy Peanut Sauce:

    • ½ cup creamy peanut butter (all-natural, unsweetened, or your preferred brand)
    • 3 tablespoons rice vinegar (unseasoned is best, but seasoned works in a pinch)
    • 2 tablespoons soy sauce (low-sodium preferred)
    • 1 tablespoon sesame oil (toasted sesame oil for richer flavor)
    • 1-2 tablespoons chili crisp or chili oil with flakes (adjust to your spice preference)
    • 1 tablespoon honey or maple syrup (for sweetness and balance)
    • 1 tablespoon fresh ginger, grated or finely minced
    • 2 cloves garlic, minced
    • ¼ – ½ cup warm water (or vegetable broth), for thinning the sauce to desired consistency
    • ½ teaspoon fresh black pepper (optional, for an extra kick)
  • For Garnish (Optional but highly recommended):

    • 2 tablespoons toasted sesame seeds (white or black)
    • 2 tablespoons chopped fresh cilantro
    • Extra drizzle of chili crisp or chili oil

Preparing the Cucumbers: The Art of the Smash

This section is all about transforming humble cucumbers into flavorful, tender morsels that perfectly absorb our exquisite spicy peanut sauce. The smashing technique is not just for show; it creates craggy, irregular surfaces that are ideal for soaking up all those delicious flavors, while also releasing excess water to prevent a watery final dish. Trust me, it’s worth the extra step!

  1. Wash and Prepare the Cucumbers: First, give your cucumbers a thorough wash under cool running water. Pat them dry completely with a clean kitchen towel. If you’re using English cucumbers, there’s no need to peel them; their skin is thin and tender. For other varieties with thicker skins, you might choose to peel them, either partially or completely, depending on your preference.

    Choosing the Right Cucumbers for Success

    I find English or Persian cucumbers work best for this recipe because they have fewer seeds and higher water content, leading to a wonderfully crisp yet tender texture when smashed. Avoid large, seedy American slicing cucumbers if possible, as they can become too watery and soft.

  2. Smash the Cucumbers: This is the fun part! Place the cucumbers on a clean cutting board. Using the flat side of a heavy chef’s knife, a rolling pin, or even a meat tenderizer, firmly but gently smash each cucumber along its length. You don’t want to pulverize them into mush, but rather crack them open and create rough, uneven pieces. The goal is to break down their cell walls, which helps them release water and absorb flavor later. Aim for a “just-broken” look, where they are split and somewhat flattened but still holding together.

    Technique Tip: How to Achieve the Perfect Smash

    To avoid a mess and keep everything contained, I often place the cucumber inside a large zip-top bag before smashing. This not only prevents pieces from flying everywhere but also makes cleanup a breeze! Apply even pressure, and don’t be afraid to give it a good whack. You’ll hear a satisfying crunch as the cucumber yields.

  3. Cut into Bite-Sized Pieces: Once smashed, cut the cucumbers into roughly 1-inch to 1.5-inch pieces. Because they are already irregularly shaped from the smashing, simply cutting them crosswise will result in beautifully textured, rustic chunks. These uneven surfaces are crucial for maximizing flavor absorption from the spicy peanut sauce.
  4. Salt and Drain: Transfer the cut cucumber pieces to a colander. Sprinkle them evenly with 1 teaspoon of sea salt. Toss gently to ensure all pieces are lightly coated. The salt will draw out excess moisture from the cucumbers. Let them sit in the colander over a bowl or in the sink for at least 15-20 minutes. You’ll be surprised by how much water accumulates at the bottom! This step is critical; skipping it can lead to a watery sauce and dilute the robust flavors of your Cucumbers In Spicy Peanut Sauce.

    Why Salting and Draining is Non-Negotiable

    This process is key to preventing a soggy dish. Cucumbers are naturally full of water. By salting them, we use osmosis to pull out that water, resulting in firmer, more concentrated cucumber flavor that won’t thin out our glorious spicy peanut sauce. It also enhances their crispness.

  5. Pat Dry: After draining, gently squeeze the cucumbers with your hands to release any remaining water. Then, transfer them to several layers of paper towels or a clean kitchen towel and pat them very, very dry. This is another crucial step; any residual moisture will weaken the sauce. You want them as dry as possible to ensure maximum flavor adherence.

Crafting the Irresistible Spicy Peanut Sauce

The sauce is the heart and soul of our Cucumbers In Spicy Peanut Sauce. It’s a harmonious blend of savory, sweet, tangy, and spicy, creating an explosion of flavor in every bite. Making it from scratch allows you to control the exact balance of flavors and adjust the spice level to your liking. Get ready to whisk up some magic!

  1. Combine Wet Ingredients: In a medium-sized mixing bowl, combine the creamy peanut butter, rice vinegar, soy sauce, sesame oil, chili crisp (or chili oil), and honey (or maple syrup).

    Peanut Butter Pointers for the Best Sauce

    For the best results, I recommend using an all-natural, creamy peanut butter that’s unsweetened. It provides a pure peanut flavor without competing with the other ingredients. If your peanut butter is very thick or stiff, you might need to add a touch more warm water later to achieve the desired consistency. Avoid varieties with added sugars or oils if you can, as they can throw off the balance of flavors we’re carefully building.

  2. Add Aromatics: Grate or finely mince your fresh ginger and mince your garlic cloves. Add them directly to the bowl with the other sauce ingredients. These fresh aromatics provide a wonderful pungency and warmth that elevates the entire dish.

    Fresh vs. Powdered Aromatics: A Note on Flavor

    While garlic powder and ground ginger can be used in a pinch, I strongly advocate for fresh ingredients here. Fresh ginger offers a bright, zesty zing, and fresh garlic provides a robust, pungent flavor that simply can’t be replicated by their dried counterparts. It makes a significant difference in the final taste of your spicy peanut sauce.

  3. Whisk Until Smooth: Using a whisk, vigorously mix all the sauce ingredients together. At first, it might seem a bit thick and clumpy, especially with the peanut butter. Keep whisking! Your goal is a smooth, homogenous mixture.
  4. Thin to Desired Consistency: Gradually add the warm water (or vegetable broth), one tablespoon at a time, while continuing to whisk. The amount of water you need will depend on the thickness of your peanut butter and your desired sauce consistency. You’re aiming for a pourable, but still substantial, sauce that will coat the cucumbers beautifully. It shouldn’t be too thick like a paste, nor too thin like a broth. I usually find ¼ to ½ cup is sufficient, but trust your judgment. If you prefer a richer, thicker sauce, use less water. If you want it lighter, add a little more.

    The Art of Sauce Consistency: Why it Matters for Cucumbers In Spicy Peanut Sauce

    The consistency of your sauce is critical. Too thick, and it won’t evenly coat the smashed cucumbers. Too thin, and it will just drip off, leaving you with less flavor in every bite. Slowly adding water gives you maximum control. Taste and adjust as you go!

  5. Taste and Adjust: This is perhaps the most important step for any recipe. Taste the sauce! Does it need more spice? Add more chili crisp. More tang? A splash more rice vinegar. A touch more sweetness? A little more honey or maple syrup. More salt? A dash of soy sauce. This is your chance to customize the sauce to perfectly suit your palate. Remember to consider the saltiness from the soy sauce before adding additional salt. If you like a hint of black pepper, now is the time to whisk it in.

    Balancing Flavors: Your Personal Touch

    The beauty of making your own Cucumbers In Spicy Peanut Sauce is the ability to tailor it. Some like it intensely spicy, others prefer a milder warmth. Adjust the chili crisp accordingly. If your peanut butter is on the sweeter side, you might reduce the honey. It’s all about finding your perfect balance.

Bringing It All Together: Assembling Your Cucumbers In Spicy Peanut Sauce

With your perfectly prepared cucumbers and your expertly crafted spicy peanut sauce, all that’s left is to combine them. This step is quick, but the subsequent chilling time is essential for the flavors to meld and for the cucumbers to truly absorb the sauce’s essence.

  1. Combine Cucumbers and Sauce: In a large mixing bowl, add the thoroughly drained and dried cucumber pieces. Pour the prepared spicy peanut sauce over the cucumbers.
  2. Toss to Coat: Using a spoon or your clean hands (which I find works best for gentle, even coating), gently toss the cucumbers until every piece is generously coated with the luscious peanut sauce. Ensure the irregular surfaces of the smashed cucumbers are thoroughly covered, allowing them to soak up maximum flavor.
  3. Chill and Marinate: Cover the bowl with plastic wrap or transfer the Cucumbers In Spicy Peanut Sauce to an airtight container. Refrigerate for at least 30 minutes, or ideally 1-2 hours. This chilling time is crucial. It allows the flavors to deepen and meld, and the cucumbers to become even more infused with the spicy, tangy, and savory notes of the sauce. The slight chill also makes the dish incredibly refreshing.

    The Magic of Marination: Don’t Rush This Step!

    While you can eat this immediately, allowing it to chill truly transforms the dish. The cucumbers release a tiny bit more moisture, which slightly thins the sauce, allowing it to penetrate deeper into the cucumber flesh. This is when the magic happens, developing those complex flavors we’re aiming for.

Serving Suggestions and Storage Tips

Once your Cucumbers In Spicy Peanut Sauce has chilled to perfection, it’s ready to be enjoyed! This dish is incredibly versatile, serving as a fantastic side dish, a light lunch, or even an appetizer. Here are some ideas to make it shine.

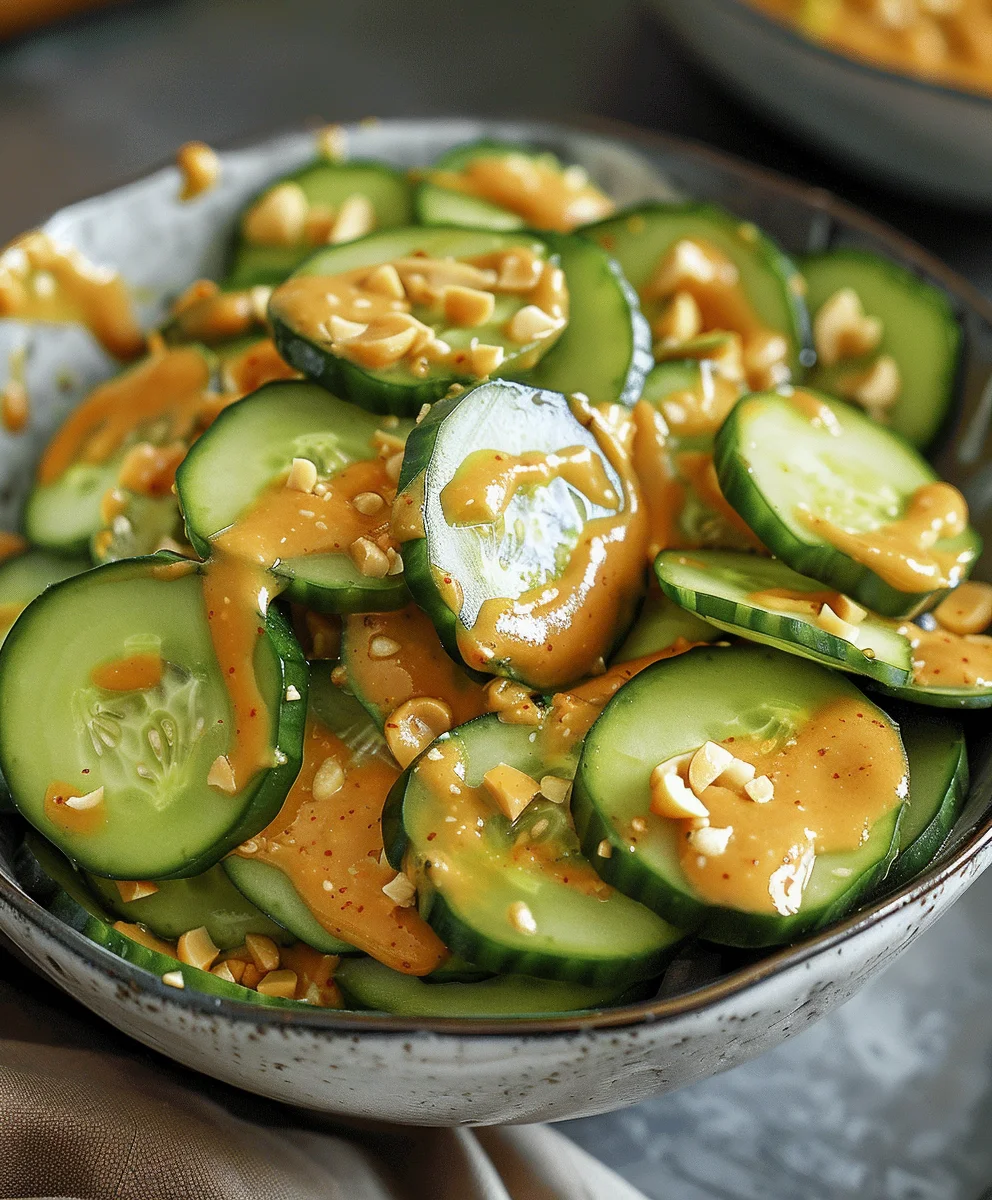
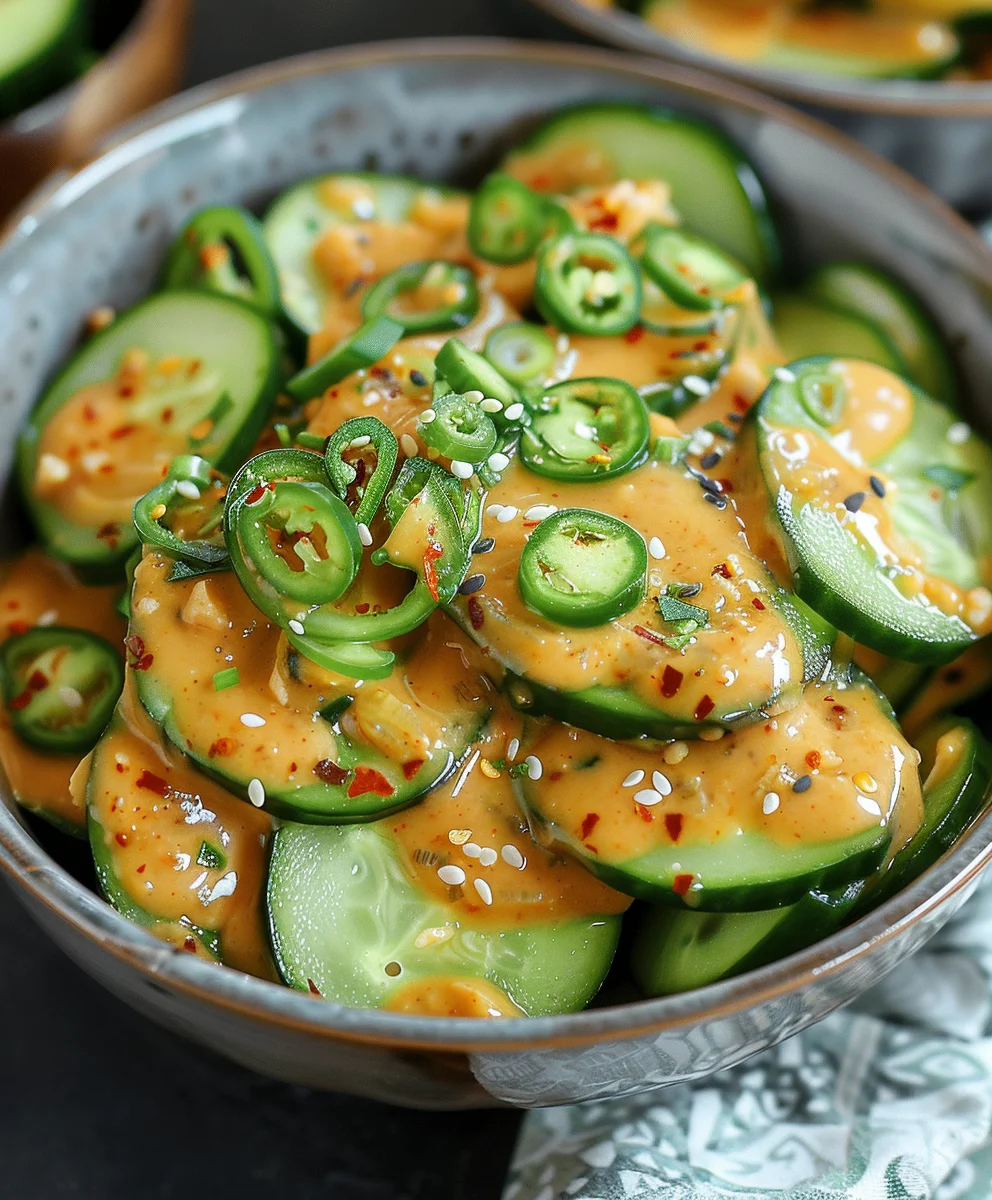
  1. Garnish and Serve: Just before serving, give the cucumbers another gentle toss. Transfer them to a serving bowl. Sprinkle generously with toasted sesame seeds and fresh chopped cilantro. If you love extra heat and flavor, drizzle a little extra chili crisp or chili oil over the top. The visual appeal of these garnishes adds to the overall experience.

    Presentation Matters: Elevating Your Dish

    A beautifully presented dish is always more appealing. The vibrant green of the cilantro against the rich, creamy sauce and the contrasting colors of sesame seeds make this dish not just delicious, but also a feast for the eyes.

Tips for Mastering Your Cucumbers In Spicy Peanut Sauce

Here are some additional insights to ensure your Cucumbers In Spicy Peanut Sauce turns out perfectly every time, and how you can adapt it to your preferences.

  • Spice Level Customization: The amount of chili crisp or chili oil is entirely up to your heat tolerance. If you love a fiery kick, don’t hesitate to add an extra tablespoon or two. For a milder version, start with just one tablespoon and add more after tasting. Remember that the spice level can intensify slightly as the dish chills.
  • Make Ahead: This dish is wonderful for meal prep! You can prepare the cucumbers and the sauce separately a day in advance. Store them in airtight containers in the refrigerator. Combine and toss them about 2-3 hours before you plan to serve to allow sufficient marination time. This makes entertaining a breeze!
  • Leftovers: Leftovers store beautifully in an airtight container in the refrigerator for up to 3-4 days. The flavors actually deepen and become even more harmonious over time. Just give it a good stir before serving.
  • Adding Texture: For an extra layer of crunch, consider adding a handful of chopped roasted peanuts along with the sesame seeds at the end. This adds another dimension to the dish that complements the creamy sauce and crisp cucumbers beautifully.
  • Protein Boost: Turn this side dish into a complete meal by adding some cooked, shredded chicken, pan-seared tofu, or even crispy tempeh. Toss the protein with the sauced cucumbers for a satisfying and flavorful lunch or light dinner.
  • Vinegar Variations: While rice vinegar is traditional and highly recommended for its mild tang, you could experiment with a splash of black vinegar for a deeper, more complex sour note, or even lime juice for a brighter, more zesty flavor profile. Just be sure to taste as you go, as these can drastically change the sauce’s character.
  • Sweetener Alternatives: If you’re avoiding refined sugars, maple syrup or agave nectar work perfectly as substitutes for honey, providing the necessary sweetness to balance the salty, spicy, and tangy elements of the sauce.
  • Don’t Skip the Drying: I cannot emphasize enough the importance of thoroughly drying your cucumbers after salting. Any excess water will dilute your carefully crafted spicy peanut sauce, resulting in a less flavorful and potentially watery dish. Pat, pat, pat those cucumbers dry!
  • Serving Temperature: While delicious at room temperature, this dish truly shines when served chilled. The coldness enhances the refreshing quality of the cucumbers and makes the spicy sauce even more invigorating.

Enjoy creating this vibrant and incredibly flavorful dish! It’s a fantastic way to enjoy cucumbers, offering a burst of Asian-inspired flavors that are both satisfying and refreshing.

Cool Cucumbers in Spicy Peanut Sauce – Refreshing Side

Conclusion:

This isn’t just another cucumber dish; it’s a revelation. I genuinely believe that once you try this recipe, it will quickly become a cherished favorite in your culinary repertoire. The sheer simplicity of its preparation belies the explosion of complex flavors it delivers. We’re talking about the ultimate balance: the crisp, cool refreshment of fresh cucumbers providing the perfect counterpoint to a sauce that is at once creamy, nutty, spicy, savory, and just a touch sweet. It’s a symphony of textures and tastes that tantalizes the palate and leaves a lasting impression. I’ve served this countless times, and without fail, it elicits “wows” and requests for the recipe. It’s incredibly quick to whip up, making it an ideal choice for busy weeknights when you crave something extraordinary but are short on time. Beyond its speed, the refreshing quality makes it a perfect dish for warmer weather, though I find myself craving it year-round. It stands out because it takes humble ingredients and elevates them into something truly special, proving that sometimes, the most unforgettable dishes are born from the simplest components. This recipe, dare I say, transforms the ordinary cucumber into a star, making it an absolute must-try for anyone looking to add a vibrant, flavorful, and unique dish to their table. The magic of Cucumbers In Spicy Peanut Sauce is undeniable, offering a fresh perspective on what a simple side dish can achieve.

But the beauty of this dish extends far beyond its initial deliciousness; it’s also incredibly versatile. While it shines brightly as a standalone appetizer, eagerly devoured before any main course even hits the table, its potential is truly boundless.

Versatile Serving Ideas

Consider serving a generous bowl of these vibrant cucumbers alongside grilled chicken or pork – the cool, spicy crunch provides a fantastic contrast to the rich, smoky flavors of BBQ. It’s also an exceptional partner for a simple bowl of steamed rice or your favorite stir-fried noodles, instantly upgrading a humble meal into a more sophisticated and satisfying experience. I often prepare it as a palate cleanser during a multi-course meal, as its bright flavors refresh and prepare your taste buds for the next culinary adventure. For a lighter lunch, I’ve been known to enjoy a larger portion on its own, perhaps with a sprinkle of extra protein, and it’s always wonderfully satisfying. Imagine it at your next picnic or potluck; it travels beautifully and always disappears quickly. The vibrant colors alone are enough to brighten any spread, making it a feast for both the eyes and the taste buds.

Creative Variations to Explore

And don’t be afraid to experiment with variations! This recipe is wonderfully forgiving and open to customization. To boost its nutritional profile or simply add more texture, try tossing in some thinly sliced bell peppers, shredded carrots, or even shelled edamame beans. For a more substantial dish, consider adding some pan-fried tofu cubes, grilled shrimp, or shredded leftover chicken – turning it into a light yet fulfilling salad. If you’re not a fan of peanuts or have an allergy, almond butter or cashew butter can be fantastic substitutes, offering a slightly different, perhaps milder, nutty note. Feel free to adjust the spice level to your preference; a dash more chili garlic sauce or a sprinkle of red pepper flakes will amp up the heat for those who love a fiery kick, while less will keep it mild and approachable for all. Finally, don’t forget the garnishes! A scattering of toasted sesame seeds, chopped roasted peanuts, fresh cilantro, or thinly sliced green onions not only adds visual appeal but also an extra layer of flavor and texture that truly completes the experience. You could even drizzle a bit of toasted sesame oil right before serving for an extra layer of aromatic depth.

So, my dear readers, please don’t just read about this incredible creation; go out and make it! I promise you, you won’t be disappointed. There’s a special kind of joy that comes from creating something so simple yet so utterly delicious, and this recipe delivers that joy in spades. It’s an invitation to bring new, exciting flavors into your kitchen and onto your table. Imagine the smiles it will bring to your family, the compliments from your friends, or simply the pure satisfaction of enjoying a perfectly balanced, refreshing, and spicy dish all to yourself. I’m truly excited for you to experience this culinary delight. Once you’ve had a chance to try your hand at this recipe, I would absolutely love to hear about your experience. Did you add any unique twists? What did you serve it with? How did your family and friends react? Your feedback and shared experiences are what make this culinary journey so much more rewarding for all of us. So, take the leap, embrace the deliciousness, and come back to share your spicy peanut cucumber adventure with our growing community of food lovers. Happy cooking, and I can’t wait to hear all about your triumphs!


Cool Cucumbers in Spicy Peanut Sauce – Refreshing Side

Cool Cucumbers in Spicy Peanut Sauce – Refreshing Side

A delightful side dish featuring crisp cucumbers tossed in a creamy, spicy peanut sauce. This recipe combines refreshing textures with complex flavors, perfect for a light meal or accompaniment.

Prep Time
30 Minutes

Cook Time
0 Minutes

Total Time
1 Hours

Servings
2-4 servings

Ingredients

  • 1.5 English cucumbers
  • 1/4–1/3 cup chopped peanuts, lightly salted
  • 2 teaspoons white sesame seeds
  • 2–3 tablespoons chopped green onion
  • Pinch red pepper flakes (optional)
  • 1/4 cup creamy peanut butter
  • 2 tablespoons maple syrup
  • 1.5–2 tablespoons warm water
  • 1 tablespoon low sodium soy sauce
  • 1 tablespoon sriracha
  • 2 teaspoons rice vinegar
  • 1 teaspoon sesame oil

Instructions

  1. Step 1
    Wash cucumbers, then smash each along its length using a heavy knife or rolling pin to create rough, uneven pieces. Cut into roughly 1-1.5 inch chunks.
  2. Step 2
    Transfer cucumber pieces to a colander. Salt to draw out excess moisture. Let sit for 15-20 minutes, then gently squeeze and pat very dry with paper towels.
  3. Step 3
    In a mixing bowl, combine creamy peanut butter, maple syrup, soy sauce, sriracha, rice vinegar, and sesame oil. Whisk vigorously until smooth.
  4. Step 4
    Gradually add warm water (1.5–2 tablespoons) to the sauce, whisking until it reaches a pourable, yet substantial, consistency. Taste and adjust flavors as needed.
  5. Step 5
    Add the thoroughly dried cucumber pieces to the sauce. Toss gently until every piece is generously coated.
  6. Step 6
    Cover and refrigerate for at least 30 minutes, or ideally 1-2 hours, to allow flavors to meld and deepen.
  7. Step 7
    Before serving, give a gentle toss. Garnish with chopped peanuts, white sesame seeds, chopped green onion, and an optional pinch of red pepper flakes.

Important Information

Nutrition Facts (Per Serving)

It is important to consider this information as approximate and not to use it as definitive health advice.

Allergy Information

Please check ingredients for potential allergens and consult a health professional if in doubt.

« Previous Post
Addictively Crispy Garlic Herb Roasted Potato Skins
Next Post »
Best Cranberry Apple Twice Baked Sweet Potatoes Recipe!

If you enjoyed this…

Rustic Garlic Rosemary Skillet Bread – Easy & Delicious

Chili Garlic Crunch: The Ultimate Guide to Flavor and Recipes

Skellington Cheese Ball: Easy Halloween Appetizer Recipe

Primary Sidebar

Browse by Diet

BreakfastDinnerLunchDessertAppetizer

Sweet Peach Yogurt Parfait Delight

One of my fondest memories is from a lazy summer afternoon spent at my grandmother’s house. The sun filtered through the kitchen window, casting a warm glow over the table where she would create her culinary magic. It was during one of those blissful moments that I first tasted her Peach Yogurt Parfait with Honey and Granola. The sweet aroma of ripe peaches mingling with creamy yogurt and the crunch of granola was nothing short of heavenly. It felt like summer captured in a bowl, and I still remember the joy of diving in with a spoon, each layer revealing a new burst of flavor.

When I think about that parfait, I can almost hear the gentle hum of the bees outside, reminding me of the floral notes that honey brings to every bite. The vibrant yellows and soft oranges of the peaches contrast beautifully with the creamy white yogurt and the golden crunch of granola. It’s a dish that not only looks delightful but also tastes like a celebration of fresh, wholesome ingredients.

What makes my version of this Peach Yogurt Parfait special is the careful balance of flavors and textures. I use ripe, juicy peaches, drizzled with locally sourced honey, and a homemade granola that’s bursting with nuts and seeds for an extra crunch. It’s a simple dish, but every layer is crafted with love and attention.

Let me show you exactly how to make this delightful parfait, so you can bring a bit of that summer magic into your kitchen!

Sweet Peach Yogurt Parfait Delight

Why You’ll Love This Recipe

  • Delightfully creamy texture from the Greek yogurt, paired with the juicy sweetness of fresh peaches.
  • Ready in under 20 minutes, making it a quick and satisfying breakfast or snack option.
  • Budget-friendly, using common ingredients that you may already have in your pantry.
  • Customizable with your favorite granola and nuts, allowing you to tailor each parfait to your taste.
  • Perfectly balanced flavors with the bright acidity of lemon juice and the sweetness of honey enhancing the peaches.

Ingredients

  • For the Parfait:
  • 2 cups plain Greek yogurt (or vanilla yogurt for a sweeter option)
  • 2 large ripe peaches, diced (about 2 cups)
  • 1 tablespoon fresh lemon juice (to prevent browning of peaches)
  • 2 tablespoons honey (plus more for drizzling)
  • 1 teaspoon vanilla extract (optional for extra flavor)
  • For the Granola:
  • 1 cup granola (store-bought or homemade; see notes for a simple granola recipe)
  • 1/4 cup sliced almonds (optional for added crunch)
  • 1/4 cup shredded coconut (optional for added flavor)

Let’s dive into some key ingredients that make this Peach Yogurt Parfait so delightful! First, the Greek yogurt is not only creamy but also packed with protein, making it a satisfying option for breakfast or a snack. If you’re looking for a sweeter option, you can easily substitute it with vanilla yogurt, though it may alter the overall flavor balance. Next, the ripe peaches are the star of the show; their natural sweetness shines through, so I recommend choosing peaches that yield slightly to pressure, indicating they’re perfectly ripe. If peaches aren’t in season, feel free to use nectarines or even frozen peaches—just thaw them before use. Finally, honey adds a lovely floral sweetness that ties everything together. If you prefer, maple syrup can serve as a delicious substitute.

Step-by-Step Instructions

  1. Start by preparing the peaches. Wash them thoroughly, then slice and dice them into bite-sized pieces. In a medium bowl, toss the diced peaches with 1 tablespoon of fresh lemon juice to prevent browning. Set aside for about 5 minutes while the lemon juice works its magic.
  2. In a separate bowl, combine the Greek yogurt, 2 tablespoons of honey, and 1 teaspoon of vanilla extract if using. Stir the mixture until smooth and thoroughly blended. This should take about a minute. Avoid overmixing to maintain the creaminess of the yogurt.
  3. Now it’s time to layer your parfait. Grab a clear glass or bowl to showcase your beautiful creation. Start with a generous spoonful of the yogurt mixture at the bottom—about 1/4 cup will do. Use a spoon to spread it evenly.
  4. Add a layer of the diced peaches over the yogurt, ensuring they cover the yogurt completely. You might want to use about half of what you have prepared—roughly 1 cup. This layer should be visually appealing, so arrange the peaches neatly.
  5. Sprinkle 1/4 cup of granola over the peaches. This adds a delightful crunch. Make sure to distribute it evenly to ensure every bite has that satisfying texture. Avoid packing it down too tightly, as you want it to maintain its crunch.
  6. Repeat the layers: spoon in another 1/4 cup of yogurt, followed by another cup of peaches, and another sprinkle of granola. You should have at least two layers, but feel free to add more depending on your glass size.
  7. Finish off your parfait with a drizzle of honey on top for added sweetness and a touch of elegance. If you’re using sliced almonds or shredded coconut, sprinkle them on top now. It adds a lovely visual contrast and extra flavor.
  8. Serve immediately or refrigerate for up to 30 minutes before serving to allow the flavors to meld together. However, I recommend enjoying it fresh to maintain the granola’s crunch.

Pro Tips for the Best Peach Yogurt Parfait With Honey And Granola

  • Make sure to choose ripe peaches for the best flavor and texture. A common mistake is using unripe fruit, which can lead to a less enjoyable parfait. Look for peaches that are fragrant and slightly soft to the touch.
  • Use a clear glass to assemble your parfait; this not only makes for a beautiful presentation but also allows you to see the colorful layers, which adds to the enjoyment of eating it.
  • For an even creamier texture, consider whipping the Greek yogurt with a hand mixer for a couple of minutes before layering. This small adjustment makes a huge difference in mouthfeel.
  • Be mindful of the granola-to-yogurt ratio. Too much granola can overwhelm the parfait, while too little can make it feel too creamy. Aim for about 1/4 cup of granola per layer for the perfect balance.
  • If you’re making this for a gathering, consider preparing the yogurt and peaches ahead of time and layering them just before serving. This ensures the granola stays crunchy!

Variations & Serving Ideas

There are so many ways to get creative with your Peach Yogurt Parfait! For a tropical twist, swap out the peaches for mangoes or pineapples and top with coconut flakes. If you prefer a berry flavor, mix in some blueberries or strawberries with the peaches for added color and taste. For a nutty version, incorporate chopped walnuts or pecans instead of almonds.

As for serving ideas, this parfait pairs beautifully with a side of scrambled eggs for a hearty breakfast or fresh fruit salad for a light lunch. You might also enjoy it alongside whole grain toast with almond butter for an energizing snack. The contrast of flavors and textures will elevate your meal experience!

Storage, Make-Ahead & Reheating

The Peach Yogurt Parfait is best enjoyed fresh, but you can prepare some components ahead of time. Store the layered parfait in an airtight container in the refrigerator for up to 24 hours. However, be cautious; the granola may lose its crunch if stored too long. You can freeze the yogurt and peach mixture for up to 2 months; just remember to thaw it in the refrigerator overnight before serving.

If you plan to enjoy this dish the next day, it can taste even better as the flavors meld together. Just remember to add the granola right before serving to keep its delightful crunch!

Frequently Asked Questions

Can I make Peach Yogurt Parfait With Honey And Granola ahead of time?

Yes — in fact, it tastes even better the next day as the flavors meld. However, I recommend waiting to add the granola until just before serving to maintain its crunch.

What can I substitute for Greek yogurt?

If you prefer a lighter option, you can substitute Greek yogurt with regular yogurt or a dairy-free alternative like coconut yogurt. Just remember that this may alter the creaminess and flavor profile slightly.

Can I use frozen peaches for this parfait?

Absolutely! Just make sure to thaw the frozen peaches before using them. They will still add great flavor, though the texture may be slightly softer than fresh peaches.

How do I make the parfait vegan?

To make a vegan version, substitute the Greek yogurt with a plant-based yogurt alternative, and replace honey with maple syrup or agave nectar. This keeps the parfait sweet while adhering to a vegan diet.

What other fruits can I use in this recipe?

You can mix and match fruits based on your preference. Try using strawberries, blueberries, raspberries, or even bananas. Just make sure to adjust the lemon juice as needed to prevent browning.

Sweet Peach Yogurt Parfait Delight

Final Thoughts

The Peach Yogurt Parfait with Honey and Granola is a delightful blend of creamy yogurt, sweet peaches, and crunchy granola that creates a satisfying and nourishing treat. Each layer bursts with flavor, making it a perfect choice for breakfast or a light dessert.

This is the kind of recipe I come back to again and again, especially when I want something refreshing and wholesome to start my day. The harmony of sweet and tart flavors, combined with the delightful crunch, never fails to lift my spirits!

I encourage you to give this parfait a try and indulge in its comforting goodness. Feel free to share your results or even add your own twist—perhaps a sprinkle of cinnamon or a handful of nuts. Enjoy creating your perfect parfait!

Print
clock clock iconcutlery cutlery iconflag flag iconfolder folder iconinstagram instagram iconpinterest pinterest iconfacebook facebook iconprint print iconsquares squares iconheart heart iconheart solid heart solid icon

Peach Yogurt Parfait


  • Author: Lily author
  • Total Time: 15 minutes
  • Yield: 4 servings 1x
Pin Recipe
Print Recipe

Description

This Peach Yogurt Parfait combines creamy Greek yogurt, juicy peaches, and crunchy granola for a delightful treat. It’s a perfect breakfast or snack that captures the essence of summer in every bite.


Ingredients

Scale
  • For the Parfait:
  • 2 cups plain Greek yogurt (or vanilla yogurt for a sweeter option)
  • 2 large ripe peaches, diced (about 2 cups)
  • 1 tablespoon fresh lemon juice (to prevent browning of peaches)
  • 2 tablespoons honey (plus more for drizzling)
  • 1 teaspoon vanilla extract (optional for extra flavor)
  • For the Granola:
  • 1 cup granola (store-bought or homemade; see notes for a simple granola recipe)
  • 1/4 cup sliced almonds (optional for added crunch)
  • 1/4 cup shredded coconut (optional for added flavor)

Instructions

  1. Start by preparing the peaches. Wash them thoroughly, then slice and dice them into bite-sized pieces. In a medium bowl, toss the diced peaches with 1 tablespoon of fresh lemon juice to prevent browning. Set aside for about 5 minutes while the lemon juice works its magic.
  2. In a separate bowl, combine the Greek yogurt, 2 tablespoons of honey, and 1 teaspoon of vanilla extract if using. Stir the mixture until smooth and thoroughly blended. This should take about a minute. Avoid overmixing to maintain the creaminess of the yogurt.
  3. Now it’s time to layer your parfait. Grab a clear glass or bowl to showcase your beautiful creation. Start with a generous spoonful of the yogurt mixture at the bottom—about 1/4 cup will do. Use a spoon to spread it evenly.
  4. Add a layer of the diced peaches over the yogurt, ensuring they cover the yogurt completely. You might want to use about half of what you have prepared—roughly 1 cup. This layer should be visually appealing, so arrange the peaches neatly.
  5. Sprinkle 1/4 cup of granola over the peaches. This adds a delightful crunch. Make sure to distribute it evenly to ensure every bite has that satisfying texture. Avoid packing it down too tightly, as you want it to maintain its crunch.
  6. Repeat the layers: spoon in another 1/4 cup of yogurt, followed by another cup of peaches, and another sprinkle of granola. You should have at least two layers, but feel free to add more depending on your glass size.
  7. Finish off your parfait with a drizzle of honey on top for added sweetness and a touch of elegance. If you’re using sliced almonds or shredded coconut, sprinkle them on top now. It adds a lovely visual contrast and extra flavor.
  8. Serve immediately or refrigerate for up to 30 minutes before serving to allow the flavors to meld together. However, I recommend enjoying it fresh to maintain the granola’s crunch.
  • Prep Time: 15 mins
  • Cook Time: 0 mins
  • Category: Breakfast
  • Method: No-cook
  • Cuisine: American

Nutrition

  • Serving Size: 1 parfait
  • Calories: 250
  • Sugar: 20 g
  • Sodium: 50 mg
  • Fat: 5 g
  • Saturated Fat: 2 g
  • Unsaturated Fat: 3 g
  • Trans Fat: 0 g
  • Carbohydrates: 40 g
  • Fiber: 3 g
  • Protein: 10 g
  • Cholesterol: 10 mg

Keywords: Choose ripe peaches for the best flavor and texture. Use a clear glass for a beautiful presentation. For creaminess, consider whipping the yogurt before layering. Be mindful of the granola-to-yogurt ratio. Prepare yogurt and peaches ahead of time for gatherings, layering just before serving.

Did you make this recipe?

Share a photo and tag us — we can't wait to see what you've made!

Sun-Kissed Frozen Orange Cream Slush

As a child, summer days felt like they lasted forever. I remember the sticky heat wrapping around me as I played outside, my laughter mingling with the sounds of the neighborhood. But nothing could cool me down quite like the moment I’d spot my grandmother, laboring over her blender, whipping up her famous Frozen Orange Creamsicle Slush. That vibrant orange treat, with its frosty texture and sweet citrus aroma, was like a burst of sunshine in a cup. Just one sip, and I could feel the coolness wash over me, sparking pure joy.

This Frozen Orange Creamsicle Slush has a way of making you feel like a kid again. Its creamy, dreamy consistency is a delightful balance of bright orange and soft vanilla, inviting you to dive right in. The refreshing tang of orange dances on your tongue, while the smooth creaminess envelops you in a comforting embrace. It’s a nostalgic treat that’s perfect for hot summer afternoons or anytime you need a little pick-me-up.

What makes my version of this slush stand out is the addition of a hint of vanilla bean, which elevates the flavor and adds an extra layer of richness. Plus, it’s super easy to whip up with just a few simple ingredients that you probably already have on hand! So, if you’re ready to relive those sun-soaked memories, let me show you exactly how to make it.

Sun-Kissed Frozen Orange Cream Slush

Why You’ll Love This Recipe

  • Each slush is a perfect blend of creamy vanilla and zesty orange, creating a nostalgic flavor reminiscent of summer days.
  • This refreshing treat is ready in under 15 minutes, making it an ideal quick dessert for unexpected guests or hot afternoons.
  • With just 8 simple ingredients, it’s budget-friendly, ensuring you don’t have to break the bank to enjoy a delicious slush.
  • The slush has a perfectly smooth texture, thanks to the combination of ice and ice cream, providing a delightful contrast to the bright citrus flavors.
  • It’s highly customizable; you can easily adjust the sweetness and add fresh herbs for a unique twist that suits your taste.

Ingredients

  • 2 cups orange juice (freshly squeezed or store-bought)
  • 1 cup vanilla ice cream
  • 1 cup crushed ice
  • 1/2 cup milk (whole or 2%)
  • 1/4 cup granulated sugar (adjust based on sweetness preference)
  • 1 teaspoon vanilla extract
  • Zest of 1 orange (for added flavor)
  • Fresh orange slices and mint leaves (for garnish)

The star of this Frozen Orange Creamsicle Slush is the orange juice, which provides the vibrant, citrusy base. Freshly squeezed juice will yield the brightest flavor, but store-bought options can be just as convenient. If you’re opting for store-bought, choose 100% pure juice with no added sugars for the best results. Another essential ingredient is the vanilla ice cream; it adds creaminess and sweetness. You can substitute it with dairy-free ice cream if you’re looking for a vegan option. Whole or 2% milk complements the ice cream, creating a smooth blend. If you want a lower-calorie version, almond or oat milk can be good alternatives.

Lastly, the granulated sugar can be adjusted based on your sweetness preference. If you prefer a more natural sweetener, consider using honey or agave syrup. The orange zest enhances the flavor profile, providing an aromatic pop that brings the whole slush together. Don’t skip it! It adds an extra layer of brightness that makes this slush truly special.

Step-by-Step Instructions

  1. Start by preparing your ingredients. Gather 2 cups of orange juice, 1 cup of vanilla ice cream, and 1 cup of crushed ice. Make sure the ice is finely crushed, as larger chunks can make blending difficult.
  2. In a blender, combine the orange juice, vanilla ice cream, crushed ice, and 1/2 cup of milk. Add 1/4 cup of granulated sugar and 1 teaspoon of vanilla extract. If you like a sweeter slush, consider adding a bit more sugar at this stage.
  3. Add the zest of 1 orange to the blender. This step is crucial for enhancing the citrus flavor of your slush. Make sure not to include the bitter white pith—only the flavorful zest.
  4. Blend the mixture on medium-high speed for about 30-45 seconds. Stop once the ingredients are fully combined and the slush has a smooth, even consistency. If you notice large chunks of ice, blend for an additional 10-15 seconds. Avoid over-blending, as this can make the slush too liquidy.
  5. Once blended, taste the slush. If it needs more sweetness, add a little more sugar and blend for a few more seconds. If it’s too thick, you can add a splash of milk to reach your desired consistency.
  6. Pour the slush into glasses. This recipe typically serves 4, but you can easily double it for larger gatherings. Use a spoon to help guide the slush into the glasses if needed.
  7. Garnish each serving with fresh orange slices and mint leaves. The mint not only adds a pop of color but also a refreshing aroma that complements the citrus flavors beautifully.
  8. Serve immediately and enjoy! If you’ve made extra, you can refrigerate it for a short time, but it’s best enjoyed fresh.

Pro Tips for the Best Frozen Orange Creamsicle Slush

  • Don’t skip the orange zest! It’s a game-changer for flavor. Always zest before juicing to make it easier.
  • Use a high-powered blender for the best texture. A standard blender may struggle with ice, leading to uneven consistency. If you have a food processor, that can work too, but ensure the ice is finely crushed.
  • Adjust the ice-to-liquid ratio carefully. If your slush is too thick, it won’t blend well. Start with less ice and add more until you reach your preferred texture.
  • Be cautious with the sugar! Always start with the lower amount, as you can easily add more, but it’s hard to fix an overly sweet slush.
  • For a fun twist, consider adding a splash of coconut milk or a handful of fresh fruit like strawberries or pineapple. This not only enhances the flavor but also adds a beautiful color contrast.

Variations & Serving Ideas

There are countless ways to put a spin on your Frozen Orange Creamsicle Slush. Consider making a tropical version by adding in some pineapple juice or coconut milk for a delightful tropical twist. If you’re feeling adventurous, try incorporating a handful of frozen mango or peach slices for added sweetness. For a lighter version, swap out the vanilla ice cream for Greek yogurt for a creamy yet tangy alternative.

As for serving ideas, this refreshing slush pairs wonderfully with light summer dishes like grilled chicken skewers, fish tacos, or a simple salad topped with citrus vinaigrette. The bright, zesty flavors of the slush complement these dishes perfectly, making them an ideal pairing for a sunny day.

Storage, Make-Ahead & Reheating

This Frozen Orange Creamsicle Slush is best enjoyed fresh, but if you have leftovers, you can store them in an airtight container in the fridge for up to 2 days. Just keep in mind that the slush may lose some of its texture over time as the ice melts. It doesn’t freeze well, as the ice will turn into a solid block. If you must freeze it, blend again after thawing to restore the slushy consistency. This treat is best the day you make it, as the flavors meld together beautifully overnight, enhancing its deliciousness.

Frequently Asked Questions

Can I make Frozen Orange Creamsicle Slush ahead of time?

Yes — in fact, it tastes even better the next day as the flavors meld. However, it’s best to enjoy it fresh, as the texture can change if stored for too long. If you need to prepare it ahead, keep it in the fridge and re-blend before serving.

What kind of orange juice should I use?

For the best flavor, use freshly squeezed orange juice. However, if you’re short on time, opt for 100% pure store-bought juice without added sugars. This will ensure that your slush remains flavorful and refreshing.

Can I substitute the vanilla ice cream?

Absolutely! If you’re looking for a dairy-free option, coconut milk ice cream or a non-dairy vanilla ice cream can work wonderfully. They will still provide the creamy texture and sweetness you desire.

How can I adjust the sweetness of my slush?

You can easily adjust the sweetness by modifying the amount of sugar added. Start with 1/4 cup and taste the mixture before blending. If you prefer it sweeter, add more sugar gradually until it reaches your desired level.

What should I do if my slush is too thick?

If your slush is too thick, simply add a splash of milk or orange juice and blend again. This will help achieve a more drinkable consistency while maintaining the slushy texture. Adjust gradually to reach your preferred thickness.

Sun-Kissed Frozen Orange Cream Slush

Final Thoughts

The Frozen Orange Creamsicle Slush is a delightful blend of refreshing citrus and creamy goodness, making it a perfect treat for warm days or any time you crave a taste of nostalgia. The way the bright orange flavor dances with the creamy texture truly elevates this slush, transforming it into a satisfying escape from the everyday.

This is the kind of recipe I come back to again and again, especially when I’m looking to cool down or impress guests at a summer gathering. It’s simple to make and always brings smiles all around! I encourage you to try this recipe for yourself—don’t hesitate to share your results or even put your own spin on it. Happy slushing!

Print
clock clock iconcutlery cutlery iconflag flag iconfolder folder iconinstagram instagram iconpinterest pinterest iconfacebook facebook iconprint print iconsquares squares iconheart heart iconheart solid heart solid icon

Frozen Orange Creamsicle Slush


  • Author: Lily author
  • Total Time: 15 minutes
  • Yield: 4 servings 1x
Pin Recipe
Print Recipe

Description

This Frozen Orange Creamsicle Slush is a refreshing treat that combines creamy vanilla and zesty orange flavors. Perfect for hot summer days, it brings back nostalgic memories with every sip.


Ingredients

Scale
  • 2 cups orange juice (freshly squeezed or store-bought)
  • 1 cup vanilla ice cream
  • 1 cup crushed ice
  • 1/2 cup milk (whole or 2%)
  • 1/4 cup granulated sugar (adjust based on sweetness preference)
  • 1 teaspoon vanilla extract
  • Zest of 1 orange (for added flavor)
  • Fresh orange slices and mint leaves (for garnish)

Instructions

  1. Start by preparing your ingredients. Gather 2 cups of orange juice, 1 cup of vanilla ice cream, and 1 cup of crushed ice. Make sure the ice is finely crushed, as larger chunks can make blending difficult.
  2. In a blender, combine the orange juice, vanilla ice cream, crushed ice, and 1/2 cup of milk. Add 1/4 cup of granulated sugar and 1 teaspoon of vanilla extract. If you like a sweeter slush, consider adding a bit more sugar at this stage.
  3. Add the zest of 1 orange to the blender. This step is crucial for enhancing the citrus flavor of your slush. Make sure not to include the bitter white pith—only the flavorful zest.
  4. Blend the mixture on medium-high speed for about 30-45 seconds. Stop once the ingredients are fully combined and the slush has a smooth, even consistency. If you notice large chunks of ice, blend for an additional 10-15 seconds. Avoid over-blending, as this can make the slush too liquidy.
  5. Once blended, taste the slush. If it needs more sweetness, add a little more sugar and blend for a few more seconds. If it’s too thick, you can add a splash of milk to reach your desired consistency.
  6. Pour the slush into glasses. This recipe typically serves 4, but you can easily double it for larger gatherings. Use a spoon to help guide the slush into the glasses if needed.
  7. Garnish each serving with fresh orange slices and mint leaves. The mint not only adds a pop of color but also a refreshing aroma that complements the citrus flavors beautifully.
  8. Serve immediately and enjoy! If you’ve made extra, you can refrigerate it for a short time, but it's best enjoyed fresh.
  • Prep Time: 15 min
  • Cook Time: 0 min
  • Category: Dessert
  • Method: Blending
  • Cuisine: American

Nutrition

  • Serving Size: 1 serving
  • Calories: 200
  • Sugar: 30 g
  • Sodium: 50 mg
  • Fat: 5 g
  • Saturated Fat: 3 g
  • Unsaturated Fat: 2 g
  • Trans Fat: 0 g
  • Carbohydrates: 40 g
  • Fiber: 1 g
  • Protein: 2 g
  • Cholesterol: 20 mg

Keywords: Don't skip the orange zest! It's a game-changer for flavor. Always zest before juicing to make it easier.

Did you make this recipe?

Share a photo and tag us — we can't wait to see what you've made!

Zesty Lemon Poppy Seed Delight

One rainy afternoon, I found myself in my grandmother’s cozy kitchen, the kind that always smelled like warmth and love. She was whipping up her famous Lemon Poppy Seed Loaf, a recipe that had been passed down through generations. As the batter came together, the zesty aroma of fresh lemons filled the air, mingling perfectly with the nutty fragrance of poppy seeds. I can still picture her, apron-clad, as she expertly drizzled a vibrant citrus icing over the loaf, creating a glossy, sun-kissed finish that beckoned us to dive in. It was a moment that sparked my own passion for baking, and this recipe has become a cherished staple in my home ever since.

When you take a bite of this Lemon Poppy Seed Loaf, it’s like a burst of sunshine on your palate. The loaf is beautifully golden, with a tender crumb that melts in your mouth. Each slice is speckled with tiny poppy seeds, adding a delightful crunch that contrasts beautifully with the tangy sweetness of the lemon. And that citrus icing? It’s the finishing touch that elevates this loaf from ordinary to extraordinary, with its bright, zesty flavor dancing on your taste buds.

This recipe stands out because it embraces simplicity while delivering on flavor. I’ve added a hint of vanilla to the batter, enhancing the overall taste and making it even more indulgent. Trust me, once you make this Lemon Poppy Seed Loaf With Citrus Icing, it’ll become a go-to in your baking repertoire.

So, let me show you exactly how to make it!

Zesty Lemon Poppy Seed Delight

Why You’ll Love This Recipe

  • Moist and tender crumb that melts in your mouth, thanks to the perfect balance of butter and buttermilk.
  • Bright, zesty lemon flavor paired with crunchy poppy seeds, creating a delightful texture and taste experience.
  • Easy to whip up in just about an hour, perfect for last-minute gatherings or a cozy afternoon treat.
  • Budget-friendly with everyday ingredients, making it an accessible option for all home bakers.
  • The citrus icing adds a sweet tang that elevates the loaf, turning a simple recipe into a showstopper!

Ingredients

  • 1 ½ cups (190g) all-purpose flour
  • 1 teaspoon baking powder
  • ½ teaspoon baking soda
  • ½ teaspoon salt
  • 3 tablespoons poppy seeds
  • ½ cup (115g) unsalted butter, softened to room temperature
  • 1 cup (200g) granulated sugar
  • 2 large eggs
  • 1 teaspoon vanilla extract
  • 1 teaspoon lemon zest (from about 1 medium lemon)
  • ½ cup (120ml) buttermilk
  • 2 tablespoons fresh lemon juice

For the Citrus Icing:

  • 1 cup (120g) powdered sugar
  • 2 tablespoons fresh lemon juice
  • 1 tablespoon orange juice
  • 1 teaspoon lemon zest (for garnish, optional)

Let’s dive into the key ingredients that make this Lemon Poppy Seed Loaf so special. The all-purpose flour provides the structure and base for the loaf, while the baking powder and baking soda ensure it rises perfectly, giving the loaf a light texture. For a gluten-free variation, you could substitute the flour with a gluten-free all-purpose blend. Poppy seeds not only add a delightful crunch but also contribute to the unique flavor profile that pairs well with the citrus notes.

Unsalted butter is crucial for achieving the buttery richness that makes this loaf so moist. If you’re looking for a dairy-free option, coconut oil or a vegan butter can be used instead. The buttermilk is another essential component, providing acidity that activates the baking soda for a fluffy texture. If you don’t have buttermilk on hand, you can easily make a substitute by mixing ½ cup of milk with 1 tablespoon of vinegar or lemon juice and letting it sit for about 5 minutes.

Step-by-Step Instructions

  1. Preheat your oven to 350°F (175°C). Grease a 9×5-inch loaf pan or line it with parchment paper for easy removal later.
  2. In a medium mixing bowl, whisk together 1 ½ cups of all-purpose flour, 1 teaspoon of baking powder, ½ teaspoon of baking soda, ½ teaspoon of salt, and 3 tablespoons of poppy seeds. This helps to evenly distribute the baking agents and ensures a uniform rise.
  3. In a large mixing bowl, cream together ½ cup of softened unsalted butter and 1 cup of granulated sugar using an electric mixer on medium speed for about 3-4 minutes, until the mixture is light and fluffy. Make sure to scrape down the sides of the bowl occasionally.
  4. Add 2 large eggs, 1 teaspoon of vanilla extract, and 1 teaspoon of lemon zest to the creamed butter and sugar, mixing until fully combined. You want a smooth consistency, so ensure there are no lumps of butter.
  5. In a small bowl, combine ½ cup of buttermilk and 2 tablespoons of fresh lemon juice. Alternately add the dry ingredients and buttermilk mixture to the butter mixture, starting and ending with the dry ingredients. Mix just until combined; do not overmix, as this can lead to a dense loaf.
  6. Pour the batter into the prepared loaf pan. Smooth the top with a spatula, ensuring it’s even. Bake in the preheated oven for 50-60 minutes, or until a toothpick inserted in the center comes out clean. The edges should be lightly golden brown, and the center should feel just set.
  7. Once baked, remove the loaf from the oven and allow it to cool in the pan for about 10 minutes. Then, transfer it to a wire rack to cool completely. Resist the urge to slice too soon, as it will be crumbly if it’s still warm.
  8. While the loaf is cooling, prepare the citrus icing. In a medium bowl, whisk together 1 cup of powdered sugar, 2 tablespoons of fresh lemon juice, and 1 tablespoon of orange juice until smooth. If the icing is too thick, you can add a little more juice to reach your desired consistency.
  9. Once the loaf is completely cool, drizzle the citrus icing over the top. If you like, sprinkle with an additional teaspoon of lemon zest for an extra pop of flavor and color.

Pro Tips for the Best Lemon Poppy Seed Loaf With Citrus Icing

  • Be careful not to overmix your batter; this is a common mistake that can lead to a dense loaf. Mix just until the dry ingredients are incorporated for a light and fluffy texture.
  • Use room temperature ingredients, especially the butter and eggs. This helps to create a smoother batter and ensures even baking. Take your eggs out of the fridge about 30 minutes before you start.
  • For a more pronounced lemon flavor, consider adding a little lemon extract in addition to the zest and juice. Just a half teaspoon can elevate the citrus notes significantly.
  • When measuring your flour, spoon it into the measuring cup and level it off with a knife instead of scooping directly from the bag. This prevents packing and ensures you don’t end up with a dry loaf.
  • Invest in a good quality loaf pan; it makes a difference in heat distribution, which ensures even baking. If your pan is dark-coated, reduce the oven temperature by 25°F to prevent over-browning.

Variations & Serving Ideas

For a delightful twist, consider adding blueberries or raspberries to the batter for a fruity burst of flavor. You can also experiment with different citrus fruits—try lime or grapefruit zest and juice for a refreshing change. For a healthier option, substitute half of the all-purpose flour with whole wheat flour for added fiber without compromising too much on texture.

This Lemon Poppy Seed Loaf pairs beautifully with a light salad, such as a mixed greens salad with a vinaigrette, or a cup of tea for a cozy afternoon treat. It also complements a creamy cheese platter, as the acidity of the loaf balances rich cheeses perfectly. Lastly, a scoop of vanilla ice cream on the side creates a delightful contrast of temperatures and flavors!

Storage, Make-Ahead & Reheating

This Lemon Poppy Seed Loaf can be stored at room temperature for up to 3 days if wrapped tightly in plastic wrap. If you want to keep it longer, it freezes well for up to 3 months. To freeze, wrap the loaf tightly in plastic wrap and then in aluminum foil to prevent freezer burn.

When you’re ready to enjoy it again, simply thaw it in the fridge overnight. Reheat individual slices in the microwave for 15-20 seconds or in a toaster oven until warmed through. Interestingly, many people find that this loaf tastes even better the next day, as the flavors have time to meld!

Frequently Asked Questions

Can I make Lemon Poppy Seed Loaf With Citrus Icing ahead of time?

Yes — in fact, it tastes even better the next day! You can make the loaf a day in advance, allowing the flavors to develop. Just be sure to store it in an airtight container to maintain its moisture.

Can I substitute the poppy seeds?

Absolutely! If you don’t have poppy seeds on hand or prefer an alternative, you can use sesame seeds for a similar crunch or omit them entirely for a smooth loaf.

What can I use instead of buttermilk?

If you don’t have buttermilk, you can easily create a substitute by mixing ½ cup of milk (dairy or plant-based) with 1 tablespoon of vinegar or lemon juice. Let it sit for 5 minutes before using in the recipe.

How can I make this recipe gluten-free?

To make a gluten-free version of this Lemon Poppy Seed Loaf, substitute the all-purpose flour with a gluten-free all-purpose flour blend. Just ensure that the blend contains a binding agent like xanthan gum for the best results.

What is the best way to store leftover loaf?

Leftover Lemon Poppy Seed Loaf should be stored in an airtight container at room temperature for up to 3 days. For longer storage, wrap it tightly and freeze for up to 3 months. Thaw it before serving for the best texture.

Zesty Lemon Poppy Seed Delight

Final Thoughts

The Lemon Poppy Seed Loaf with Citrus Icing is truly a delightful treat that brings a burst of brightness to any occasion. The zesty lemon flavor combined with the subtle crunch of poppy seeds creates a satisfying balance, while the citrus icing adds a touch of sweetness that perfectly complements the loaf’s tanginess.

This is the kind of recipe I come back to again and again, especially when I want to brighten up a gloomy day or celebrate a small victory. The aroma that fills the kitchen as it bakes is absolutely heavenly! I encourage you to give this recipe a try; you might just find it becoming a beloved staple in your home. Don’t forget to share your results or even add your own unique twist—I can’t wait to see what you create!

Print
clock clock iconcutlery cutlery iconflag flag iconfolder folder iconinstagram instagram iconpinterest pinterest iconfacebook facebook iconprint print iconsquares squares iconheart heart iconheart solid heart solid icon

Lemon Poppy Seed Loaf


  • Author: Lily author
  • Total Time: 37 minute
  • Yield: 1 loaf 1x
Pin Recipe
Print Recipe

Description

This Lemon Poppy Seed Loaf is a delightful treat that combines zesty lemon flavor with crunchy poppy seeds. Topped with a citrus icing, it’s perfect for any occasion.


Ingredients

Scale
  • 1 ½ cups (190g) all-purpose flour
  • 1 teaspoon baking powder
  • ½ teaspoon baking soda
  • ½ teaspoon salt
  • 3 tablespoons poppy seeds
  • ½ cup (115g) unsalted butter, softened to room temperature
  • 1 cup (200g) granulated sugar
  • 2 large eggs
  • 1 teaspoon vanilla extract
  • 1 teaspoon lemon zest (from about 1 medium lemon)
  • ½ cup (120ml) buttermilk
  • 2 tablespoons fresh lemon juice
  • 1 cup (120g) powdered sugar
  • 2 tablespoons fresh lemon juice
  • 1 tablespoon orange juice
  • 1 teaspoon lemon zest (for garnish, optional)

Instructions

  1. Preheat your oven to 350°F (175°C). Grease a 9×5-inch loaf pan or line it with parchment paper for easy removal later.
  2. In a medium mixing bowl, whisk together 1 ½ cups of all-purpose flour, 1 teaspoon of baking powder, ½ teaspoon of baking soda, ½ teaspoon of salt, and 3 tablespoons of poppy seeds. This helps to evenly distribute the baking agents and ensures a uniform rise.
  3. In a large mixing bowl, cream together ½ cup of softened unsalted butter and 1 cup of granulated sugar using an electric mixer on medium speed for about 3-4 minutes, until the mixture is light and fluffy. Make sure to scrape down the sides of the bowl occasionally.
  4. Add 2 large eggs, 1 teaspoon of vanilla extract, and 1 teaspoon of lemon zest to the creamed butter and sugar, mixing until fully combined. You want a smooth consistency, so ensure there are no lumps of butter.
  5. In a small bowl, combine ½ cup of buttermilk and 2 tablespoons of fresh lemon juice. Alternately add the dry ingredients and buttermilk mixture to the butter mixture, starting and ending with the dry ingredients. Mix just until combined; do not overmix, as this can lead to a dense loaf.
  6. Pour the batter into the prepared loaf pan. Smooth the top with a spatula, ensuring it’s even. Bake in the preheated oven for 50-60 minutes, or until a toothpick inserted in the center comes out clean. The edges should be lightly golden brown, and the center should feel just set.
  7. Once baked, remove the loaf from the oven and allow it to cool in the pan for about 10 minutes. Then, transfer it to a wire rack to cool completely. Resist the urge to slice too soon, as it will be crumbly if it’s still warm.
  8. While the loaf is cooling, prepare the citrus icing. In a medium bowl, whisk together 1 cup of powdered sugar, 2 tablespoons of fresh lemon juice, and 1 tablespoon of orange juice until smooth. If the icing is too thick, you can add a little more juice to reach your desired consistency.
  9. Once the loaf is completely cool, drizzle the citrus icing over the top. If you like, sprinkle with an additional teaspoon of lemon zest for an extra pop of flavor and color.
  • Prep Time: 15 mins
  • Cook Time: 50-60 mins
  • Category: Dessert
  • Method: Baking
  • Cuisine: American

Nutrition

  • Serving Size: 1 slice
  • Calories: 200
  • Sugar: 15 g
  • Sodium: 150 mg
  • Fat: 8 g
  • Saturated Fat: 5 g
  • Unsaturated Fat: 3 g
  • Trans Fat: 0 g
  • Carbohydrates: 30 g
  • Fiber: 1 g
  • Protein: 3 g
  • Cholesterol: 40 mg

Keywords: Be careful not to overmix your batter; this is a common mistake that can lead to a dense loaf. Use room temperature ingredients for a smoother batter and even baking.

Did you make this recipe?

Share a photo and tag us — we can't wait to see what you've made!

  • Privacy Policy
  • Terms Of Service
  • Contact
  • About
  • GDPR

Copyright © 2025 Homesmad