Cheesy Ramen Noodles: Prepare to elevate your instant noodle game to a whole new level of deliciousness! Forget everything you thought you knew about dorm-room dinners because this recipe transforms humble ramen into a creamy, comforting, and utterly irresistible dish. I’m talking about a flavor explosion that will have you craving it again and again.
While ramen’s origins trace back to China, it was in Japan that it truly blossomed into the culinary phenomenon we know and love today. Post-World War II, instant ramen emerged as an affordable and convenient food source, quickly gaining popularity worldwide. But let’s be honest, sometimes we need a little something extra to jazz it up, and that’s where the magic of cheese comes in!
What makes cheesy ramen noodles so incredibly appealing? It’s the perfect marriage of textures and tastes. The springy, slightly chewy noodles are coated in a rich, velvety cheese sauce that’s both savory and satisfying. It’s quick, it’s easy, and it’s a guaranteed crowd-pleaser. Whether you’re a student on a budget, a busy professional looking for a fast weeknight meal, or simply a ramen enthusiast seeking a new adventure, this recipe is for you. Get ready to experience the ultimate comfort food!
Ingredients:
- 3 packages ramen noodles (any flavor, discard seasoning packets or save for another use)
- 4 tablespoons butter
- 1/4 cup all-purpose flour
- 3 cups milk (whole milk recommended for richness)
- 1 teaspoon salt
- 1/2 teaspoon black pepper
- 1/4 teaspoon garlic powder
- 1/4 teaspoon onion powder
- 1/4 teaspoon paprika (optional, for color)
- 4 cups shredded cheddar cheese (sharp cheddar recommended)
- 1 cup shredded mozzarella cheese
- 1/2 cup grated Parmesan cheese
- Optional toppings: cooked bacon crumbles, chopped green onions, hot sauce
Cooking the Noodles:
- Bring a large pot of water to a rolling boil. This is crucial for properly cooking the ramen noodles. Don’t skimp on the water; you want the noodles to have plenty of room to move around.
- Add the ramen noodles to the boiling water. Cook according to package directions, usually about 3-4 minutes. Be careful not to overcook them, as they will become mushy later in the baking process. We want them slightly al dente.
- Drain the noodles well in a colander. Make sure to shake off any excess water. Set aside.
Making the Cheese Sauce:
- In a large saucepan, melt the butter over medium heat. Watch it carefully so it doesn’t burn. We want it melted and shimmering, ready to create a roux.
- Whisk in the flour and cook for 1-2 minutes, stirring constantly. This creates a roux, which is the base of our cheese sauce. It should be smooth and slightly golden. Don’t let it brown too much.
- Slowly whisk in the milk, about 1/2 cup at a time, ensuring each addition is fully incorporated before adding more. This prevents lumps from forming. Keep whisking constantly to maintain a smooth consistency.
- Continue to cook, stirring constantly, until the sauce thickens. This usually takes about 5-7 minutes. The sauce should be thick enough to coat the back of a spoon.
- Remove the saucepan from the heat. This is important to prevent the cheese from clumping and becoming grainy.
- Stir in the salt, pepper, garlic powder, onion powder, and paprika (if using). These spices add depth and flavor to the cheese sauce. Adjust the seasonings to your liking.
- Add the cheddar cheese, mozzarella cheese, and Parmesan cheese, stirring until completely melted and smooth. Make sure all the cheese is fully incorporated for a creamy, decadent sauce. If the cheese doesn’t melt completely, you can return the saucepan to low heat, stirring constantly, until it does.
Combining Noodles and Cheese Sauce:
- Add the drained ramen noodles to the cheese sauce. Gently toss to coat the noodles evenly with the sauce. Make sure every strand is covered in cheesy goodness.
Baking the Cheesy Ramen:
- Preheat your oven to 350°F (175°C). This ensures the cheesy ramen bakes evenly.
- Grease a 9×13 inch baking dish. This prevents the cheesy ramen from sticking to the dish. You can use butter, cooking spray, or even a little bit of oil.
- Pour the cheesy ramen mixture into the prepared baking dish. Spread it out evenly.
- Optional: Sprinkle additional shredded cheddar cheese on top for an extra cheesy crust. This adds a nice golden-brown color and extra flavor.
- Bake for 20-25 minutes, or until the top is golden brown and bubbly. Keep an eye on it to prevent burning.
- Remove from the oven and let cool for a few minutes before serving. This allows the cheesy ramen to set slightly and makes it easier to serve.
Serving and Optional Toppings:
- Serve hot. This cheesy ramen is best enjoyed fresh out of the oven.
- Optional toppings: cooked bacon crumbles, chopped green onions, hot sauce. These toppings add extra flavor and texture. Feel free to get creative and add your own favorite toppings. Some other ideas include:
- Diced tomatoes
- Jalapeños
- Sour cream
- Everything bagel seasoning
- A sprinkle of red pepper flakes
Tips and Tricks for the Best Cheesy Ramen:
- Don’t overcook the noodles: Overcooked noodles will become mushy in the final dish. Aim for al dente.
- Use good quality cheese: The better the cheese, the better the flavor of the sauce. Sharp cheddar is recommended for its bold flavor.
- Whisk constantly: When making the cheese sauce, whisking constantly is key to preventing lumps.
- Don’t overheat the cheese sauce: Overheating the cheese sauce can cause the cheese to separate and become grainy. Remove from the heat before adding the cheese.
- Customize the flavor: Feel free to experiment with different cheeses and spices to create your own unique cheesy ramen.
- Make it ahead of time: You can assemble the cheesy ramen ahead of time and bake it later. Just cover it tightly with plastic wrap and refrigerate it until you’re ready to bake. You may need to add a few extra minutes to the baking time if it’s cold.
- Spice it up: Add a dash of hot sauce or a pinch of red pepper flakes to the cheese sauce for a spicy kick.
- Add protein: Cooked chicken, ground beef, or sausage can be added to the cheesy ramen for a heartier meal.
- Vegetarian option: Use vegetable broth instead of milk for a vegetarian version.
Variations:
- Spicy Cheesy Ramen: Add a tablespoon of sriracha or your favorite hot sauce to the cheese sauce for a spicy kick.
- Bacon Cheesy Ramen: Add cooked bacon crumbles to the cheese sauce and sprinkle some on top before baking.
- Broccoli Cheesy Ramen: Add steamed broccoli florets to the cheesy ramen mixture before baking.
- Mac and Cheese Ramen: Use elbow macaroni instead of ramen noodles for a classic mac and cheese dish.
- Lobster Mac and Cheese Ramen: Add cooked lobster meat to the cheesy ramen for a luxurious treat.
Troubleshooting:
- Cheese sauce is too thick: Add a little more milk, a tablespoon at a time, until it reaches the desired consistency.
- Cheese sauce is too thin: Cook the sauce for a few more minutes, stirring constantly, until it thickens.
- Cheese sauce is lumpy: Use an immersion blender to smooth out the sauce.
- Cheesy ramen is dry: Add a little more milk or cheese sauce to the mixture before baking.
- Cheesy ramen is burning: Cover the baking dish with foil for the last few minutes of baking.
Storage:
- Store leftover cheesy ramen in an airtight container in the refrigerator for up to 3 days.
- Reheat in the microwave or oven until heated through.
Nutritional Information (approximate, may vary based on ingredients used):
- Calories: 600-800 per serving
- Fat: 30-40g
- Protein: 20-30g
- Carbohydrates: 60-80g
This cheesy ramen recipe is a fun and delicious twist on a classic comfort food. It’s easy to make and can be customized to your liking. Enjoy!

Conclusion:
So there you have it! This Cheesy Ramen Noodles recipe is more than just a quick meal; it’s a flavor explosion waiting to happen, and I truly believe it’s a must-try for anyone looking for comfort food with a twist. The creamy, cheesy sauce perfectly complements the savory ramen noodles, creating a symphony of textures and tastes that will leave you craving more. It’s the kind of dish that satisfies your hunger and warms your soul, all in one delicious bowl.
But why is this recipe a must-try, you ask? Well, beyond the incredible flavor, it’s incredibly versatile and adaptable to your own preferences. It’s also incredibly budget-friendly and quick to prepare, making it perfect for busy weeknights or when you’re simply craving something comforting without spending hours in the kitchen. Seriously, from start to finish, you’re looking at maybe 15 minutes tops! And the best part? It’s a guaranteed crowd-pleaser, whether you’re serving it to your family, friends, or just yourself.
Now, let’s talk about serving suggestions and variations, because the possibilities are truly endless! For a heartier meal, consider adding some cooked chicken, shrimp, or tofu to the noodles. Sautéed vegetables like broccoli, bell peppers, or mushrooms would also be a fantastic addition, adding both flavor and nutritional value. A sprinkle of chopped green onions or a drizzle of sriracha can add a pop of freshness and spice, respectively.
If you’re feeling adventurous, why not experiment with different types of cheese? Gruyere, pepper jack, or even a sharp cheddar would all bring their own unique flavor profiles to the dish. You could also try using different types of ramen noodles, such as the thicker, chewier udon noodles, for a different textural experience. And for those who love a little heat, a dash of red pepper flakes or a swirl of chili oil would be the perfect finishing touch.
Serving Suggestions:
- Top with a fried egg for added richness.
- Serve with a side of kimchi for a spicy and tangy contrast.
- Garnish with sesame seeds and nori seaweed for an authentic Asian flair.
Variations:
- Spicy Cheesy Ramen: Add a tablespoon of gochujang (Korean chili paste) to the sauce.
- Vegetarian Cheesy Ramen: Use vegetable broth and add plenty of your favorite veggies.
- Deluxe Cheesy Ramen: Incorporate cooked bacon or pancetta for a smoky, savory flavor.
I’m so excited for you to try this recipe and discover your own favorite variations. I truly believe that this cheesy ramen noodles recipe will become a staple in your kitchen, a go-to dish for those times when you need a quick, easy, and incredibly satisfying meal.
So, what are you waiting for? Grab your ingredients, fire up your stove, and get ready to experience the magic of cheesy ramen noodles! And once you’ve tried it, I would absolutely love to hear about your experience. Share your photos, your variations, and your thoughts in the comments below. Let me know what you loved, what you changed, and how you made it your own. I can’t wait to see what culinary creations you come up with! Happy cooking!
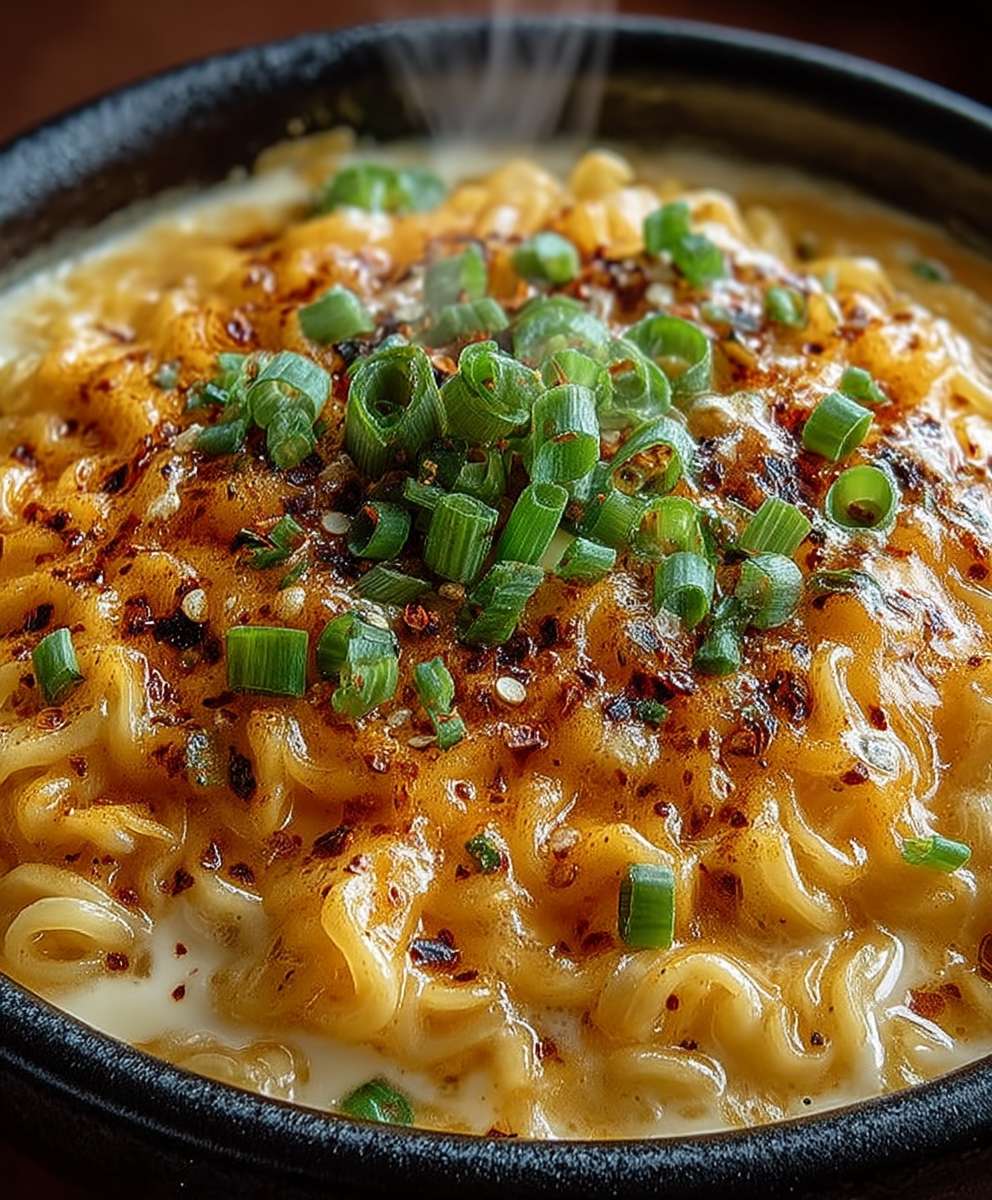
Cheesy Ramen Noodles: The Ultimate Comfort Food Recipe
Cheesy baked ramen casserole with creamy, decadent cheese sauce coating perfectly cooked ramen noodles. A comforting and customizable crowd-pleaser.
Ingredients
Instructions
Recipe Notes
- Don’t overcook the noodles; aim for al dente.
- Use good quality cheese for the best flavor.
- Whisk constantly when making the cheese sauce to prevent lumps.
- Don’t overheat the cheese sauce, as it can cause the cheese to separate.
- Customize the flavor with different cheeses and spices.
- You can assemble the cheesy ramen ahead of time and bake it later.
- Add a dash of hot sauce or a pinch of red pepper flakes for a spicy kick.
- Cooked chicken, ground beef, or sausage can be added for a heartier meal.
- Use vegetable broth instead of milk for a vegetarian version.