Creamy Tomato Garlic Pasta is more than just a meal; it’s a warm embrace in a bowl, a testament to how simple ingredients can create something truly extraordinary. Have you ever craved a dish that feels both incredibly indulgent and wonderfully comforting, all while being surprisingly straightforward to prepare? This beloved pasta dish answers that call with a resounding yes.
Tracing its lineage, while not strictly ancient, this type of pasta celebrates the timeless culinary marriage of sun-ripened tomatoes and aromatic garlic – staples at the heart of Italian cooking for centuries. Over time, as ingredients became more accessible and palates evolved, the addition of cream transformed rustic tomato sauces into the luxurious, velvety concoctions we adore today. It’s a dish that embodies the spirit of hearty home cooking, reminiscent of cozy Sunday dinners or quick weeknight delights.
Why This Dish Steals Hearts Every Time
People worldwide adore our Creamy Tomato Garlic Pasta for countless reasons. Its irresistible appeal lies in the perfect balance of tangy tomatoes, pungent garlic, and a rich, silken cream sauce that clings beautifully to every strand of pasta. The resulting flavor profile is complex yet utterly approachable, satisfying that deep craving for savory goodness. It’s not just a dinner option; it’s an experience – quick enough for a busy evening but special enough to impress. I’m confident that once you try this recipe, it will quickly become a cherished favorite in your culinary repertoire.

Ingredients:
- For the Pasta:
- 1 pound (450g) of your favorite short pasta (rigatoni, penne, fusilli, or orecchiette work beautifully) – I find that these shapes really hold onto that luscious sauce.
- 2 tablespoons of coarse sea salt for the pasta water – Don’t skimp on salting your pasta water; it’s your first chance to season the pasta itself!
- For the Creamy Tomato Garlic Sauce:
- 3 tablespoons of good quality olive oil – a fruity extra virgin olive oil can really elevate the flavor here.
- 2 tablespoons of unsalted butter – This adds a wonderful richness and helps create that glossy finish we’re looking for.
- 1 large yellow onion, finely diced – While optional for some, I believe a finely diced onion provides a crucial aromatic base that deepens the overall flavor profile of our Creamy Tomato Garlic Pasta.
- 8-10 cloves of garlic, minced – Yes, that’s right, 8-10! This is a “Creamy Tomato Garlic Pasta,” so we’re celebrating garlic in all its glory. Feel free to adjust to your personal garlic preference, but I highly recommend going generously here.
- 1 teaspoon of red pepper flakes (or more, to taste) – For a gentle warmth that beautifully complements the tomato and garlic without overpowering them. If you prefer more heat, go for it!
- 2 (28-ounce/794g) cans of crushed tomatoes – Look for high-quality crushed tomatoes, ideally San Marzano if you can find them. The quality of your tomatoes dramatically impacts the final taste of your sauce.
- 1 teaspoon of granulated sugar (optional, but recommended) – This helps to balance the acidity of the tomatoes, especially if they are a bit tart.
- 1 teaspoon of dried oregano – A classic pairing with tomato that adds an earthy, Mediterranean note.
- 1 cup (240ml) of heavy cream (also known as whipping cream) – This is the star ingredient for achieving that luxurious, velvety texture that defines our Creamy Tomato Garlic Pasta.
- 1/2 cup (about 50g) of freshly grated Parmesan cheese, plus more for serving – Freshly grated makes all the difference; it melts beautifully and has a superior flavor to pre-grated varieties.
- Salt and freshly cracked black pepper, to taste – Essential for balancing and enhancing all the flavors.
- For Garnish:
- 1/2 cup of fresh basil leaves, roughly chopped or torn – Adds a burst of freshness and a lovely aroma when stirred in at the end.
- Extra Parmesan cheese for serving – Because you can never have too much cheese!
Preparing the Pasta:
The foundation of any great pasta dish is perfectly cooked pasta. For our Creamy Tomato Garlic Pasta, we want the pasta to be al dente – firm to the bite, ready to absorb the incredible sauce we’re about to make.
- Bring Water to a Rolling Boil: In a large pot, bring about 6 quarts of water to a rapid, rolling boil. It’s crucial to use a generous amount of water so the pasta has plenty of room to move and cook evenly.
- Season the Water: Once boiling vigorously, add 2 tablespoons of coarse sea salt to the water. The water should taste like the sea. This step is vital because it’s your only opportunity to season the pasta from the inside out, imparting flavor into every strand or shape.
- Cook the Pasta: Add your chosen 1 pound of short pasta to the boiling salted water. Stir immediately to prevent the pasta from sticking together. Cook according to package directions, but always keep an eye on it. My personal preference is to cook it until it’s al dente. This usually means checking it a minute or two before the suggested cooking time on the package. You want a slight chew, not mushiness.
- Reserve Pasta Water: This is a critical step, do not skip it! Before draining the pasta, ladle out about 1 to 1.5 cups of the starchy pasta water into a heatproof mug or bowl. This cloudy, salty, starchy water is liquid gold for emulsifying your sauce and achieving the perfect consistency for your Creamy Tomato Garlic Pasta.
- Drain the Pasta: Once the pasta is al dente, drain it immediately in a colander. Do not rinse the pasta. Rinsing will wash away the valuable starch that helps the sauce cling beautifully to the pasta.
Crafting the Creamy Tomato Garlic Sauce:
This is where the magic truly happens, transforming simple ingredients into a rich, flavorful, and wonderfully creamy sauce that will coat every piece of your pasta.
- Sauté the Aromatics: Place a large, deep skillet or Dutch oven over medium heat. Add the 3 tablespoons of olive oil and 2 tablespoons of unsalted butter. Allow the butter to melt and swirl with the oil. Once the butter is foamy, add the finely diced yellow onion. Sauté, stirring occasionally, for 5-7 minutes, until the onion is softened and translucent. The goal here is to build a sweet and savory base without browning the onion too much.
- Infuse with Garlic and Spice: Add the 8-10 minced garlic cloves and 1 teaspoon of red pepper flakes to the skillet. Continue to cook for another 1-2 minutes, stirring constantly, until the garlic is fragrant. Be very careful not to burn the garlic, as burnt garlic will impart a bitter taste to your entire Creamy Tomato Garlic Pasta sauce. Keep the heat at medium and watch it closely. You’ll know it’s ready when you can smell that intoxicating garlic aroma filling your kitchen.
- Add the Tomatoes and Season: Pour in the two 28-ounce cans of crushed tomatoes. Give everything a good stir to combine. Add the optional 1 teaspoon of granulated sugar and the 1 teaspoon of dried oregano. Season generously with about 1 teaspoon of salt and 1/2 teaspoon of freshly cracked black pepper to start. Remember, you’ll taste and adjust later.
- Simmer for Flavor Development: Bring the sauce to a gentle simmer. Reduce the heat to low, cover the skillet partially, and let the sauce simmer for at least 20-25 minutes, or even up to 30 minutes. This slow simmer is crucial for allowing the flavors to meld and deepen, for the raw tomato taste to cook out, and for the sauce to thicken slightly. Stir occasionally to prevent sticking and ensure even cooking. The longer it simmers, the more complex and rich your Creamy Tomato Garlic Pasta sauce will become.
- Introduce the Cream: Once the sauce has simmered and developed its rich flavor, remove it from the heat or keep it on very low. Stir in the 1 cup of heavy cream. Stir gently until the cream is fully incorporated and the sauce takes on a beautiful, pale orange hue and a luscious consistency. At this point, you’ll start to see that signature creamy texture forming.
- Melt in the Parmesan: Add the 1/2 cup of freshly grated Parmesan cheese to the sauce. Stir continuously until the cheese is completely melted and smoothly integrated into the sauce. The Parmesan adds another layer of umami and helps thicken the sauce further, contributing to the incredible richness of our Creamy Tomato Garlic Pasta.
- Taste and Adjust Seasoning: Now is the time to taste the sauce. Is it salty enough? Does it need more pepper? Perhaps a tiny pinch more sugar if the tomatoes are still too acidic? Adjust the seasonings to your preference. Remember that the pasta water you reserved is salty, and the Parmesan also adds salt, so be mindful when adding more.
Bringing it All Together and Serving:
This is the exciting grand finale, where the perfectly cooked pasta meets the luxurious sauce, culminating in the ultimate plate of Creamy Tomato Garlic Pasta.
- Combine Pasta and Sauce: Add the drained, al dente pasta directly into the skillet with the creamy tomato garlic sauce. Using tongs, toss the pasta vigorously with the sauce, ensuring every piece is thoroughly coated. This step is more than just mixing; it allows the pasta to absorb the sauce and the flavors to fully meld together.
- Achieve Perfect Consistency with Pasta Water: As you toss, if the sauce appears too thick or isn’t coating the pasta as nicely as you’d like, gradually add small splashes (a tablespoon at a time) of the reserved starchy pasta water. The starch in the water will help emulsify the sauce, making it incredibly silky and ensuring it clings beautifully to the pasta. Continue adding until you reach your desired consistency – a creamy, glossy sauce that coats the pasta without being watery or overly thick.
- A Final Touch of Freshness: Remove the skillet from the heat. Add the fresh basil leaves to the pasta. Toss once more to distribute the basil. The residual heat from the pasta and sauce will gently wilt the basil, releasing its aromatic oils and adding a burst of fresh flavor that wonderfully contrasts the richness of the Creamy Tomato Garlic Pasta.
- Serve Immediately: Divide the Creamy Tomato Garlic Pasta among warm bowls. For an extra flourish, sprinkle each serving with additional freshly grated Parmesan cheese and, if desired, a final grind of black pepper or a tiny drizzle of your best olive oil. Serve this dish immediately, while it’s piping hot and the flavors are at their peak. Enjoy every decadent bite of your homemade Creamy Tomato Garlic Pasta! It’s truly a comforting and satisfying meal that’s perfect for a weeknight dinner or entertaining guests.
Conclusion:
Well, friends, we’ve journeyed through the simple magic of creating a truly unforgettable meal, and I hope you’re feeling as excited as I am about the prospect of bringing this dish to your own table. If there’s one recipe I genuinely believe everyone needs in their repertoire, it’s this one. This isn’t just another pasta dish; it’s a culinary hug in a bowl, a vibrant symphony of flavors that manages to be both incredibly comforting and impressively elegant at the same time. It’s the kind of dish that garners rave reviews with minimal effort, making it ideal for busy weeknights when you crave something special without the fuss, or for a relaxed weekend dinner with loved ones. The rich, velvety sauce, infused with the sweet tang of tomatoes and the pungent warmth of garlic, clings perfectly to every strand of pasta, creating a harmonious bite every single time. I promise, once you take that first bite of this glorious Creamy Tomato Garlic Pasta, you’ll understand why it’s become such a beloved staple in my kitchen, and soon, I hope, in yours too. The sheer joy of watching the sauce come together, smelling the fragrant garlic sizzling, and seeing the vibrant colors meld, is a rewarding experience in itself. It truly transforms humble ingredients into something extraordinary, showcasing how a few quality components can create profound flavor.
Now, for those of you who love to experiment, this recipe is incredibly versatile and open to your personal touch. While divine as is, consider these suggestions to make it uniquely yours or to suit different occasions. For a heartier meal, why not stir in some grilled chicken or pan-seared shrimp during the final stages? Italian sausage, crumbled and browned, also adds a wonderful depth and savory kick. If you’re leaning vegetarian, roasted chickpeas or cannellini beans can provide an excellent protein boost. Feel free to wilt in a handful of fresh spinach, add sautéed mushrooms, or incorporate some roasted red bell peppers for extra color and nutrients. If you enjoy a little heat, a pinch of red pepper flakes stirred into the garlic and tomato base will awaken your palate. As for cheese, while Parmesan is a classic, try a dollop of creamy burrata or fresh mozzarella melted on top just before serving for an added touch of indulgence. Don’t be afraid to play with different pasta shapes either; penne, fettuccine, or even orecchiette would work beautifully. For a complete meal, I always recommend serving this Creamy Tomato Garlic Pasta alongside a simple crisp green salad with a light vinaigrette and some crusty artisan bread, perfect for soaking up every last drop of that incredible sauce. It’s a truly satisfying meal that feels gourmet but is surprisingly accessible.
So, what are you waiting for? I wholeheartedly encourage you to roll up your sleeves, gather your ingredients, and give this incredible recipe a try this week. You deserve to experience the pure delight of creating and savoring this magnificent dish. I have every confidence that you’ll fall in love with its simplicity, its robust flavor, and its undeniable comfort. And when you do, please don’t keep it to yourself! I would absolutely love to hear about your experience. Did you add any unique twists? What was your favorite part? Share your culinary triumphs, your serving ideas, and any photos you might snap with me. There’s a wonderful community of food lovers out there, and your insights and experiences enrich us all. Happy cooking, and prepare to be utterly charmed by your very own homemade Creamy Tomato Garlic Pasta! Your culinary adventure awaits!
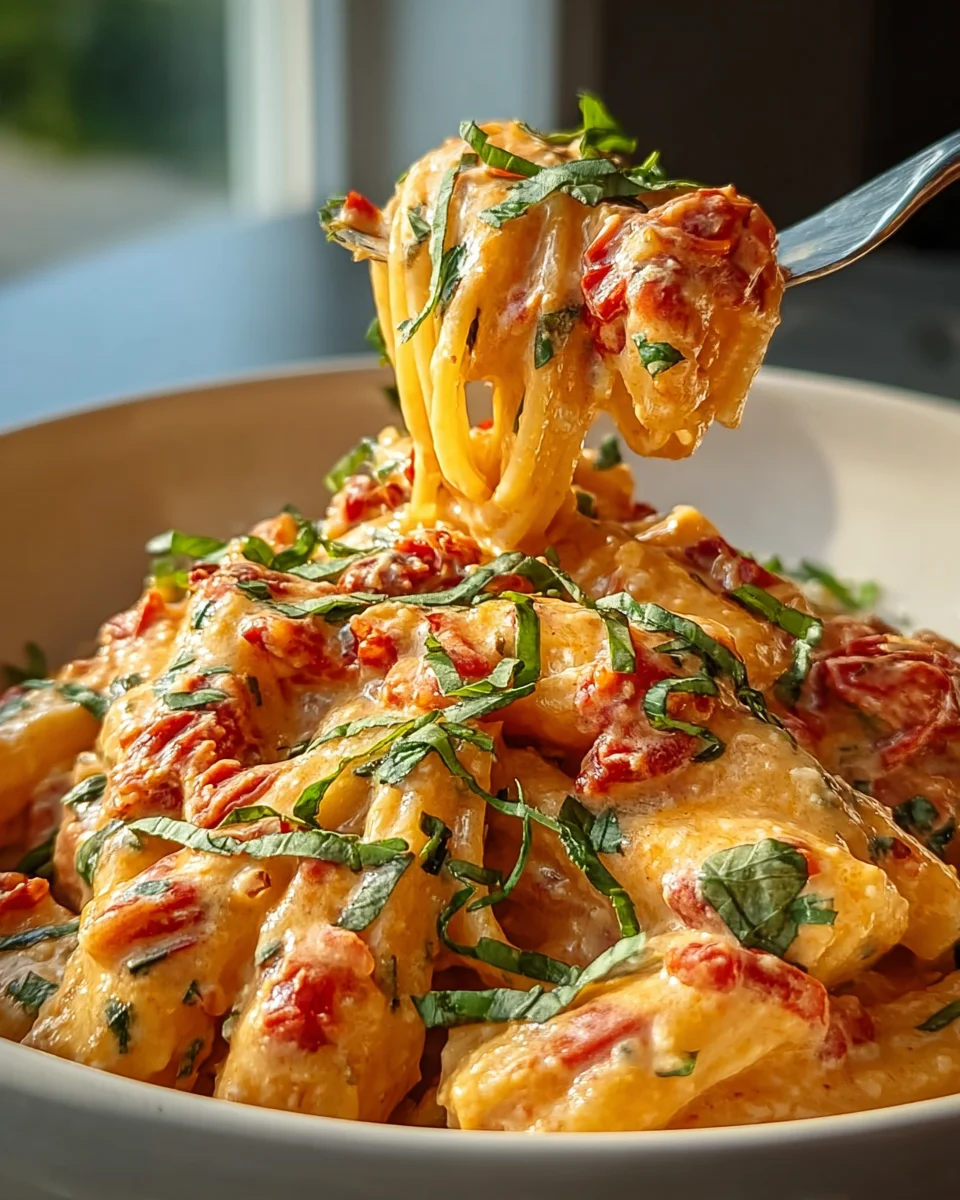
Creamy Tomato Garlic Pasta
A comforting and easy pasta dish featuring spaghetti or fettuccine tossed in a rich sauce of ripe tomatoes, abundant garlic, and creamy goodness, finished with fresh basil.
Ingredients
Instructions
Important Information
Nutrition Facts (Per Serving)
It is important to consider this information as approximate and not to use it as definitive health advice.
Allergy Information
Please check ingredients for potential allergens and consult a health professional if in doubt.