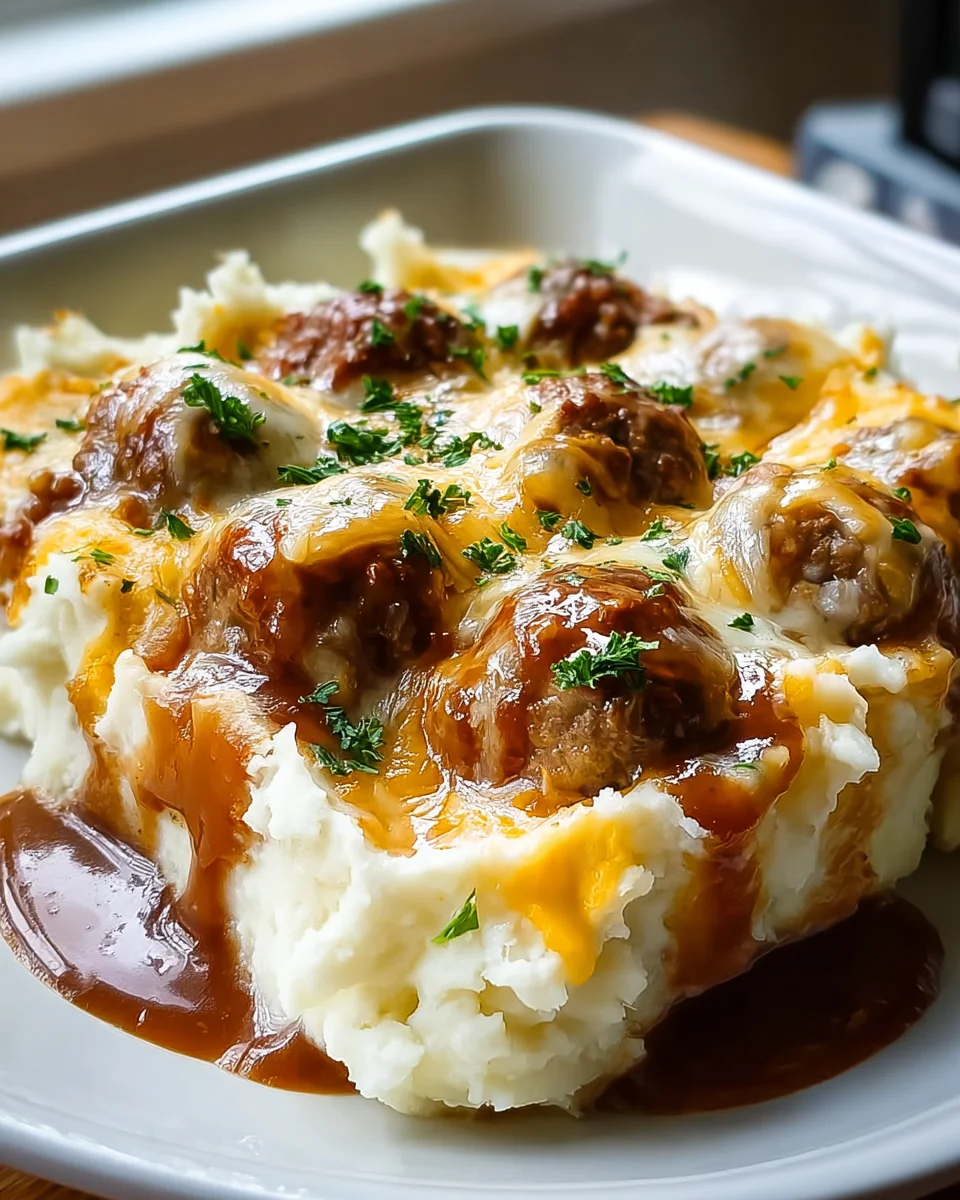
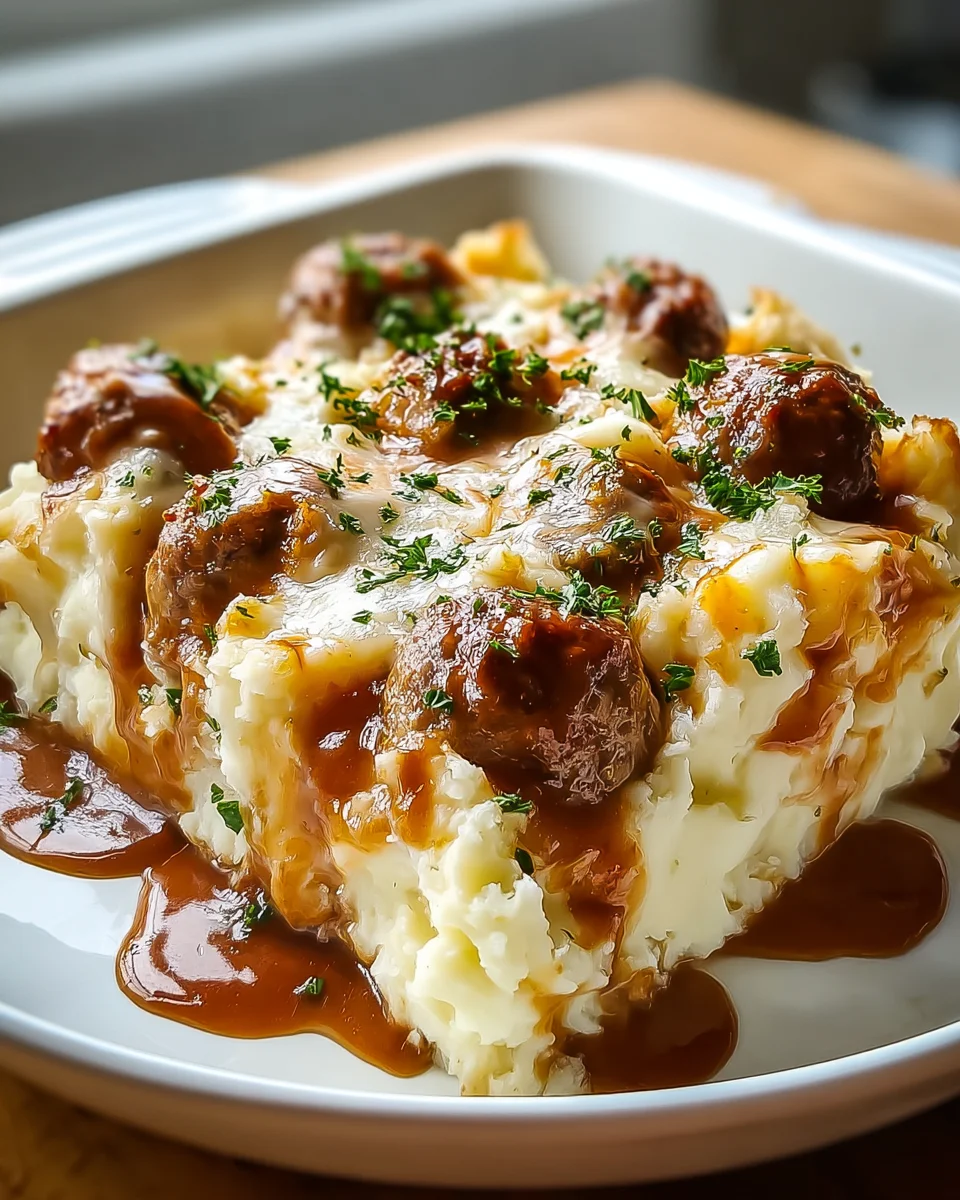
Meatball And Mashed Potato Bake
Oh my goodness, get ready to fall in love with a dish that combines two of the most comforting classics into one glorious, satisfying meal! Meatball And Mashed Potato Bake is not just another weeknight dinner; it’s a hug in a casserole dish, a culinary stroke of genius that brings together all the flavors you adore in a convenient, hearty bake.
Why will you absolutely adore this recipe? Because it takes the best bits of your favorite homemade beef meatballs and your creamiest mashed potatoes, then unites them in a way that’s both elegant and utterly comforting. Forget juggling separate pots and pans; here, you’ve got tender, juicy beef meatballs simmered in a rich, savory gravy (infused with delicious non-alcohol alternatives for that deep, complex flavor!), all tucked beneath a fluffy blanket of golden-baked mashed potatoes. It’s a complete meal, perfectly portioned, and incredibly easy to serve straight from the oven.
This isn’t just a bake; it’s an experience. The meatballs are perfectly seasoned, the gravy is wonderfully robust, and the mashed potato topping gets that irresistible golden crust while remaining incredibly soft underneath. It’s the ultimate comfort food upgrade, promising smiles around the table and very likely, requests for seconds. Trust me, once you try this delightful Meatball And Mashed Potato Bake, it’ll quickly become a cherished family favorite!
Ingredient Notes
Crafting the perfect Meatball and Mashed Potato Bake starts with understanding the stars of the show and how to make them shine. I’ve found that using quality ingredients truly makes all the difference in this comforting dish, transforming it from good to absolutely incredible!
For the Meatballs:
- Ground Beef: I always opt for a good quality ground beef, typically 80/20 lean-to-fat ratio. This gives the meatballs fantastic flavor and keeps them moist without being greasy. If you’re looking for an alternative, ground turkey or even a mix of ground beef and lamb can work beautifully, though the flavor profile will change slightly.
- Breadcrumbs: Plain dried breadcrumbs are my go-to. They help bind the meatballs and absorb moisture, keeping them tender. For a gluten-free version, simply use gluten-free breadcrumbs. You could also use crushed crackers in a pinch for a similar binding effect.
- Egg: A single large egg acts as a crucial binder, ensuring your meatballs hold their shape beautifully during cooking and baking.
- Onion & Garlic: Finely minced yellow onion and fresh garlic cloves are non-negotiable for me. They infuse the meatballs with incredible aromatic depth. If fresh isn’t an option, a little onion powder and garlic powder can substitute, but fresh is definitely preferred.
- Fresh Herbs: I love incorporating fresh parsley and a touch of fresh oregano into my meatballs. They add a vibrant, fresh flavor that dried herbs just can’t quite match. If you only have dried herbs, use about a third of the amount of fresh.
- Seasoning: Don’t forget salt, black pepper, and a pinch of red pepper flakes for a subtle warmth.
For the Mashed Potatoes:
- Potatoes: Russet or Yukon Gold potatoes are ideal for mashing. Russets are starchy and fluffy, while Yukon Golds are creamy and buttery. I often use a mix for the best of both worlds. Peel them, quarter them, and they’re ready for boiling.
- Milk/Cream: Whole milk or half-and-half gives the mashed potatoes a wonderfully creamy texture. For an extra rich mash, heavy cream is fantastic. If you’re aiming for a dairy-free option, unsweetened plain almond milk or oat milk can be used, though the texture might be slightly different.
- Butter: Unsalted butter is key here. It adds richness and a beautiful flavor. You can adjust the amount to your preference.
- Salt & Pepper: Seasoning is vital for delicious mashed potatoes. Taste and adjust as you go!
For the Sauce & Topping:
- Marinara Sauce: A good quality store-bought marinara or your favorite homemade recipe forms the flavorful base for the bake. Choose one you love, as its flavor will permeate the dish.
- Beef Broth: To thin out the marinara sauce just a bit and add another layer of savory flavor, I like to add a splash of beef broth. This works wonderfully to ensure the meatballs stay moist and the sauce is perfectly spreadable.
- Cheese: A blend of shredded mozzarella and Parmesan cheese is my top choice for the ultimate cheesy topping. Mozzarella offers that satisfying melty stretch, while Parmesan adds a salty, nutty depth. Feel free to experiment with other good melting cheeses like cheddar or provolone.
Step-by-Step Instructions
Let’s get cooking! This Meatball and Mashed Potato Bake is a truly satisfying meal that comes together beautifully with a little step-by-step guidance. I always enjoy the process of layering this dish, knowing how delicious the final product will be.
1. Prepare Your Delicious Meatballs
- Mix the Meatball Mixture: In a large mixing bowl, gently combine the ground beef, breadcrumbs, egg, finely minced onion, minced garlic, chopped fresh parsley, fresh oregano, salt, black pepper, and red pepper flakes (if using). I find it best to use my hands for this, mixing just until everything is combined. Overmixing can lead to tough meatballs, and we definitely want them tender!
- Form the Meatballs: Scoop out about a tablespoon or two of the mixture for each meatball. Roll them gently between your palms to form uniform balls, aiming for about 1 to 1.5 inches in diameter. Uniformity helps them cook evenly.
- Brown the Meatballs: Heat a couple of tablespoons of olive oil in a large skillet or Dutch oven over medium-high heat. Once hot, carefully place the meatballs in a single layer, working in batches if necessary to avoid overcrowding. Brown them on all sides until they have a lovely crust. They don’t need to be cooked through at this stage; we’re just building flavor and color. Once browned, transfer them to a plate and set aside.
2. Master Your Creamy Mashed Potatoes
- Boil the Potatoes: Peel and cut your potatoes into roughly 1-inch pieces. Place them in a large pot and cover them with cold water by about an inch. Add a generous pinch of salt to the water. Bring to a boil, then reduce heat and simmer until the potatoes are fork-tender, usually about 15-20 minutes.
- Drain and Mash: Once tender, thoroughly drain the potatoes. Return them to the hot pot over low heat for a minute or two to allow any remaining moisture to evaporate. This helps prevent watery mashed potatoes. Remove from heat.
- Mash to Perfection: Add the butter, warm milk (or cream), salt, and pepper to the pot. Using a potato masher or a potato ricer, mash the potatoes until smooth and creamy. I prefer a masher for a bit of texture. Taste and adjust seasoning as needed – don’t be shy with the salt and pepper! Set aside.
3. Assemble the Glorious Bake
- Preheat Oven & Prep Dish: Preheat your oven to 375°F (190°C). Lightly grease a 9×13-inch baking dish.
- Layer the Sauce: Pour about half of your marinara sauce into the bottom of the prepared baking dish, spreading it evenly. If your sauce is very thick, you can stir in a splash of beef broth now.
- Add the Meatballs: Arrange the browned meatballs evenly over the sauce layer.
- More Sauce!: Pour the remaining marinara sauce over the meatballs. At this point, I like to stir in a bit more beef broth with the remaining sauce to make sure everything stays nice and moist during the bake. Make sure the meatballs are mostly covered in sauce.
- Top with Mashed Potatoes: Carefully spoon the mashed potatoes over the saucy meatballs. Gently spread the mashed potatoes to create an even layer, making sure to seal the meatballs underneath. You can use the back of a spoon or an offset spatula.
- Sprinkle with Cheese: Finally, generously sprinkle the shredded mozzarella and Parmesan cheese over the top of the mashed potatoes.
4. Bake to Golden Perfection
- Bake Time: Place the baking dish in your preheated oven. Bake for 25-30 minutes, or until the sauce is bubbly around the edges and the cheese on top is melted, golden brown, and slightly bubbly. If the cheese starts to brown too quickly, you can loosely tent the dish with aluminum foil.
- Rest: Once out of the oven, let the bake rest for 5-10 minutes. This allows the layers to set slightly, making it easier to serve and preventing it from falling apart.
5. Serve and Enjoy!
- Serve It Up: Cut into generous portions and serve hot. This dish is a complete meal on its own, but it pairs wonderfully with a simple green salad or some crusty bread for soaking up that delicious sauce.
Tips & Suggestions
Over the years of making this Meatball and Mashed Potato Bake, I’ve picked up a few tricks and tips that I think really elevate the dish. These are the things I tell my friends when they ask for the recipe!
- Don’t Overmix Your Meatballs: This is probably my number one tip for tender meatballs. Mix the ingredients just until combined. Overworking the meat can make your meatballs dense and tough.
- Sear for Flavor: While you could bake the meatballs directly in the sauce, browning them first in a skillet adds incredible depth of flavor and a lovely crust. It’s an extra step that’s truly worth the effort.
- Warm Your Dairy for Mashed Potatoes: When adding milk or cream to your mashed potatoes, make sure it’s warm. Adding cold dairy can cool down your potatoes and make them gummy. Gently heat the milk and butter together before incorporating them.
- Season Liberally: Potatoes can handle a lot of seasoning. Don’t be afraid to taste your mashed potatoes and adjust the salt and pepper. Bland potatoes can dull the whole dish.
- Spice it Up: If you like a little kick, add extra red pepper flakes to your meatballs or even stir a pinch into your marinara sauce. It provides a nice warmth without being overly spicy.
- Vary the Cheese: While mozzarella and Parmesan are my go-tos, feel free to experiment! A sprinkle of provolone, sharp cheddar, or even a smoked gouda could add an interesting twist to the topping.
- Make Ahead Magic: This bake is fantastic for meal prep! You can assemble the entire dish up to the point of baking, cover it tightly with plastic wrap, and refrigerate it for up to 24 hours. When you’re ready to bake, let it sit at room temperature for about 30 minutes before baking, and you might need to add an extra 10-15 minutes to the baking time.
- Add Some Veggies: For a hidden veggie boost, finely grate some carrots or zucchini into your meatball mixture. You won’t even notice them, but they add extra moisture and nutrients. Alternatively, sauté some mushrooms or bell peppers and layer them with the sauce for extra texture and flavor.
- Customize Your Sauce: While marinara is classic, feel free to enhance it. Stir in some fresh basil, a spoonful of pesto, or a dash of balsamic glaze for extra layers of flavor.
Storage
One of the best things about the Meatball and Mashed Potato Bake is how well it stores, making it perfect for leftovers or meal prepping. I always make a big batch so I can enjoy it throughout the week!
Refrigeration:
- Cool Completely: Before storing, allow the bake to cool down to room temperature. This is important for food safety and prevents condensation from forming, which can make the dish soggy.
- Airtight Container: Once cooled, transfer any leftover portions to an airtight container. If you’re storing the entire baking dish, cover it tightly with plastic wrap and then aluminum foil.
- How Long: It will keep beautifully in the refrigerator for 3-4 days.
- Reheating: To reheat individual portions, I usually pop them in the microwave until heated through. For larger portions in the baking dish, cover with foil and reheat in a 300°F (150°C) oven until warmed through, about 20-30 minutes. You can uncover it for the last few minutes if you want to crisp up the cheese a bit.
Freezing:
- Baked or Unbaked: This dish freezes well both baked and unbaked. I often assemble it, then freeze it unbaked if I know I’ll want a quick meal later.
- For Unbaked Freeze: Assemble the bake as per instructions, but do not bake. Cover the dish tightly with plastic wrap, then a layer of heavy-duty aluminum foil. Label with the date.
- For Baked Freeze: Bake the dish as instructed, then let it cool completely. Cover tightly with plastic wrap and then foil. Label with the date.
- Freezer Life: The Meatball and Mashed Potato Bake can be stored in the freezer for up to 2-3 months.
- Thawing (for unbaked): For best results, thaw the unbaked casserole in the refrigerator overnight before baking. Then, bake as directed, potentially adding an extra 10-15 minutes to the baking time if it’s still quite cold.
- Thawing (for baked): Thaw overnight in the refrigerator. Reheat as you would refrigerated leftovers, in the oven until heated through.
- Reheating from Frozen (Baked): If you need to reheat directly from frozen, remove the plastic wrap (if any) and cover the dish tightly with foil. Bake in a 350°F (175°C) oven for about 1 hour to 1 hour 30 minutes, or until heated through. Remove the foil for the last 15-20 minutes to crisp the cheese.
Final Thoughts
So there you have it – the wonderful Meatball And Mashed Potato Bake. I truly believe this recipe is an absolute must-try for anyone seeking the ultimate in comfort food. The combination of perfectly seasoned, tender beef meatballs nestled under a golden, creamy blanket of mashed potatoes is simply irresistible.
It’s a dish that warms you from the inside out, bringing smiles to every face at the table. Whether you’re looking for a hearty weeknight dinner or a crowd-pleasing meal that feels like a hug, the Meatball And Mashed Potato Bake delivers on all fronts. Give it a try, and I promise, you’ll be adding this comforting classic to your regular rotation!

Hearty Beef Meatball & Mashed Potato Bake
- Total Time: 1 hour
- Yield: 4 servings 1x
Description
This Hearty Beef Meatball & Mashed Potato Bake combines the best of homemade beef meatballs and creamy mashed potatoes into one comforting dish. It’s a complete meal that promises satisfaction and smiles around the table!
Ingredients
- Ground Beef
- Plain dried breadcrumbs
- 1 large egg
- Finely minced yellow onion
- Minced garlic cloves
- Chopped fresh parsley
- Fresh oregano
- Salt
- Black pepper
- Red pepper flakes
- Russet or Yukon Gold potatoes
- Whole milk or half-and-half
- Unsalted butter
- Marinara sauce
- Beef broth
- Shredded mozzarella cheese
- Parmesan cheese
Instructions
- In a large mixing bowl, gently combine the ground beef, breadcrumbs, egg, finely minced onion, minced garlic, chopped fresh parsley, fresh oregano, salt, black pepper, and red pepper flakes. Mix just until combined.
- Scoop out about a tablespoon or two of the mixture for each meatball and roll them gently between your palms to form uniform balls, about 1 to 1.5 inches in diameter.
- Heat a couple of tablespoons of olive oil in a large skillet or Dutch oven over medium-high heat. Brown the meatballs on all sides until they have a lovely crust, then transfer them to a plate and set aside.
- Peel and cut the potatoes into roughly 1-inch pieces. Place them in a large pot, cover with cold water, and add a generous pinch of salt. Bring to a boil, then reduce heat and simmer until fork-tender, about 15-20 minutes.
- Drain the potatoes and return them to the hot pot over low heat for a minute or two to evaporate any remaining moisture. Remove from heat.
- Add the butter, warm milk (or cream), salt, and pepper to the pot. Mash the potatoes until smooth and creamy, adjusting seasoning as needed. Set aside.
- Preheat your oven to 375°F (190°C) and lightly grease a 9×13-inch baking dish.
- Pour about half of the marinara sauce into the bottom of the prepared baking dish. Arrange the browned meatballs evenly over the sauce layer.
- Pour the remaining marinara sauce over the meatballs, ensuring they are mostly covered in sauce.
- Spoon the mashed potatoes over the saucy meatballs, spreading to create an even layer.
- Sprinkle the shredded mozzarella and Parmesan cheese over the top of the mashed potatoes.
- Bake in the preheated oven for 25-30 minutes, until the sauce is bubbly and the cheese is melted and golden brown.
- Let the bake rest for 5-10 minutes before serving.
- Prep Time: 30 mins
- Cook Time: 30 mins
- Category: Dinner
- Method: Baking
- Cuisine: American
Nutrition
- Serving Size: 1 bowl
- Calories: 600
- Sugar: 5 g
- Sodium: 800 mg
- Fat: 30 g
- Saturated Fat: 15 g
- Unsaturated Fat: 10 g
- Trans Fat: 0 g
- Carbohydrates: 50 g
- Fiber: 4 g
- Protein: 30 g
- Cholesterol: 100 mg
Keywords: Don't overmix your meatballs to keep them tender. Browning them first adds flavor, and warm dairy is essential for creamy mashed potatoes. Feel free to customize your cheese or add veggies for extra nutrition.