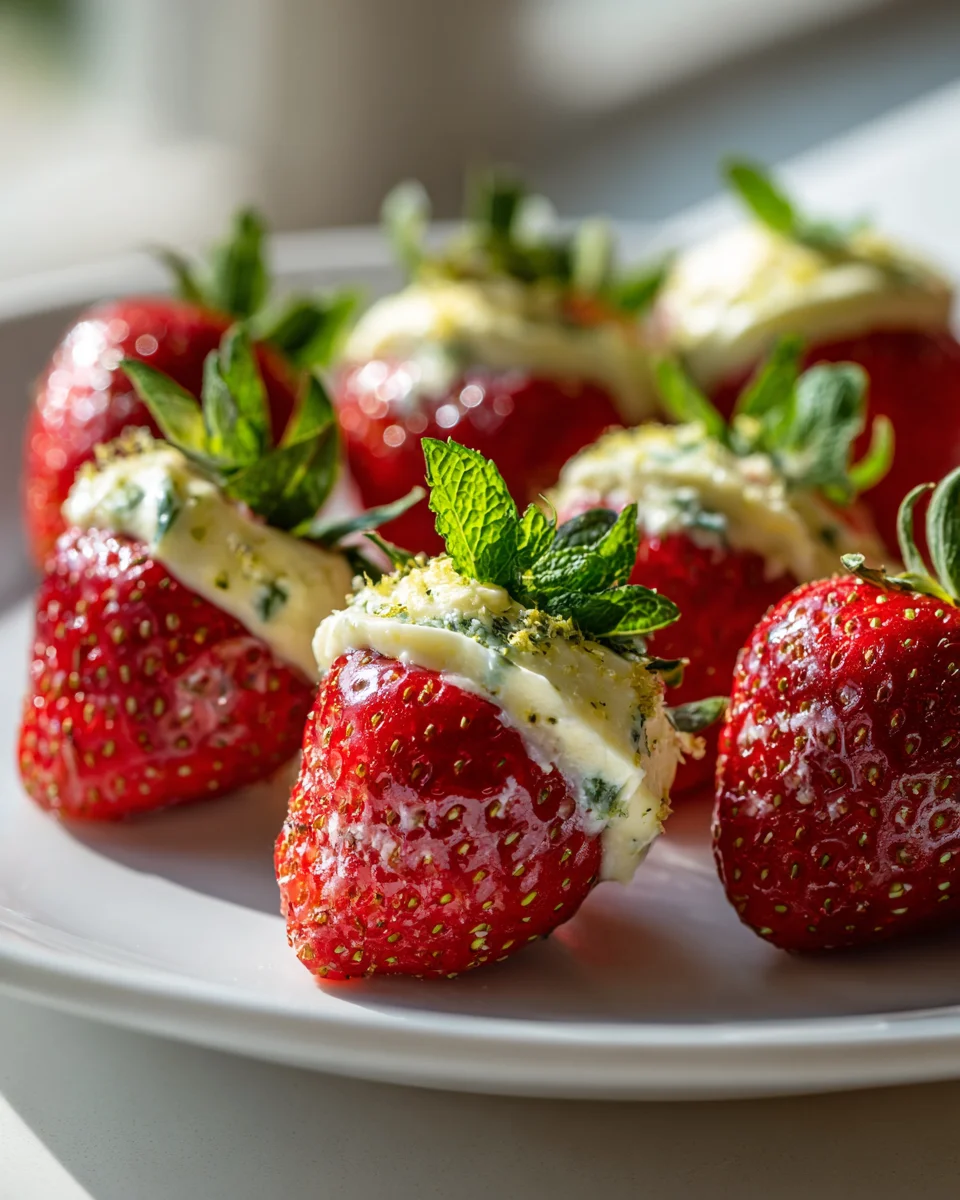
Lemon Cream Stuffed Strawberries
Oh, prepare yourselves, because I am absolutely thrilled to share one of my all-time favorite easy desserts with you today! Lemon Cream Stuffed Strawberries are, quite frankly, a little bite of heaven that encapsulates everything I love about spring and summer treats. What makes this recipe so incredibly special, you ask? Well, it’s the perfect harmony of vibrant flavors and effortless elegance. Imagine plump, juicy strawberries, carefully cored and transformed into delightful little cups, then generously filled with a velvety, zesty lemon cream that just melts in your mouth.
You are going to adore these for so many reasons! They’re incredibly refreshing, wonderfully light, and utterly gorgeous to look at – making them ideal for everything from a sophisticated garden party to a casual backyard BBQ, or even just a sweet pick-me-up on a Tuesday afternoon. The bright, tangy kick of the lemon cream perfectly complements the natural sweetness of the fresh strawberries, creating a flavor combination that is both sophisticated and incredibly satisfying. Plus, they come together so quickly, allowing you to whip up an impressive dessert without spending hours in the kitchen. Trust me, these aren’t just strawberries; they’re tiny bursts of joy waiting to be devoured!
Welcome to a delightful dessert that perfectly balances sweet and tart, all wrapped up in a beautiful package! My Lemon Cream Stuffed Strawberries are an absolute joy to make and even more enjoyable to eat. They’re elegant, surprisingly simple, and always a crowd-pleaser, whether you’re hosting a brunch, a garden party, or just want a refreshing treat. The vibrant taste of fresh lemon combined with luscious, creamy filling inside juicy strawberries creates an irresistible bite. Trust me, these will disappear fast!
Ingredient Notes
Crafting the perfect Lemon Cream Stuffed Strawberries starts with choosing the right ingredients. Each component plays a crucial role in achieving that delightful balance of flavor and texture. Here’s a little insight into what I use and why, along with some helpful substitution ideas:
- Strawberries: The star of our show! I always look for large, firm, and vibrant red strawberries. Size matters here because we need ample space to stuff them generously. Firmness is key too; they’ll hold their shape better after being hulled and filled. Wash them thoroughly and pat them completely dry before you begin.
- Full-Fat Cream Cheese: This is the backbone of our lemon cream, providing that wonderful tangy base and rich, stable texture. Make sure it’s softened to room temperature before you start mixing. This ensures a smooth, lump-free cream. If you’re looking for an even richer, slightly less tangy option, mascarpone cheese can be a decadent substitute, offering a similar creaminess.
- Powdered Sugar (Confectioners’ Sugar): For sweetness and to create a silky-smooth texture in our cream. It dissolves beautifully, leaving no grainy residue. While granulated sugar can work in a pinch, powdered sugar truly gives that professional, melt-in-your-mouth feel. Adjust the amount to your preference – I like mine on the less sweet side to let the lemon shine.
- Heavy Cream (or Double Cream): This is whipped to stiff peaks and gently folded into our cream cheese mixture, providing incredible lightness and an airy texture to the lemon cream. Don’t skip this! It’s what makes the filling so wonderfully fluffy. For a non-dairy alternative, you can use a plant-based heavy cream substitute that is specifically designed for whipping, such as coconut cream (chilled overnight and just scoop out the thick cream).
- Fresh Lemon Zest: The absolute magic ingredient for intense lemon flavor! Zesting only the bright yellow part of the skin will give you pure lemon oil essence without any bitterness. Trust me, there’s no substitute for fresh zest when it comes to capturing that bright, aromatic lemon punch.
- Fresh Lemon Juice: This adds the essential tartness and brightens up the entire flavor profile of the cream. Always use fresh-squeezed for the best results; bottled lemon juice just doesn’t compare in terms of vibrancy and freshness.
- Non-Alcohol Vanilla Extract: A touch of non-alcohol vanilla extract rounds out the flavors beautifully, adding a subtle warmth and complexity that complements the lemon without overpowering it.
- Optional Garnishes: A sprinkle of extra lemon zest, a few fresh mint leaves, or even a dusting of finely crushed shortbread cookies can elevate the presentation and add another layer of texture.
Step-by-Step Instructions
Making these delightful Lemon Cream Stuffed Strawberries is a straightforward process, but following these steps will ensure your dessert turns out perfectly every time. I’ll walk you through my method for creating these elegant bites:
- Prepare Your Strawberries: First things first, we need to get our strawberries ready for stuffing. Gently wash all your strawberries under cool running water. Carefully pat them completely dry with paper towels. Excess moisture can make your cream watery. Now, hull each strawberry. This means carefully removing the green stem and the white core from the top. I like to use a small paring knife or a specialized strawberry huller. The goal is to create a cavity in the center of the strawberry, deep enough to hold a generous amount of cream, but without cutting all the way through the bottom. You want to leave a solid base so the filling doesn’t leak out. Arrange your hulled strawberries on a plate or tray.
- Whip the Heavy Cream: In a clean, chilled mixing bowl, pour your cold heavy cream. Using an electric mixer (handheld or stand mixer with a whisk attachment), whip the cream on medium-high speed until it forms stiff peaks. Stiff peaks mean that when you lift the whisk, the cream stands up straight and holds its shape firmly. Be careful not to over-whip, or it can turn grainy. Set this aside in the refrigerator.
- Prepare the Lemon Cream Base: In a separate, medium-sized mixing bowl, combine your softened full-fat cream cheese, powdered sugar, fresh lemon zest, fresh lemon juice, and non-alcohol vanilla extract. Using an electric mixer, beat these ingredients together on medium speed until the mixture is completely smooth, creamy, and lump-free. Make sure to scrape down the sides of the bowl occasionally to ensure everything is incorporated evenly.
- Gently Fold the Whipped Cream: Now comes the part where we combine our two creamy components. Take about a third of your whipped heavy cream and add it to the lemon cream cheese mixture. Gently fold it in with a spatula until just combined. Then, add the remaining whipped cream and continue to fold gently until no streaks of white cream remain and the mixture is light, airy, and uniform. The key here is to be gentle to maintain the airiness of the whipped cream, which gives our filling its wonderful texture.
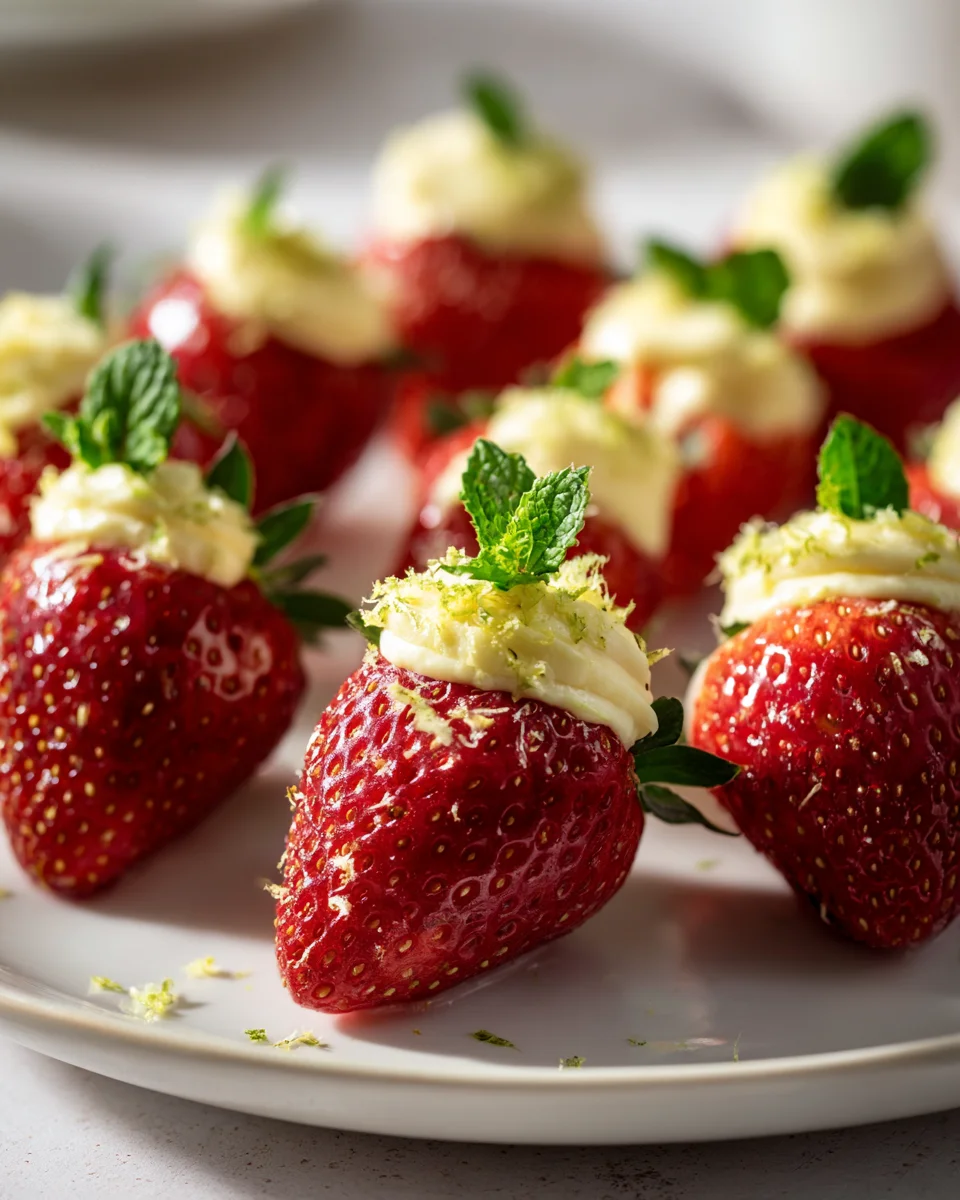
- Fill the Strawberries: This is where the fun begins! You have a couple of options for filling. For a neat, professional look, I highly recommend transferring the lemon cream to a piping bag fitted with a star tip (like an open star or closed star tip). This allows you to pipe beautiful swirls of cream into each strawberry cavity. If you don’t have a piping bag, no worries! A small spoon or even a resealable plastic bag with a corner snipped off will work just fine. Fill each strawberry generously, making sure the cream peaks nicely from the top.
- Chill and Garnish: Once all your strawberries are filled, arrange them on a serving platter. Place the platter in the refrigerator and chill for at least 30 minutes. This chilling time allows the cream to firm up slightly and helps the flavors meld together beautifully. Just before serving, I love to add a little extra flair with garnishes. A sprinkle of fresh lemon zest over the top of the cream, or a tiny fresh mint leaf perched on each strawberry, really enhances their visual appeal and adds to the fresh experience.
Tips & Suggestions
To ensure your Lemon Cream Stuffed Strawberries are nothing short of spectacular, I’ve gathered a few extra tips and suggestions from my own experience. These little insights can make a big difference in the final outcome and presentation of your delicious dessert:
- Strawberry Selection is Key: I can’t stress this enough – choose your strawberries wisely! Look for the largest, firmest, and most uniformly shaped strawberries you can find. Not only do they look more impressive, but their size also makes hollowing them out much easier and provides a substantial cavity for the filling. Firm strawberries will also hold their shape better once filled and chilled.
- Room Temperature Cream Cheese: This is a non-negotiable step for a perfectly smooth cream. If your cream cheese isn’t soft enough, you’ll end up with lumps in your filling, no matter how much you beat it. Take it out of the fridge at least 30-60 minutes before you plan to start.
- Don’t Overmix the Cream: When you’re incorporating the whipped cream into the cream cheese mixture, fold it gently. Overmixing can deflate the whipped cream, resulting in a dense, rather than light and airy, filling. The goal is just to combine until no streaks remain.
- Piping Bag for Presentation: While a spoon works, using a piping bag with a star tip (my favorite is a Wilton 1M or 21) truly elevates the look of these strawberries. It creates a beautiful, professional swirl of cream that makes them even more appealing. If you don’t have one, a sturdy plastic bag with a corner snipped off can serve as a makeshift piping bag.
- Hulling Technique: When hulling your strawberries, be careful not to cut too deep or all the way through the bottom. You want to create a stable little cup for your cream. A small melon baller can also be a neat tool for scooping out the center.
- Flavor Variations: While lemon is the star here, don’t hesitate to experiment!
- Citrus Twist: A tiny bit of orange or lime zest along with the lemon can add a complex, brighter citrus note.
- Added Crunch: For a textural contrast, sprinkle a tiny bit of finely crushed graham cracker crumbs, shortbread cookie crumbs, or even toasted coconut flakes over the top of the cream just before serving.
- Chocolate Drizzle: A delicate drizzle of melted white chocolate over the finished strawberries can be a beautiful and delicious addition.
- Berry Boost: For a slightly different flavor, you could even fold in a tiny amount of finely diced raspberries into your lemon cream.
- Make Ahead Option: You can prepare the lemon cream filling up to one day in advance and store it in an airtight container in the refrigerator. Just give it a gentle whisk or stir before filling. I recommend stuffing the strawberries no more than a few hours before serving to ensure the berries remain fresh and firm.
- Serving Suggestions: These are perfect as a light dessert, an elegant appetizer for a shower or party, or even a fancy brunch item. They pair wonderfully with a glass of chilled sparkling non-alcoholic cider or a cup of your favorite tea.
Storage
Lemon Cream Stuffed Strawberries are at their absolute best when enjoyed fresh, shortly after they’ve been assembled and chilled. However, I understand that sometimes you might have leftovers or need to prepare them slightly in advance. Here’s my advice on how to store them:
- Refrigeration is Key: Any leftover stuffed strawberries, or those you’ve prepared ahead of time, must be stored in the refrigerator. The dairy in the cream filling means they need to be kept cool to maintain freshness and food safety.
- Airtight Container: Place the stuffed strawberries in a single layer in an airtight container. If you need to stack them, place a layer of parchment paper between the layers to prevent them from sticking together or squishing the delicate cream topping. This also helps to protect them from absorbing any odors from other foods in your fridge.
- Short Shelf Life: Unfortunately, due to the nature of fresh strawberries, these delights have a relatively short shelf life once stuffed. The strawberries can start to release their natural juices, which can make the cream filling watery and the berries softer over time. I find they are best enjoyed within 1-2 days of being assembled.
- Best When Fresh: For optimal taste and texture, I always recommend assembling and chilling these beauties no more than a few hours before you plan to serve them. This ensures the strawberries are still firm and juicy, and the lemon cream is perfectly set and fresh.
- Freezing Not Recommended: I do not recommend freezing Lemon Cream Stuffed Strawberries. The texture of both the strawberries (which become mushy) and the cream (which can separate and become grainy) will significantly degrade upon thawing. These are definitely a “make and enjoy” kind of treat!
Final Thoughts
I genuinely believe these Lemon Cream Stuffed Strawberries are an absolute must-try! The way the bright, zesty lemon cream perfectly nestles inside a sweet, juicy strawberry creates an explosion of fresh flavors that truly delights the senses. It’s an effortless dessert that looks incredibly elegant, making it perfect for impressing guests or simply treating yourself to something special. I just adore how simple they are to assemble, yet they deliver such a sophisticated taste experience. Trust me, once you experience the delightful balance of tang and sweetness in these Lemon Cream Stuffed Strawberries, you’ll find yourself reaching for this recipe again and again!

Irresistible Lemon Cream Stuffed Strawberries Recipe
- Total Time: 15 minutes
- Yield: 12 servings
Description
These Lemon Cream Stuffed Strawberries are a delightful dessert that combines the sweetness of fresh strawberries with a zesty lemon cream filling. Perfect for any occasion, they are easy to make and sure to impress your guests!
Ingredients
- Large, firm, vibrant red strawberries
- Full-fat cream cheese, softened to room temperature
- Powdered sugar (confectioners' sugar)
- Heavy cream (or double cream)
- Fresh lemon zest
- Fresh lemon juice
- Non-alcohol vanilla extract
- Optional garnishes: extra lemon zest, fresh mint leaves, finely crushed shortbread cookies
Instructions
- Prepare Your Strawberries: Gently wash all your strawberries under cool running water. Pat them completely dry with paper towels. Hull each strawberry by removing the green stem and the white core from the top, creating a cavity in the center.
- Whip the Heavy Cream: In a clean, chilled mixing bowl, pour your cold heavy cream. Whip the cream on medium-high speed until it forms stiff peaks. Set this aside in the refrigerator.
- Prepare the Lemon Cream Base: In a separate mixing bowl, combine softened cream cheese, powdered sugar, fresh lemon zest, fresh lemon juice, and vanilla extract. Beat these ingredients together until smooth and lump-free.
- Gently Fold the Whipped Cream: Add about a third of the whipped heavy cream to the lemon cream cheese mixture and gently fold it in. Then add the remaining whipped cream and continue to fold until no streaks remain.
- Fill the Strawberries: Transfer the lemon cream to a piping bag fitted with a star tip or use a small spoon to fill each strawberry cavity generously with the cream.
- Chill and Garnish: Arrange the filled strawberries on a serving platter and chill in the refrigerator for at least 30 minutes. Before serving, garnish with extra lemon zest or mint leaves.
- Prep Time: 15 mins
- Cook Time: 0 mins
- Category: Dessert
- Method: No-bake
- Cuisine: American
Nutrition
- Serving Size: 1 stuffed strawberry
- Calories: 50
- Sugar: 5 g
- Sodium: 30 mg
- Fat: 3 g
- Saturated Fat: 2 g
- Unsaturated Fat: 1 g
- Trans Fat: 0 g
- Carbohydrates: 6 g
- Fiber: 1 g
- Protein: 1 g
- Cholesterol: 10 mg
Keywords: Choose the largest, firmest strawberries for the best results. Ensure your cream cheese is at room temperature for a smooth mixture. Use a piping bag for a professional look, and avoid overmixing the whipped cream to maintain airiness.