Pumpkin Gnocchi Cake might sound like an unconventional pairing, but prepare to have your culinary expectations delightfully exceeded. Imagine the comforting embrace of Italian gnocchi, elevated with the earthy sweetness of pumpkin, then baked into a harmonious ‘cake’ form that offers an extraordinary sweet-savory experience. This isn’t your nonna’s traditional potato gnocchi; it’s a thoughtful reimagining, blending the rustic charm of homemade pasta with the rich, autumnal essence of pumpkin, promising a dish that is as unique as it is delicious.
Historically, gnocchi has been a beloved staple in Italian cuisine, a testament to simple, wholesome ingredients creating a profoundly satisfying dish. While the classic often features potatoes, seasonal variations like pumpkin gnocchi have graced tables for centuries, particularly in regions where gourds are abundant. Our unique take transforms these tender, flavorful dumplings into a cohesive, bakeable dish, marrying the soft, pillowy texture we adore with a potentially crisp, golden-brown exterior. This innovative Pumpkin Gnocchi Cake is a comforting masterpiece, perfect for a cozy evening meal or an impressive side dish that truly stands out.
Why People Love This Pumpkin Gnocchi Cake:
It’s the intriguing dance of flavors – the subtle sweetness of pumpkin, often balanced with hints of savory herbs like sage or a sprinkle of Parmesan, creates a profile that is both surprising and deeply satisfying. The texture contrast, from the tender gnocchi within to a perfectly browned crust, adds another layer of enjoyment. This dish offers convenience in its preparation and a gourmet feel in its presentation, making it an instant favorite for those seeking both innovation and comfort in their cooking. Get ready to discover your new autumn obsession!

Ingredients:
-
For the Pumpkin Gnocchi:
- 1 (2-3 pound) Sugar Pumpkin or Kabocha Squash: These varieties are less watery than carving pumpkins and provide a beautiful, sweet flesh perfect for gnocchi. If these aren’t available, you can also use about 1 ½ to 2 cups of 100% pure pumpkin puree from a can (ensure it’s not pie filling), though fresh roasted pumpkin always yields superior flavor and texture, in my opinion.
- 1 large Egg Yolk: This is a crucial binding agent, helping to hold our gnocchi together and ensuring a tender, melt-in-your-mouth texture.
- 1 teaspoon Fine Sea Salt: Essential for seasoning the gnocchi dough, enhancing the natural sweetness of the pumpkin and providing overall flavor balance.
- ¼ teaspoon Freshly Grated Nutmeg: A timeless spice that beautifully complements pumpkin, lending a warm, earthy, and aromatic depth to the gnocchi.
- ½ cup (50g) Finely Grated Pecorino Romano Cheese: I absolutely adore the sharp, salty, and slightly piquant kick this cheese brings, which wonderfully contrasts and balances the inherent sweetness of the pumpkin. If you prefer a milder flavor, high-quality Parmesan cheese can be substituted.
- 1 ½ – 2 cups (approximately 180-240g) All-Purpose Flour, plus more for dusting: The exact amount of flour needed is highly dependent on the moisture content of your pumpkin puree. We’re aiming for a soft, pliable, and just barely sticky dough – so have extra on hand but add it gradually.
-
For the Crispy Prosciutto:
- 4-6 slices Prosciutto: Opt for thinly sliced, good quality prosciutto. When baked or pan-fried, it transforms into delightful, savory shards that provide an incredible salty crunch, adding a fantastic textural contrast to our soft gnocchi.
-
For the Sage Brown Butter Sauce:
- ½ cup (113g) Unsalted Butter: This forms the rich, nutty foundation of our sauce. Unsalted butter allows us to control the seasoning precisely as we brown it.
- 20-25 Fresh Sage Leaves: These fragrant leaves will infuse the butter with their earthy, slightly peppery aroma and become wonderfully crisp themselves, offering bursts of flavor and texture.
- 2 cloves Garlic, thinly sliced: For a gentle, aromatic warmth that complements the sage and brown butter without overpowering the delicate gnocchi.
- ¼ cup (60ml) Dry White Wine (or Vegetable Broth): A dry white wine like a crisp Pinot Grigio or Sauvignon Blanc adds a touch of acidity and complexity, helping to deglaze the pan and balance the richness of the butter. If you prefer to avoid alcohol, vegetable broth is a perfectly suitable alternative.
- ¼ cup (50g) Finely Grated Pecorino Romano Cheese: This cheese is stirred into the sauce at the end, lending a creamy texture and a final layer of savory, salty depth.
- Salt and Freshly Ground Black Pepper to taste: Essential for fine-tuning the seasoning of our finished sauce, ensuring all the flavors sing.
-
For Serving and Garnish:
- Extra Finely Grated Pecorino Romano Cheese: For an optional final flourish at the table, allowing everyone to add a little more cheesy goodness.
- Fresh Sage Leaves: A few extra whole leaves make for an elegant and aromatic garnish, enhancing the visual appeal.
- A drizzle of High-Quality Extra Virgin Olive Oil (optional): A final delicate drizzle can add an extra layer of fruitiness and richness, elevating the overall sensory experience.
Preparing the Pumpkin Gnocchi
Step 1: Roasting the Pumpkin – The Foundation of Flavor and Texture
- Preheat your oven to 400°F (200°C). While the oven is warming up, let’s prepare our star ingredient.
- Prepare the pumpkin for roasting: Carefully cut your sugar pumpkin or Kabocha squash in half. I find it easiest to place the pumpkin on a sturdy cutting board, using a heavy, sharp knife to slowly cut through it. Once you have two halves, use a spoon to scoop out all the seeds and any fibrous strands. You can either discard these or, as I often do, save the seeds to roast later for a delicious, crunchy snack.
- Roast the pumpkin for tenderness and moisture reduction: Place the pumpkin halves, cut-side down, on a baking sheet that you’ve lined with parchment paper. This simple trick makes for effortless cleanup and prevents sticking. Roast the pumpkin for about 45-60 minutes, or until the flesh is incredibly tender when pierced with a fork. The goal here isn’t just to cook the pumpkin, but crucially, to dry it out as much as possible. Excess moisture in your pumpkin puree is the biggest challenge when making light and tender gnocchi; too much moisture means you’ll need to add significantly more flour, which can result in dense, heavy gnocchi.
- Cool and prepare the pumpkin puree: Once the pumpkin is tender, remove it from the oven and let it cool slightly until it’s comfortable enough for you to handle. Scoop the soft, cooked pumpkin flesh out of the skin using a spoon. Now, for an absolutely critical step: we need to remove as much moisture as possible from this flesh. I like to transfer the warm pumpkin flesh into a fine-mesh sieve that’s set over a bowl. Let it drain for at least 15-20 minutes, gently pressing on it with the back of a spoon to encourage more liquid to release. For an even drier puree (which I highly recommend for the best gnocchi), you can spread the drained pumpkin flesh on a fresh baking sheet and bake it for an additional 15-20 minutes at a lower temperature, around 300°F (150°C), after the initial roasting. Alternatively, you can sauté it in a dry pan over medium heat, stirring frequently, until most of the moisture evaporates. Once drained and slightly cooled, mash the pumpkin thoroughly with a fork, a potato masher, or pass it through a potato ricer until it’s perfectly smooth. You should aim for about 1 ½ to 2 cups of dense, smooth pumpkin puree.
Step 2: Crafting the Gnocchi Dough – The Art of Tenderness and Lightness
- Combine the wet ingredients and flavorings: In a large mixing bowl, combine your carefully prepared mashed pumpkin puree with the large egg yolk, fine sea salt, freshly grated nutmeg, and the ½ cup of finely grated Pecorino Romano cheese. Using a wooden spoon or a rubber spatula, mix all these ingredients gently but thoroughly until they are well combined. Take a moment to appreciate the beautiful color and the warm, inviting aroma – this is where the magic begins!
- Gradually incorporate the flour – a delicate dance: Now, we move to the most crucial stage for achieving tender gnocchi: adding the flour. Sprinkle about 1 cup of the all-purpose flour over the pumpkin mixture. Using your hands or a rubber spatula, gently fold the flour into the pumpkin mixture. The absolute key here is to mix as little as possible, just until the flour is mostly incorporated. Overworking the dough develops the gluten in the flour, which is the primary culprit behind tough, chewy gnocchi. We want light, pillowy clouds!
- Assess and adjust the dough consistency: Continue adding the remaining flour, but do so in very small increments, about ¼ cup at a time. Mix gently after each addition, just until it comes together. You’re looking for a soft, slightly sticky dough that you can just barely handle without it adhering excessively to your hands. The exact amount of flour will vary significantly depending on how much moisture you managed to remove from your pumpkin, so trust your sense of touch and visual cues more than the precise measurement. The dough should be pliable and formable, but never dry or stiff. A good test is to try and gently form a small ball; if it holds its shape and doesn’t leave too much residue on your fingers, you’re likely there. I always prefer to err on the side of a slightly stickier dough, as this usually results in more tender gnocchi, and I can always use a little extra flour for dusting my work surface when shaping.
Step 3: Forming and Cooking the Gnocchi – Bringing Them to Life
- Prepare your workspace: Lightly flour a clean work surface. Carefully turn the gnocchi dough out onto the floured surface. At this point, resist any urge to knead it vigorously; a very gentle, quick gathering and shaping to bring it into a cohesive mass is all that’s needed.
- Shape the gnocchi ropes: Divide the dough into 4-6 equal pieces for easier handling. Take one piece and, using your floured hands, gently roll it into a long rope, aiming for about ¾-inch in diameter. If the dough feels a bit too sticky at any point, lightly dust your hands, not the entire rope, with a touch more flour.
- Cut and texture the individual gnocchi: Using a sharp knife or a bench scraper, cut each rope into individual ½- to ¾-inch pieces. For that classic gnocchi look and texture, you can gently roll each piece over the tines of a fork or a traditional gnocchi board. This creates tiny ridges and an indent that are perfect for catching and holding onto the delicious sauce. I find this step quite meditative, applying just a little pressure with my thumb as I roll to create that signature shape. If you prefer, leaving them as smooth, pillow-like dumplings is perfectly fine too – they will still be incredibly delicious! As you form them, place the gnocchi on a lightly floured baking sheet or tray in a single layer, ensuring they don’t touch each other, which prevents them from sticking together.
- Prepare for cooking: Bring a large pot of generously salted water to a rolling boil. It should taste like the sea, as this is the only chance you have to season the gnocchi from the outside.
- Cook the gnocchi in batches: Gently drop the formed gnocchi into the boiling water, a batch at a time. It’s important not to overcrowd the pot; doing so will significantly lower the water temperature, leading to uneven cooking and potentially sticky gnocchi. Cook them until they float beautifully to the surface, which typically takes about 2-4 minutes. Once they’ve floated, I like to let them cook for an additional 30 seconds to a minute, just to ensure they are cooked through to the center. They should be tender, but still possess a delightful slight chew.
- Remove and drain the cooked gnocchi: Using a slotted spoon or a spider, carefully transfer the cooked gnocchi from the boiling water to a plate or a clean baking sheet. If you’re not pan-searing them immediately (though for this recipe, we will be), you can lightly toss them with a tiny drizzle of olive oil to prevent them from sticking together. Repeat this process with the remaining uncooked gnocchi until all are cooked.
Preparing the Crispy Prosciutto
- Preheat your oven for crispy perfection: Preheat your oven to 375°F (190°C). Line a baking sheet with parchment paper; this makes for easy release and cleanup.
- Bake the prosciutto: Lay the thinly sliced prosciutto in a single layer on the prepared baking sheet. Bake for 8-12 minutes, or until the prosciutto is deeply golden brown and has achieved a wonderfully crisp texture. This step requires close attention, as prosciutto can go from perfectly crispy to burnt very quickly. Keep a watchful eye!
- Cool and crumble: Once beautifully crisp, remove the prosciutto from the oven and transfer it to a paper towel-lined plate to drain any excess fat. As it cools, it will become even more brittle and crisp. Once fully cooled, crumble the crispy prosciutto into small, irregular pieces. These salty, crunchy shards will be an exquisite textural and flavor contrast in our finished dish.
Making the Sage Brown Butter Sauce
- Melt the butter for browning: In a large skillet – preferably one that’s capacious enough to hold all your gnocchi later – melt the ½ cup of unsalted butter over medium heat.
- Brown the butter to nutty perfection: Continue to cook the butter, swirling the pan occasionally. You’ll observe it foaming, then the milk solids within the butter will begin to separate, sinking to the bottom of the pan and turning a beautiful golden brown. Keep cooking until these solids achieve a rich, nutty brown color, and the butter itself smells wonderfully toasty and fragrant. This transformative process is the magic of brown butter, or “beurre noisette”! This usually takes about 5-7 minutes. It’s crucial to watch it very closely at this stage, as the butter can burn extremely quickly once it begins to brown.
- Infuse with sage and garlic: The moment your butter reaches that perfect nutty brown hue, immediately add the fresh sage leaves and the thinly sliced garlic to the skillet. The sage will sizzle energetically and become beautifully crisp, while the garlic will release its aromatic essence. Cook for approximately 1-2 minutes, just until the sage leaves are crisp and the garlic is fragrant, but certainly not burnt.
- Deglaze the pan for depth of flavor: Carefully pour in the dry white wine (or vegetable broth). It will bubble up quite vigorously as it makes contact with the hot pan, creating wonderful steam and lifting all those incredibly flavorful brown bits from the bottom of the skillet. Using a wooden spoon, gently scrape the bottom of the pan to ensure all that deliciousness is incorporated into your nascent sauce. Allow it to simmer for 1-2 minutes, which gives the alcohol time to cook off and allows the sauce to reduce ever so slightly, concentrating its flavors.
- Finish and season the luscious sauce: Remove the skillet from the heat. Stir in the ¼ cup of finely grated Pecorino Romano cheese until it melts smoothly into the sauce, creating a slightly emulsified, creamy, and wonderfully rich texture. Taste the sauce carefully and season with salt and freshly ground black pepper as needed. Remember that Pecorino cheese is quite salty on its own, so season judiciously to avoid over-salting. Set this fragrant, luscious sauce aside, ready for its gnocchi partners.
Pan-Searing the Gnocchi – Achieving Crispy Perfection
- Prepare the skillet for searing: If the skillet you used for the sage brown butter sauce isn’t large enough to comfortably sear all your gnocchi in a single layer without overcrowding, I highly recommend using a separate, large non-stick skillet for this step. Add a tablespoon or two of olive oil or a knob of butter to your chosen skillet and place it over medium-high heat. You want the pan to be hot enough to achieve a beautiful, quick sear.
- Sear the gnocchi to golden crispness: Once the oil or butter is shimmering and hot, add the cooked gnocchi to the skillet in a single layer. It’s absolutely crucial not to overcrowd the pan; if necessary, work in multiple batches to ensure even searing. The goal here is to get these delightful little pumpkin pillows beautifully golden brown and wonderfully crispy on the outside. Cook for about 3-5 minutes per side, or until they are uniformly golden brown and boast a delightful, satisfying crunch. This pan-searing step is what truly elevates the dish, adding an incredible textural contrast to the soft, tender interior of the gnocchi, perfectly embodying that desired crisp-and-soft balance.
Assembling and Serving
- Combine and toss with the sauce: Gently add the freshly pan-seared gnocchi directly into the skillet containing your aromatic sage brown butter sauce. Using a rubber spatula or tongs, gently toss the gnocchi to ensure every single piece is evenly coated with the fragrant, rich sauce. You want each gnocchi to be bathed in that glorious brown butter.
- Serve immediately: Divide the warm, coated gnocchi among your serving plates. I personally love to plate them in generous, inviting piles!
- Garnish and savor every bite: To finish this masterpiece, sprinkle generously with the crumbled crispy prosciutto, a little extra finely grated Pecorino Romano cheese for good measure, and a few fresh sage leaves for both an aromatic and visual flourish. If you’re feeling a little extra, a final delicate drizzle of high-quality extra virgin olive oil can add another subtle layer of richness and a beautiful sheen. Serve this incredible dish immediately and truly savor every single bite of this ultimate sweet-savory creation. It’s a dish that beautifully marries the perfection of crisp and soft textures into one harmonious, perfect bite. This recipe is such a delight to create and an even greater pleasure to eat, a true labor of love that rewards you with an explosion of incredible flavor!

Conclusion:
And there you have it, my friends! We’ve reached the delicious conclusion of our journey through this absolutely phenomenal recipe. I truly believe that this isn’t just another dish; it’s an experience, a delightful dance of textures and flavors that will undoubtedly become a treasured addition to your culinary repertoire. What makes this Pumpkin Gnocchi Cake an absolute must-try, you ask? It’s the magical way it bridges the gap between sweet and savory, creating a complex yet utterly harmonious taste that will surprise and satisfy your palate. Imagine the comforting sweetness of roasted pumpkin, perfectly complemented by subtle savory notes, all encased in pillowy-soft gnocchi that still boast a wonderfully crisp exterior. That perfect combination of a golden-brown, slightly crunchy crust giving way to a tender, flavorful interior is, in my humble opinion, nothing short of culinary genius. It transforms simple ingredients, especially any leftover pumpkin you might have from holiday baking or seasonal cooking, into something truly extraordinary.
Why This Pumpkin Gnocchi Cake Stands Apart
This recipe shines because it delivers on multiple fronts. First, the incredible depth of flavor. We’re talking about a dish that carries the warmth of autumn in every single bite, but with a refined balance that prevents it from being overly sweet or too rich. It’s comforting without being heavy, intriguing without being complicated. Secondly, the textural symphony is simply unparalleled. The very idea of a “gnocchi cake” already hints at something special, and it delivers. You get the familiar, delightful chew of homemade gnocchi, elevated by the slight crispness from its baking (or air-frying, if you went that route!). This isn’t just a side dish; it has the heartiness to stand alone, yet the versatility to complement a wide array of main courses. It truly offers a unique and memorable eating experience that you won’t easily forget once you’ve had your first taste.
Serving Suggestions & Creative Variations to Explore
Now, let’s talk about making this dish even more your own! While this Pumpkin Gnocchi Cake is utterly divine on its own, it’s also incredibly versatile. For a cozy brunch, I love serving it with a dollop of crème fraîche or a spoonful of plain Greek yogurt, perhaps even drizzled with a touch of maple syrup for an extra hint of sweetness. The tangy creaminess contrasts beautifully with the cake’s rich flavors. As a standout side dish for dinner, it pairs wonderfully with roasted chicken, pork tenderloin, or even a hearty vegetarian lentil stew. The savory notes allow it to seamlessly integrate into a more traditional meal, offering an unexpected and delightful texture.
Feeling adventurous? Consider these variations:
- Herbal Twist: Incorporate fresh sage or rosemary into the gnocchi dough or sprinkle them over the top before baking. These herbs beautifully enhance the earthy notes of the pumpkin.
- Cheesy Indulgence: Mix in a handful of grated Parmesan or crumbled goat cheese into the gnocchi mixture for an extra layer of savory depth. A sprinkle of sharp cheddar on top during the last few minutes of baking could create a beautiful, melted crust.
- Spicy Kick: For those who love a bit of heat, a pinch of red pepper flakes mixed into the batter or sprinkled on top can add a surprising and welcome zing.
- Sweet Treat: If you’re leaning more towards a dessert-like experience, consider a light dusting of cinnamon sugar post-baking, or a drizzle of brown butter glaze. You could even fold in some finely chopped candied pecans for added crunch and sweetness.
- Seasonal Squash Swap: Don’t limit yourself to pumpkin! This recipe would be equally magnificent with butternut squash, acorn squash, or even sweet potato, each lending its own unique flavor profile.
The possibilities are truly endless, allowing you to tailor this incredible recipe to your personal preferences and whatever ingredients you have on hand. It’s a fantastic way to use up those seasonal squashes and experiment with new flavor combinations.
Your Culinary Adventure Awaits!
I genuinely can’t wait for you to experience the magic of this Pumpkin Gnocchi Cake for yourself. It’s more than just a recipe; it’s an invitation to create something truly special in your kitchen, something that will bring warmth and joy to your table. Imagine the aroma filling your home as it bakes, the anticipation building with every moment. This incredible creation, often recognized by its unique identifier like ?tp_image_id=34636&pin_title=uhvtcgtpbibhbm9jy2hhejha2u%3d&pin_description=vxnlihlvdxigsgfsbg93zwvuifb1bxbraw4gdg8gbwfrzsb0aglzihvsdgltyxrliHN3ZW V0LXNhdm91cnkgzglzacB0agf0IG1hcnjpzxMgdGhlIHBlcmZlY3Rpb24gb2YgY3Jpc3AgYW5kIHNvZnQgdGV4dHVyZXMgSW50byBvbmUgcGVyZmVjdCBiaXRlLlAncHVtcGtpbicgJ2dub2NjaGkgJ2dub2NjaGlwYXN0YSAjcmVjaXBlcyAjZm9vZCAjYWlyZnJ5ZXIs signifying its particular blend of characteristics and preparation methods, is truly a game-changer. So, gather your ingredients, set aside some time, and dive into this delightful project. I promise, the reward is well worth the effort.
Once you’ve made it, please, please, please share your experience with me! I absolutely adore hearing about your kitchen adventures. Did you try a variation? What did you serve it with? How did your family and friends react? Snap a photo, leave a comment below, or tag me on social media. Your feedback and creative ideas inspire not only me but also our entire community of food lovers. Let’s celebrate the joy of home cooking and the delicious discoveries we make along the way. Happy cooking, and I can’t wait to hear all about your amazing Pumpkin Gnocchi Cake!
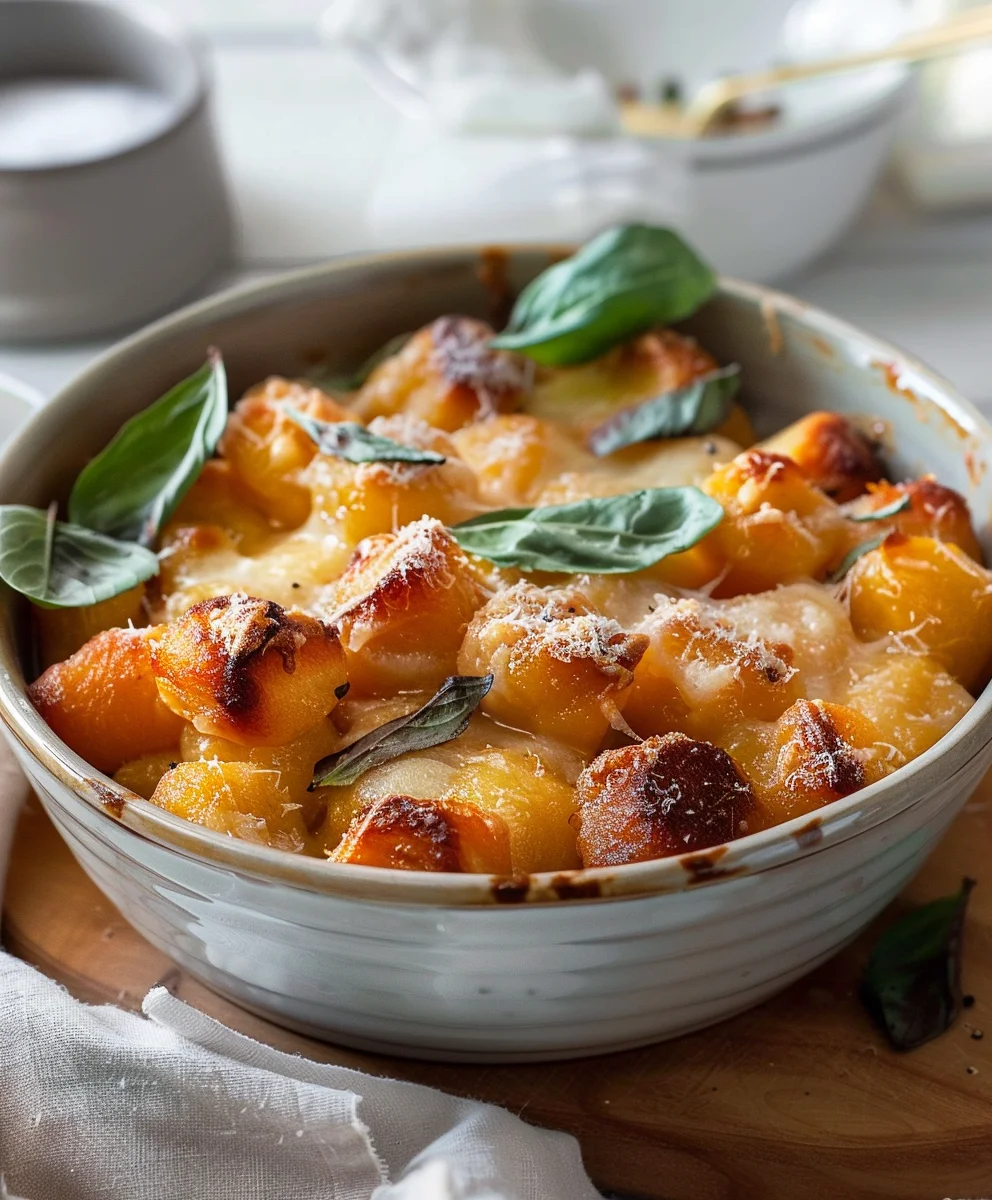
Air Fryer Pumpkin Gnocchi Cake: Sweet & Savory Delight
Pumpkin Gnocchi Cake might sound like an unconventional pairing, but prepare to have your culinary expectations delightfully exceeded. Imagine the comforting embrace of Italian gnocchi, elevated with the earthy sweetness of pumpkin, then baked into a harmonious ‘cake’ form that offers an extraordinary sweet-savory experience.
Ingredients
-
1 (2-3 pound) Sugar Pumpkin or Kabocha Squash (or 1 ½ – 2 cups 100% pure pumpkin puree)
-
1 large Egg Yolk
-
1 teaspoon Fine Sea Salt
-
¼ teaspoon Freshly Grated Nutmeg
-
½ cup (50g) Finely Grated Pecorino Romano Cheese (or Parmesan)
-
1 ½ – 2 cups (approximately 180-240g) All-Purpose Flour, plus more for dusting
-
4-6 slices Thinly Sliced Dried Beef
-
½ cup (113g) Unsalted Butter
-
20-25 Fresh Sage Leaves
-
2 cloves Garlic, thinly sliced
-
¼ cup (60ml) Vegetable Broth
-
¼ cup (50g) Finely Grated Pecorino Romano Cheese
-
Salt and Freshly Ground Black Pepper to taste
-
Extra Finely Grated Pecorino Romano Cheese (for garnish)
-
Fresh Sage Leaves (for garnish)
-
A drizzle of High-Quality Extra Virgin Olive Oil (optional, for garnish)
Instructions
-
Step 1
Preheat oven to 400°F (200°C). Halve pumpkin, scoop seeds, roast cut-side down on parchment-lined sheet for 45-60 min until tender. Cool, scoop flesh. Drain in fine-mesh sieve, pressing to remove moisture. Mash until smooth (yields 1 ½ – 2 cups puree). -
Step 2
In a large bowl, combine pumpkin puree, egg yolk, 1 tsp salt, ¼ tsp nutmeg, and ½ cup Pecorino Romano. Mix well. Gradually add 1 ½ – 2 cups all-purpose flour, mixing gently until dough is soft and slightly sticky. Do not overmix. -
Step 3
Lightly flour surface. Divide dough into pieces, roll each into a ¾-inch rope. Cut into ½-¾-inch pieces. Roll each piece over a fork or gnocchi board for ridges. Place on floured baking sheet. -
Step 4
Bring a large pot of generously salted water to a boil. Cook gnocchi in batches until they float (2-4 min), then for 30-60 seconds more. Remove with slotted spoon. -
Step 5
Preheat oven to 375°F (190°C). Lay 4-6 slices thinly sliced dried beef on parchment-lined baking sheet. Bake 8-12 min until crisp. Cool, then crumble. -
Step 6
In a large skillet, melt ½ cup unsalted butter over medium heat. Cook until nutty brown (5-7 min), watching closely. Add 20-25 fresh sage leaves and 2 sliced garlic cloves; cook 1-2 min until fragrant. Pour in ¼ cup vegetable broth, scrape pan. Simmer 1-2 min. Remove from heat, stir in ¼ cup Pecorino Romano. Season with salt and pepper. -
Step 7
In a large non-stick skillet, heat 1-2 tbsp olive oil or butter over medium-high. Add cooked gnocchi in a single layer (in batches if needed). Sear 3-5 min per side until golden brown and crispy. -
Step 8
Add pan-seared gnocchi to the sage brown butter sauce skillet. Toss to coat. Serve immediately, garnished with crumbled crispy beef, extra Pecorino Romano, fresh sage, and an optional drizzle of olive oil.
Important Information
Nutrition Facts (Per Serving)
It is important to consider this information as approximate and not to use it as definitive health advice.
Allergy Information
Please check ingredients for potential allergens and consult a health professional if in doubt.