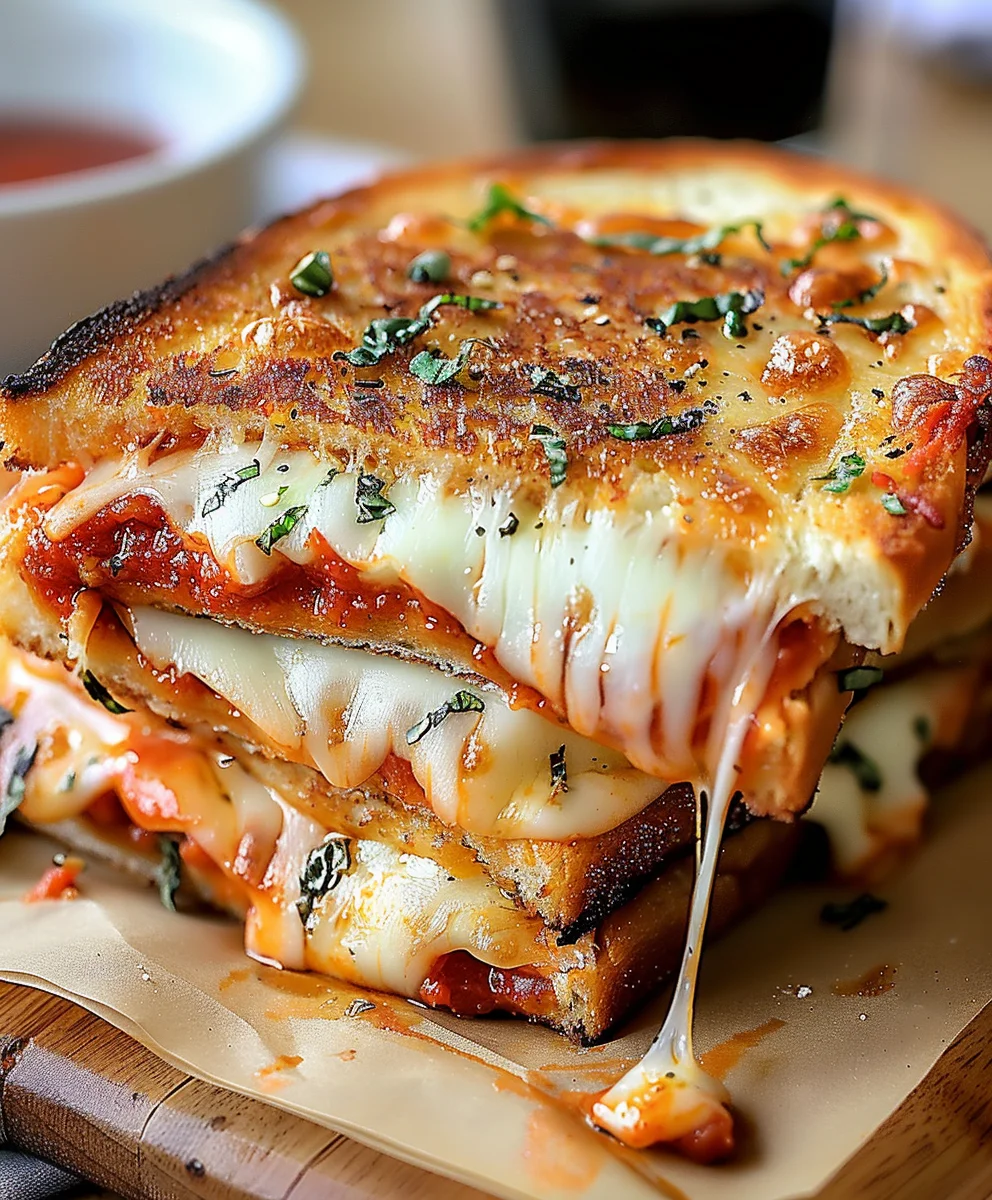
Pizza Grilled Cheese combines two of the world’s most beloved comfort foods into one irresistible package. Imagine the unparalleled joy of crispy, buttery bread encasing a cascade of molten cheese, now elevated with the zesty kick of marinara, savory pepperoni, and aromatic herbs. This ingenious creation takes the familiar, satisfying warmth of a classic grilled cheese sandwich and infuses it with the vibrant, celebratory essence of your favorite pizza.
While the grilled cheese has been a humble staple in American kitchens for generations, and pizza boasts a rich heritage tracing back to the bustling streets of Naples, this brilliant culinary fusion is a modern testament to inventive home cooking. I’ve found that the sheer simplicity combined with the explosion of familiar yet exciting flavors is precisely why the Pizza Grilled Cheese has quickly become a sensation. It’s a dish that not only satisfies a deep craving for comfort but also sparks a delightful sense of culinary adventure with its perfect balance of tangy sauce, savory fillings, and gooey, melted cheese. Perfect for a quick weeknight dinner, a fun lunch, or even a nostalgic weekend treat, I am confident you’ll understand why this delightful twist is adored by so many.

Ingredients:
- For the Sandwiches:
- 8 slices of your favorite sturdy bread, such as sourdough, brioche, or a good quality artisan white bread. I find thicker slices hold up best to all the delicious fillings.
- 4 tablespoons unsalted butter, softened, or 4 tablespoons mayonnaise. I often use mayonnaise for an incredibly golden and crispy exterior, but butter is a classic for a reason!
- 1 cup shredded whole milk mozzarella cheese. This is crucial for that classic pizza stretch!
- 1/2 cup shredded provolone cheese. It adds a wonderful depth of flavor that complements the mozzarella beautifully.
- 1/4 cup finely grated Parmesan or Pecorino Romano cheese. Just a little bit to enhance that savory, umami punch.
- 1/2 cup pizza sauce or marinara sauce. Use your favorite brand, or a simple homemade one works wonders.
- 1/4 cup mini pepperonis or regular pepperonis, quartered. You can never go wrong with a classic pepperoni!
- Optional Additions (for ultimate customization!):
- 1/4 teaspoon garlic powder or onion powder, mixed into the softened butter/mayonnaise, or sprinkled directly onto the cheese layers.
- 1/4 teaspoon dried oregano or Italian seasoning, sprinkled onto the sauce or cheese.
- Pinch of red pepper flakes for a little kick.
- A few fresh basil leaves, torn, to add after grilling for a burst of freshness.
- Cooked crumbled sausage or finely diced cooked bacon bits.
- Finely diced bell peppers, mushrooms, or black olives (make sure these are well-drained to avoid making your sandwich soggy).
- A dollop of ricotta cheese on one side of the bread before adding other cheeses for a creamy surprise.
Gathering and Preparing Your Ingredients
Before we dive into the fun part of assembling our incredible Pizza Grilled Cheese, let’s make sure everything is prepped and ready to go. This mise en place approach ensures a smooth and enjoyable cooking experience, preventing any last-minute scrambling while your pan is heating up. Trust me, you don’t want to be fumbling for cheese while your bread is browning!
- First, take your butter out of the fridge a little while before you plan to start cooking. We want it nice and softened, almost spreadable, but not melted. If you’re using mayonnaise, you can skip this step, as it’s typically ready to go straight from the jar. A smooth, even spread is key to that beautiful golden crust we’re aiming for.
- Next, let’s get our cheeses ready. If you’re using pre-shredded cheese, fantastic! If you’re shredding your own from blocks, which I highly recommend for superior meltiness, now’s the time to do it. Combine the shredded mozzarella, provolone, and grated Parmesan/Pecorino Romano in a bowl. This mixture will be our cheesy, gooey core. Having it pre-mixed makes layering so much easier and ensures an even distribution of flavor.
- Prepare your chosen pizza sauce. If it’s a jarred sauce, simply open it up. If you’re using a homemade batch, make sure it’s at room temperature or slightly warmed; a cold sauce can cool down your sandwich too much, inhibiting proper cheese melt.
- If you’re using mini pepperonis, great! If you have larger ones, I like to quarter them. This ensures you get a little bit of pepperoni in every single bite, maximizing that savory, slightly spicy flavor throughout your Pizza Grilled Cheese.
- For any optional additions like garlic powder, onion powder, oregano, or red pepper flakes, have them within easy reach. If you’re adding fresh basil, give it a quick wash and a gentle tear just before assembly. If you’re incorporating cooked meats or finely diced vegetables, ensure they are cooked, cooled, and thoroughly drained. Excess moisture is the enemy of a crispy grilled cheese!
- Lay out your bread slices on a clean work surface. Having everything lined up and ready allows for efficient sandwich assembly. I prefer a slightly thicker slice of bread for this recipe, as it stands up well to the generous fillings without getting soggy too quickly.
Assembling the Perfect Pizza Grilled Cheese
Now for the fun part: building these flavor-packed beauties! This is where we transform simple ingredients into a truly extraordinary Pizza Grilled Cheese. Pay attention to the layering, as it makes a difference in both the cooking and the eating experience.
- Take your softened butter or mayonnaise and generously spread it on one side of each of your bread slices. I mean really get in there! This is the side that will come into direct contact with the hot pan, and it’s what’s going to give us that unbelievably crispy, golden-brown crust. Ensure an even coating right to the edges. If I’m feeling extra indulgent, I sometimes mix a pinch of garlic powder or dried herbs into my butter or mayo at this stage for an added flavor boost right into the crust.
- Lay four of the buttered/mayonnaised bread slices (butter/mayo side down) onto your clean work surface. These will be the bases of our sandwiches.
- On each of these four slices, sprinkle about 1/4 of your mixed cheese blend. We’re starting with cheese directly on the bread, which acts as a protective barrier against the sauce, helping to prevent a soggy bottom. It also creates an initial layer of gooey goodness.
- Next, take about two tablespoons of your pizza sauce and spread it evenly over the cheese layer on each bread slice. Don’t go too heavy on the sauce here, as too much moisture can lead to a less-than-crispy sandwich. We’re aiming for a balanced flavor, not a soggy mess. If you want a little extra zest, a sprinkle of dried oregano or red pepper flakes can go on top of the sauce at this point.
- Now, distribute your mini pepperonis (or quartered regular pepperonis) evenly over the sauce on each sandwich base. Try to ensure the pepperonis are mostly within the bounds of the bread slice so they don’t fall out during grilling. If you’re adding any other optional fillings like cooked sausage, mushrooms, or olives, this is the time to add them on top of the pepperonis. Again, ensure any vegetables are very finely diced and well-drained.
- Sprinkle another generous layer of your mixed cheese blend over the pepperonis and other fillings. This second layer of cheese acts as the “glue” that holds everything together and provides that fantastic cheese pull we all love in a great grilled cheese or pizza.
- Finally, place the remaining four slices of bread on top of your assembled sandwiches, with the buttered/mayonnaised side facing upwards. Give each sandwich a gentle press to compact the layers slightly. This helps all the ingredients meld together and prepares them for cooking. At this point, you have four perfectly assembled Pizza Grilled Cheese sandwiches, ready for the heat!
The Grilling Process: Achieving Golden Perfection
This is where the magic happens! Cooking your Pizza Grilled Cheese correctly is paramount to achieving that coveted golden-brown, crispy exterior and a molten, gooey interior. Temperature control is your best friend here, so let’s get cooking with care.
- Heat a large non-stick skillet or cast-iron pan over medium-low heat. This is a crucial step! We’re starting with medium-low heat, not medium or high. Patience is key here. You want the pan to heat gradually and maintain a consistent, gentle temperature. If the pan is too hot, your bread will burn before the cheese has a chance to fully melt and the flavors to properly meld. Give the pan a good 2-3 minutes to come up to temperature.
- Once your pan is gently heated, carefully place one or two of your assembled Pizza Grilled Cheese sandwiches into the pan, buttered/mayonnaised side down. Avoid overcrowding the pan; you want enough space between the sandwiches for even cooking and easy flipping.
- Cook the sandwiches for about 4-6 minutes on the first side. During this time, resist the urge to constantly peek or lift the sandwich. Let it cook undisturbed. You’re looking for a beautiful, deep golden-brown crust. You can gently lift an edge with a spatula after about 4 minutes to check the color. If it’s not golden enough, give it another minute or two. The goal is a rich, even color, indicating perfect crispness.
- While the first side is cooking, the heat is slowly penetrating the sandwich, starting to melt the cheese and warm the fillings. For an even melt and to ensure all the layers become a harmonious whole, I like to gently press down on the sandwiches with a spatula during this phase. Don’t press too hard, just enough to ensure good contact with the pan and to encourage the cheese to spread out slightly. This also helps to compact the sandwich, making it easier to handle.
- Once the first side is perfectly golden-brown, carefully flip the sandwiches over using a wide spatula. Now we’re cooking the second side.
- Continue to cook for another 4-6 minutes, or until the second side is also beautifully golden-brown and crispy. Again, gently press down occasionally. This prolonged, gentle cooking ensures that the cheese inside is completely melted and wonderfully gooey, and that all the elements of your Pizza Grilled Cheese are piping hot. You might even see a little cheese begin to ooze out, which is a glorious sign!
- Remove the cooked sandwiches from the pan and place them on a cutting board or a wire rack. Don’t rush into cutting them immediately!
Finishing Touches and Serving Your Masterpiece
You’ve done the hard work, and now it’s time to enjoy the fruits of your labor. A few final steps will ensure your Pizza Grilled Cheese is served at its absolute best.
- Allow the sandwiches to rest for about 1-2 minutes before cutting. This short resting period is crucial. It allows the incredibly hot, molten cheese to set up just slightly, preventing it from gushing out uncontrollably when you slice into it. It also helps the bread reabsorb some of its moisture, resulting in a more stable and pleasant eating experience. Trust me, it’s worth the short wait for a cleaner, more enjoyable bite.
- Using a sharp, serrated knife, carefully slice each Pizza Grilled Cheese sandwich in half. I typically cut them diagonally; there’s just something inherently satisfying about a triangular grilled cheese! The serrated knife will cut through the crispy crust and the gooey interior without squishing the sandwich.
- If you have any fresh basil, now is the perfect time to gently tear a few leaves and sprinkle them over the cut sides of your sandwiches for a burst of fresh, aromatic flavor that truly elevates the pizza experience.
- Serve your piping hot Pizza Grilled Cheese immediately! They are best enjoyed fresh off the pan.
- For an ultimate meal, I love serving these with an extra side of warm marinara sauce for dipping – it’s like a built-in dipping experience! A simple green salad or a bowl of tomato soup makes for a fantastic accompaniment, turning this comforting sandwich into a complete and satisfying meal.
Tips for Pizza Grilled Cheese Success and Variations
Creating the perfect Pizza Grilled Cheese is an art, but it’s an accessible one! Here are some invaluable tips to ensure your success, along with a plethora of variations to keep your grilled cheese game exciting and fresh.
Choosing the Right Bread: The Foundation of Flavor and Texture
The bread you choose is paramount. While I recommend a sturdy artisan white, sourdough, or brioche, let’s elaborate.
- Sourdough: Offers a delightful tang that cuts through the richness of the cheese and sauce. Its firm texture holds up exceptionally well.
- Brioche: For those who love a hint of sweetness and an incredibly tender crumb. It browns beautifully and provides a luxurious mouthfeel, though you’ll need to watch it closely as it can brown faster due to its sugar content.
- Artisan White Bread: A great all-rounder, offering a neutral canvas that allows the pizza flavors to shine, with a good crumb structure for stability.
- Thicker Slices: Regardless of type, opt for slices that are at least 1/2 to 3/4 inch thick. Thinner slices risk getting soggy or falling apart under the weight of the generous fillings.
- Avoid overly porous or soft breads: While delicious on their own, very airy breads can become too compressed or absorb too much moisture from the sauce, leading to a less-than-ideal texture.
Mastering Your Cheese Blend: Beyond Mozzarella
While mozzarella and provolone are classic, don’t be afraid to experiment to find your ultimate blend.
- Fontina: Adds a nutty, slightly fruity flavor and an incredible melt.
- Gruyere: For a more complex, savory, and sophisticated profile.
- Smoked Gouda: If you love a smoky depth, this cheese is a fantastic addition.
- Ricotta: For a creamy texture, dollop small amounts of full-fat ricotta onto one side of the bread before adding other cheeses. It creates pockets of creamy goodness.
- Sharp Cheddar: While not traditionally “pizza,” a small amount can add a pungent sharpness that some find irresistible.
- Fresh Mozzarella: If using fresh mozzarella, pat it very dry with paper towels and tear it into small pieces to prevent excess moisture from making your sandwich soggy.
Sauce Savvy: The Heart of Your Pizza Grilled Cheese
The sauce is where the “pizza” truly comes to life.
- Marinara vs. Pizza Sauce: Marinara is typically a bit thinner and brighter, while pizza sauce is often thicker and more concentrated. Both work, but ensure your sauce isn’t too watery. If your sauce is very thin, you might want to reduce it slightly on the stovetop before using to thicken it up.
- Pesto: For a vibrant, herbaceous twist, swap out half or all of the marinara for a good quality pesto.
- Roasted Red Pepper Sauce: A creamy, smoky, and slightly sweet alternative that offers a unique flavor profile.
- Spicy Sauce: Mix in a pinch of red pepper flakes directly into your sauce for an extra kick.
Innovative Toppings for Your Pizza Grilled Cheese
The world is your oyster when it comes to customizing your Pizza Grilled Cheese. Just remember the golden rule: keep additions finely diced, cooked (if necessary), and well-drained to avoid excess moisture.
- Vegetarian Power-Ups:
- Finely diced sautéed mushrooms or caramelized onions (ensure they are very dry).
- Sun-dried tomatoes (oil-packed, drained and chopped).
- Artichoke hearts (canned, drained, and chopped).
- Black or green olives, thinly sliced.
- Fresh spinach, wilted and squeezed dry.
- Meat Lover’s Dreams:
- Cooked and crumbled Italian sausage (mild or hot).
- Finely diced cooked ham.
- Crispy bacon bits.
- Shredded cooked chicken (tossed with a little buffalo sauce for a “buffalo chicken pizza grilled cheese”).
- Herb and Spice Boosters:
- Garlic confit, thinly sliced.
- Fresh or dried oregano, basil, or thyme.
- A sprinkle of nutritional yeast for an extra cheesy, umami flavor.
Alternative Cooking Methods: Beyond the Stovetop
While the skillet method is my favorite for that classic grilled cheese crust, here are other ways to cook your masterpiece:
- Panini Press: Assemble your sandwich, butter or mayo the outside, and press for 4-6 minutes until golden brown and cheese is melted. This gives you those signature grill marks and ensures even cooking. Adjust pressure to avoid squeezing out too much filling.
- Oven Baking (with broiler finish): If making a large batch, arrange buttered sandwiches on a baking sheet. Bake at 375°F (190°C) for 10-15 minutes, flipping halfway, until golden. For extra crispness and melty goodness, finish under the broiler for 1-2 minutes per side (watch very carefully to prevent burning!).
- Air Fryer: Butter or mayo the outside, then air fry at 350°F (175°C) for 8-12 minutes, flipping halfway, until golden and crispy. This method is surprisingly effective for a quick, crispy sandwich with minimal oil.
Avoiding Common Pitfalls: Troubleshooting Your Pizza Grilled Cheese
Even the best cooks run into issues sometimes. Here’s how to steer clear of common grilled cheese woes:
- Soggy Bread: Too much sauce, watery fillings, or not enough initial cheese barrier. Ensure fillings are well-drained and don’t overload with sauce. The initial cheese layer directly on the bread is your friend.
- Burnt Exterior, Unmelted Interior: The most common problem! Your pan is too hot. Cook on medium-low heat for longer. Patience is your secret ingredient.
- Fillings Falling Out: Overfilling the sandwich, or not pressing gently enough during assembly and cooking. Keep fillings within the bread’s perimeter.
- Uneven Browning: Not enough butter/mayo, or uneven heat distribution in your pan. Ensure a generous, even coating of fat and let your pan heat up thoroughly before adding sandwiches. Rotate the sandwich slightly in the pan if you notice hot spots.
By keeping these tips in mind, you’re not just making a sandwich; you’re crafting an experience. Enjoy every single, delicious bite of your homemade Pizza Grilled Cheese!
Conclusion:
Well, my friends, we’ve reached the end of our delicious journey, and I genuinely hope you’re feeling as inspired as I am to whip up this incredible creation. This isn’t just another sandwich; it’s a culinary masterpiece that brilliantly fuses two of the world’s most beloved comfort foods into one irresistible package. Think about it: the gooey, stretchy cheese, the tangy kiss of marinara, and your favorite pizza toppings, all nestled between perfectly toasted, buttery bread. It’s an experience that goes beyond mere satisfaction; it delivers pure, unadulterated joy in every single bite. If you’ve ever found yourself torn between ordering a pizza or making a grilled cheese, this recipe is your ultimate solution, offering the best of both worlds without any compromise. It’s quick enough for a weeknight, impressive enough for a casual gathering, and universally appealing to taste buds of all ages. Truly, the Pizza Grilled Cheese is a game-changer you simply must experience.
When it comes to serving, this delightful sandwich is incredibly versatile. While it’s utterly fantastic on its own, a simple bowl of warm tomato soup makes for a classic and comforting pairing, perfect for a chilly evening or a cozy lunch. The rich, acidic soup beautifully complements the cheesy, savory notes of the sandwich. Alternatively, for a lighter touch, a crisp, fresh side salad tossed in a vinaigrette can provide a welcome counterpoint, cutting through the richness and adding a vibrant crunch. Don’t forget the dipping potential! A small ramekin of extra marinara sauce on the side is always a hit, allowing for an even deeper dive into that classic pizza flavor. Some people even enjoy dipping it in a creamy ranch dressing or a spicy sriracha mayo for an extra kick. Consider serving it with a handful of potato chips or a side of crispy oven-baked fries to round out a truly satisfying meal that feels both gourmet and delightfully nostalgic. For a more substantial meal, you could even serve it alongside some roasted vegetables like asparagus or broccoli, balancing the richness with fresh, earthy flavors. The possibilities are truly endless, making this sandwich a fantastic centerpiece for any meal, any day of the week.
Endless Possibilities for Customization
Now, let’s talk about making this recipe truly your own, because the beauty of the Pizza Grilled Cheese lies in its adaptability. This isn’t a one-size-fits-all kind of meal; it’s a canvas waiting for your personal culinary artistry. Start with your cheese blend. While mozzarella is a must for that iconic stretch, don’t hesitate to experiment with other melting cheeses. A touch of sharp provolone will add depth, a sprinkle of smoked gouda will introduce a fantastic smoky note, or even some pepper jack for a subtle spicy kick. For the meat lovers, the sky’s the limit. Classic pepperoni is always a winner, but cooked and crumbled sausage, crispy bacon bits, thinly sliced ham, or even shredded leftover chicken can elevate your sandwich to new heights. If you’re leaning towards a vegetarian option, sautéed mushrooms, caramelized onions, thinly sliced bell peppers, fresh spinach, or even a handful of black olives can bring wonderful textures and flavors. Remember to cook down any high-moisture vegetables beforehand to prevent a soggy sandwich. Spice it up with a pinch of red pepper flakes, or add a more aromatic touch with dried oregano and basil layered directly onto the cheese. You can even swap out the classic marinara for a pesto spread for a fresh, herbaceous twist, or a roasted red pepper sauce for something a little different. The bread choice also makes a huge difference; while a good quality white or sourdough is excellent, a hearty ciabatta, a slightly sweet brioche, or even a marbled rye can completely transform the experience. Imagine a garlic butter spread on the outside for an extra layer of flavor – pure genius! Don’t be afraid to experiment with different seasoning blends on the buttered exterior before grilling, like Italian seasoning or a sprinkle of garlic powder and onion powder. For an ultimate indulgence, consider adding a thin layer of cream cheese before the marinara for an extra creamy texture, or a drizzle of balsamic glaze after grilling for a sophisticated tang. Each small change opens up a whole new world of flavor profiles, ensuring that your Pizza Grilled Cheese is exactly how you like it, every single time.
So, what are you waiting for? This recipe is simple, satisfying, and bursting with flavor that I promise will make your taste buds sing. I wholeheartedly encourage you to dive into your kitchen, gather your ingredients, and give this incredible Pizza Grilled Cheese a try tonight. Don’t be shy about experimenting with the variations I’ve suggested, or even coming up with your own unique combinations. That’s where the real fun begins! Once you’ve savored every glorious bite, I would absolutely love to hear all about your experience. Did you add extra garlic? Did you use a special blend of cheeses? What was your favorite part? Did you find a new unexpected topping that blew your mind? Please, share your stories, your photos, and your triumphs in the comments section below, or tag me on social media. Your culinary adventures inspire me and our entire community of food lovers. Let’s make some delicious memories together and celebrate the joy of good food!
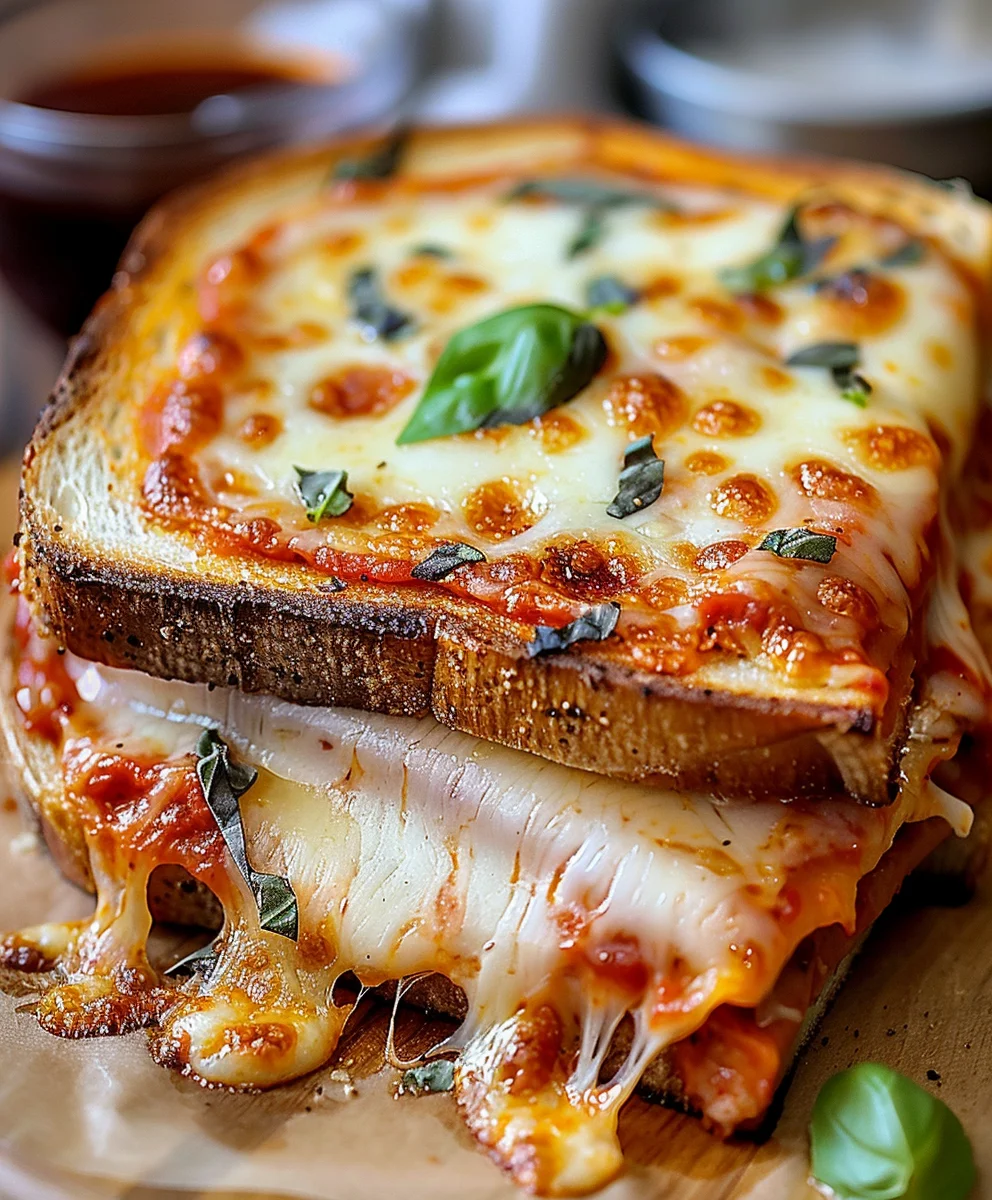
Pizza Grilled Cheese
Experience the ultimate comfort food mashup with Pizza Grilled Cheese! Crispy, buttery bread embraces molten cheese, zesty marinara, savory turkey pepperoni, and aromatic herbs for an irresistible twist on a classic.
Ingredients
-
4 slices of bread (sourdough, white, or whole wheat)
-
2 tbsp butter, softened
-
½ cup marinara or pizza sauce
-
1 cup shredded mozzarella cheese
-
¼ cup grated Parmesan cheese
-
12 slices of turkey pepperoni
-
½ tsp garlic powder
-
½ tsp Italian seasoning
-
2 tbsp chopped fresh basil (optional)
Instructions
-
Step 1
Combine shredded mozzarella and grated Parmesan cheeses. In a small bowl, mix garlic powder and Italian seasoning. Have softened butter, marinara or pizza sauce, and turkey pepperoni ready. Chop fresh basil if using. -
Step 2
Generously spread the softened butter evenly on one side of each of the four bread slices. -
Step 3
Place two of the buttered bread slices butter-side down on a clean work surface. Sprinkle half of the combined mozzarella and Parmesan cheeses onto each of these slices. -
Step 4
Evenly spread ¼ cup of marinara or pizza sauce over the cheese layer on each of the two bread slices. Top each with 6 slices of turkey pepperoni. Sprinkle a pinch of the mixed garlic powder and Italian seasoning over the pepperoni. -
Step 5
Distribute the remaining combined mozzarella and Parmesan cheeses over the turkey pepperoni. Place the remaining two bread slices on top of your assembled sandwiches, with the buttered side facing upwards. Gently press the sandwiches to compact the layers. -
Step 6
Heat a large non-stick skillet or cast-iron pan over medium-low heat. Place one or two assembled sandwiches in the pan, butter-side down (avoid overcrowding). Cook for 4-6 minutes per side, gently pressing with a spatula, until the crust is deep golden brown and crispy, and the cheese is fully melted and gooey. Adjust heat as needed to prevent burning. -
Step 7
Remove the cooked sandwiches from the pan and let them rest on a cutting board or wire rack for 1-2 minutes before cutting. Slice each sandwich diagonally with a sharp, serrated knife. Garnish with chopped fresh basil if desired. Serve immediately, ideally with an extra side of warm marinara for dipping.
Important Information
Nutrition Facts (Per Serving)
It is important to consider this information as approximate and not to use it as definitive health advice.
Allergy Information
Please check ingredients for potential allergens and consult a health professional if in doubt.