• Skip to primary navigation
  • Skip to main content
  • Skip to primary sidebar
Homesmad

Homesmad

  • Home
  • Breakfast & Brunch
  • Appetizers & Snacks
  • Dinner
  • Dessert
  • About
  • Privacy Policy
  • Contact
Homesmad
  • Home
  • Breakfast & Brunch
  • Appetizers & Snacks
  • Dinner
  • Dessert
  • About
  • Privacy Policy
  • Contact

Best Smash Burger Sauce – Quick & Tangy Homemade Recipe

November 22, 2025 by Lily author

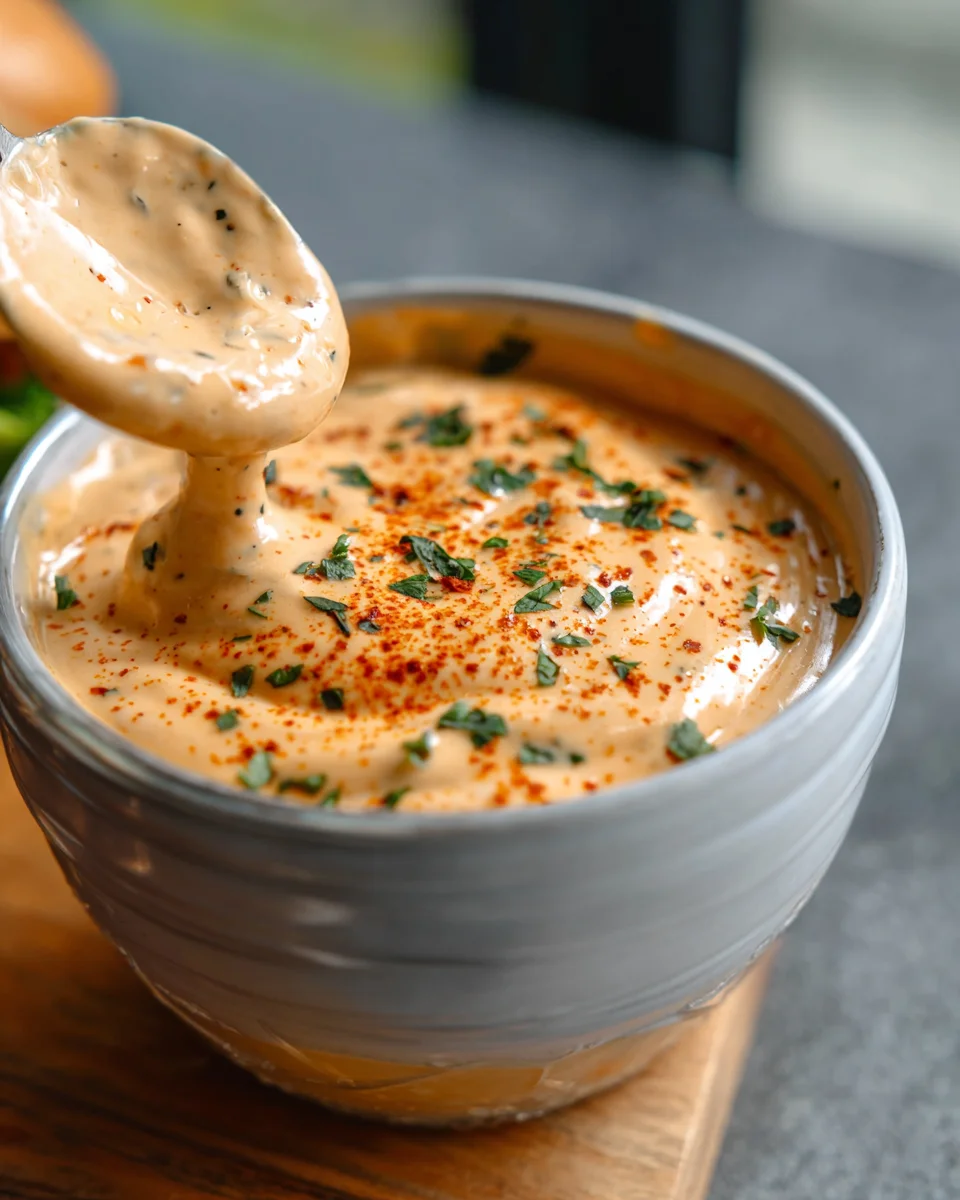
Smash Burger Sauce – that magical, tangy, and utterly irresistible condiment is what truly elevates a humble burger from good to legendary. If you’ve ever bitten into a perfectly crisp-edged, juicy smash burger and wondered what secret ingredient made it sing, chances are you were experiencing the unparalleled delight of a well-crafted sauce. I’m here to tell you that creating this iconic addition to your culinary repertoire is far simpler than you might imagine.

The Secret Ingredient to Burger Perfection

This sauce is a testament to the power of a few simple ingredients coming together to create something truly extraordinary. It’s a modern classic, often drawing inspiration from the secret “special sauces” found in classic American diners, updated for the distinct texture and flavor profile of the smash burger. Its creamy texture and vibrant tang perfectly cut through the rich, savory beef, adding a layer of complexity and moisture that makes every bite an absolute pleasure. That’s why people absolutely adore this condiment. Get ready to transform your home burger game forever with this incredible Smash Burger Sauce recipe, ensuring every patty you press is destined for greatness.

Best Smash Burger Sauce - Quick & Tangy Homemade Recipe this RECIPE

Ingredients:

  • For the Smash Burger Sauce:
    • ½ cup good quality mayonnaise
    • ¼ cup ketchup
    • 2 tablespoons yellow mustard
    • 2 tablespoons sweet pickle relish (finely diced or drained)
    • 1 teaspoon white vinegar (or apple cider vinegar)
    • ½ teaspoon garlic powder
    • ½ teaspoon onion powder
    • ¼ teaspoon smoked paprika (optional, for a subtle smoky note)
    • Pinch of cayenne pepper (optional, for a little kick)
    • Salt and freshly ground black pepper to taste
  • For the Burgers:
    • 1 ½ pounds ground beef (80/20 Chuck is ideal for flavor and fat content)
    • 4 brioche burger buns (or your favorite soft burger bun)
    • 8 slices American cheese (or cheese of your choice, cheddar works well)
    • 1 large yellow onion, very thinly sliced
    • 4-8 leaves green leaf lettuce, washed and dried
    • 8-12 dill pickle slices
    • Butter, softened (for toasting buns)
    • Neutral cooking oil (like canola or grapeseed oil, for cooking)
    • Salt and freshly ground black pepper (coarse grind preferred)

Preparing the Smash Burger Sauce

Let’s kick things off with what I consider the absolute heart and soul of any great smash burger: our incredible homemade Smash Burger Sauce. Trust me on this, once you make your own, you’ll never go back to store-bought. It’s simple, but the combination of flavors is pure magic.

  1. Grab a medium-sized mixing bowl. Into this bowl, we’re going to add our mayonnaise. I always recommend using a good quality, full-fat mayonnaise because it forms the creamy base of our sauce, giving it that luxurious texture that coats every bite of your burger beautifully. Think about how a rich sauce enhances a dish; this is no different!

  2. Next up, incorporate the ketchup. The ketchup brings a lovely balance of sweetness and acidity, a classic pairing with beef that just works. Don’t be shy about using your favorite brand; consistency here is key, but flavor is paramount.

  3. Now, for the mustard. Two tablespoons of classic yellow mustard are going in. This adds that distinctive tangy, slightly sharp flavor that cuts through the richness of the beef and cheese perfectly. It’s a foundational element of our Smash Burger Sauce.

  4. Sweet pickle relish is next. This is such a crucial ingredient, providing not only a delightful pop of sweet and sour flavor but also a fantastic textual element. If your relish is a bit watery, give it a quick squeeze to remove excess liquid. This prevents our sauce from becoming too thin.

  5. Add the white vinegar. Just a teaspoon of this will brighten up all the flavors and give our Smash Burger Sauce an extra layer of zing. You could also use apple cider vinegar for a slightly fruitier note, but white vinegar is my go-to for its clean tang.

  6. Now for our dry spices: ½ teaspoon of garlic powder and ½ teaspoon of onion powder. These are your secret weapons for depth of flavor. They bring that savory, umami punch that you find in the best burger joint sauces. Don’t underestimate their power!

  7. If you’re looking to add a little something extra, consider ¼ teaspoon of smoked paprika. It imparts a beautiful, subtle smokiness that can truly elevate the sauce, giving it a gourmet touch. And for those who like a little heat, a small pinch of cayenne pepper will give your Smash Burger Sauce a gentle warmth without overpowering the other flavors. These are optional, but highly recommended for adventurous palates.

  8. Finally, season with salt and freshly ground black pepper to taste. Start with a small amount, then mix everything thoroughly using a whisk until all the ingredients are beautifully combined and the sauce is smooth. You want a consistent, creamy texture without any streaks. Taste and adjust the seasoning as needed. This is your chance to make it perfect for your palate. Maybe a little more vinegar for tang, or more relish for sweetness? It’s all up to you!

  9. Once mixed, cover the bowl and refrigerate the Smash Burger Sauce for at least 30 minutes. This resting period is crucial! It allows all the flavors to meld and deepen, resulting in a much more harmonious and delicious sauce. I often make mine an hour or two in advance, or even the day before, to really let those flavors develop. It’s the kind of foresight that truly pays off when you bite into your burger.

Preparing the Burger Components

While our amazing Smash Burger Sauce is chilling and developing its full flavor potential, let’s get everything else ready. Organization is key in the kitchen, especially when dealing with hot griddles and fast cooking times, so preparing all your toppings and patties in advance will make the final assembly a breeze.

  1. Prepping the Ground Beef:

    Divide your 1 ½ pounds of ground beef into eight equal portions. I aim for about 3-ounce balls per patty. Gently form each portion into a loose, golf-ball-sized sphere. It’s really important not to compress or overwork the meat at this stage. We want them loose so they can “smash” beautifully and create that irresistible craggy, lacy edge. Place these beef balls on a plate or baking sheet and keep them in the refrigerator until you’re ready to cook. Keeping them cold helps them hold their shape before the smash and makes them easier to handle.

  2. Slicing the Onions:

    Take your large yellow onion and slice it as thinly as humanly possible. I’m talking paper-thin slices here! A mandoline slicer is fantastic for this if you have one, but a very sharp knife and a steady hand will also do the trick. The goal is to get slices so thin they almost melt into the burger as they cook, adding a delicate sweetness and crunch without overwhelming. Separate the rings and set them aside.

  3. Washing and Drying Lettuce:

    Wash your green leaf lettuce leaves thoroughly and then dry them completely. Excess water on lettuce can make your burger soggy, and nobody wants a soggy burger! A salad spinner works wonders here, or you can gently pat them dry with paper towels. Arrange them on a platter with your other toppings.

  4. Arranging Pickles and Cheese:

    Get your dill pickle slices ready and your American cheese slices unwrapped and easily accessible. When the burgers are cooking, things move fast, so having everything within arm’s reach is critical. I usually stack the cheese slices right next to where I’ll be cooking.

  5. Prepping the Buns:

    Slice your brioche buns in half. I’m a firm believer that a great bun can make or break a burger. Brioche buns are fantastic for smash burgers because their slight sweetness and soft, buttery texture complement the savory patty perfectly. You can lightly butter the cut sides of the buns now, or just before toasting. Set them aside.

The Cooking Process: Mastering the Smash

This is where the magic happens! Smash burgers are all about high heat and quick cooking to achieve that incredible crust, known as the Maillard reaction. Don’t be intimidated; with a few tips, you’ll be smashing like a pro.

  1. Heating the Griddle:

    Place a large cast-iron skillet or a flat-top griddle over high heat. We want it screaming hot! This is absolutely non-negotiable for a proper smash burger. Let it preheat for at least 5-7 minutes. You should see a wisp of smoke or feel intense heat radiating from the surface. A hot surface ensures an instant, beautiful crust forms when the meat hits it.

  2. Toasting the Buns:

    While the griddle is heating, lightly butter the cut sides of your burger buns, if you haven’t already. Once the griddle is hot, place the buns, cut-side down, on the dry part of the griddle or in a separate pan over medium heat. Toast them for 1-2 minutes until they are golden brown and lightly crispy. Remove them immediately and set them aside. Toasted buns add structure and prevent sogginess, providing a perfect bed for our delicious burger.

  3. Adding Oil to the Griddle:

    Once your griddle is scorching hot, add a very thin layer of neutral cooking oil. You just need enough to lightly coat the surface. A high smoke point oil like canola, grapeseed, or avocado oil is best here. Be careful as the oil might smoke immediately due to the high heat.

  4. The Smash Technique:

    Carefully place two of your cold beef balls onto the hot oiled griddle, leaving some space between them. Immediately, using a sturdy, flat metal spatula (or a burger press), firmly press down on each beef ball until it flattens into a thin patty, about ¼-inch thick. Apply significant, consistent pressure for about 10-15 seconds to ensure maximum contact with the hot surface. This is the “smash” part! The goal is to maximize the surface area that touches the hot griddle, creating that glorious, crispy crust. If you don’t have a burger press, you can place a piece of parchment paper over the beef ball and press down with the bottom of another heavy pan.

  5. Seasoning and First Cook:

    Once smashed, generously season the top side of each patty with coarse salt and freshly ground black pepper. Let them cook undisturbed for about 1 ½ to 2 minutes. During this time, you’ll notice the edges becoming crispy and browning, and some juices starting to pool on top. Look for that deep, beautiful brown crust forming on the bottom – that’s your indication they’re ready to flip.

  6. Flipping and Adding Cheese:

    Using your sturdy spatula (a thin, flexible metal spatula works best for scraping up the crust), carefully scrape under each patty, making sure to get all that delicious crust, and flip it over. Immediately place a slice of American cheese on top of each flipped patty. The residual heat from the griddle and the patty itself will start to melt the cheese almost instantly. If you’re cooking more than two patties, work in batches to avoid overcrowding the griddle, which can drop the temperature too much.

  7. Second Cook and Finishing:

    Allow the cheesed patties to cook for another 30 seconds to 1 minute, or until the cheese is beautifully melted and gooey, and the second side has also developed a nice crust. American cheese is ideal here because it melts so wonderfully and has that classic burger joint flavor and texture. If you want to add the thinly sliced raw onions to cook slightly, you can place them directly on top of the melting cheese for the last 15-20 seconds of cooking.

  8. Once cooked to your desired doneness (smash burgers cook very quickly!), carefully remove the patties from the griddle and stack them directly onto your prepared toasted bun bottoms. For a double smash burger, place one patty on the bun, then immediately top with the second patty. Repeat the cooking process with the remaining beef balls and cheese slices until all your patties are cooked.

Assembling Your Masterpiece

You’ve done all the hard work, now comes the glorious moment of bringing it all together. This is where your patiently waiting Smash Burger Sauce truly shines!

  1. Sauce the Buns:

    Take your toasted bun tops and generously spread a good dollop of your homemade Smash Burger Sauce on the inside. Don’t be shy here! This sauce is a star, and you want to ensure every bite gets a taste of its creamy, tangy goodness. You can also spread a thin layer on the bottom bun if you like extra sauce, but I find the top bun application is usually sufficient to carry the flavor throughout.

  2. Layering the Toppings:

    On top of your stacked cheeseburger patties (which are sitting on the bottom bun), arrange your desired toppings. I like to start with a few crisp dill pickle slices. Their sharp, briny crunch offers a fantastic contrast to the rich beef and cheese. Next, add a generous handful of those paper-thin raw onion slices you prepared earlier. Their delicate sweetness and subtle bite are essential for that classic diner smash burger experience.

  3. Adding the Lettuce:

    Finally, place a few fresh, crisp green leaf lettuce leaves on top. The coolness and refreshing crunch of the lettuce are the perfect finish, adding a much-needed textural element and a touch of freshness to cut through the richness of the burger. Some people prefer to put the lettuce on the bottom bun to act as a barrier to moisture, but I find it works just as well on top.

  4. Completing the Burger:

    Carefully place the sauced top bun onto your beautifully assembled burger. Give it a gentle press to hold everything together. And there you have it – a perfectly crafted, incredibly delicious homemade smash burger, bursting with flavor, especially from that irresistible Smash Burger Sauce!

  5. Serve immediately and enjoy your culinary creation. There’s truly nothing quite like the satisfaction of biting into a burger you’ve made from scratch, especially one that boasts such an amazing crust and a truly sensational sauce. Get ready to impress yourself and anyone lucky enough to share this meal with you!

Remember, the beauty of a smash burger lies in its simplicity and the quality of its components. Investing a little time in making that perfect Smash Burger Sauce and focusing on high heat for the patties will elevate your burger game to a whole new level. Happy smashing!

A little extra tip: If you’re serving a crowd, setting up a “burger bar” with all the toppings laid out is a fantastic idea. That way, everyone can customize their smash burger exactly how they like it, making it an interactive and fun meal experience. But no matter what toppings they choose, that incredible Smash Burger Sauce will undoubtedly be the star of the show.

One last thing to consider for ultimate flavor: if you have extra rendered beef fat from cooking your burgers, you can drizzle a tiny bit over the finished patties before adding the bun. This intensifies the beefy flavor even further and is a trick many gourmet burger joints use to achieve that extra layer of richness.

I hope you enjoy making and devouring these sensational smash burgers as much as I do. It truly is a rewarding experience, from the moment you mix that glorious Smash Burger Sauce to the very last bite!

The texture contrast between the super crispy, thin patty edges and the soft, juicy interior, combined with the melty cheese, crisp fresh toppings, and the tangy-sweet creaminess of our signature Smash Burger Sauce, creates a symphony of flavors and textures that is truly hard to beat. Happy cooking!

Just one more thought: for an even more decadent experience, consider caramelized onions as an additional topping. While the raw onions offer a fresh bite, slowly cooked caramelized onions bring an incredible depth of sweet, savory flavor that pairs magnificently with our Smash Burger Sauce and the rich beef. It’s an extra step, but one that seriously pays off in terms of flavor complexity and will make your smash burger truly unforgettable.

So, get ready, gather your ingredients, and prepare to create some of the best burgers you’ve ever tasted. Your taste buds will thank you for this journey, especially for that phenomenal homemade Smash Burger Sauce!

Whether it’s a casual weeknight dinner or a weekend gathering, these smash burgers are guaranteed to be a hit. The speed and intensity of the cook, paired with thoughtfully prepared toppings and that essential Smash Burger Sauce, elevate a simple burger to an art form. Enjoy every single juicy, crispy, saucy bite!

Ingredients:

  • For the Smash Burger Sauce:
    • ½ cup good quality mayonnaise
    • ¼ cup ketchup
    • 2 tablespoons yellow mustard
    • 2 tablespoons sweet pickle relish (finely diced or drained)
    • 1 teaspoon white vinegar (or apple cider vinegar)
    • ½ teaspoon garlic powder
    • ½ teaspoon onion powder
    • ¼ teaspoon smoked paprika (optional, for a subtle smoky note)
    • Pinch of cayenne pepper (optional, for a little kick)
    • Salt and freshly ground black pepper to taste
  • For the Burgers:
    • 1 ½ pounds ground beef (80/20 Chuck is ideal for flavor and fat content)
    • 4 brioche burger buns (or your favorite soft burger bun)
    • 8 slices American cheese (or cheese of your choice, cheddar works well)
    • 1 large yellow onion, very thinly sliced
    • 4-8 leaves green leaf lettuce, washed and dried
    • 8-12 dill pickle slices
    • Butter, softened (for toasting buns)
    • Neutral cooking oil (like canola or grapeseed oil, for cooking)
    • Salt and freshly ground black pepper (coarse grind preferred)

Preparing the Smash Burger Sauce

Let’s kick things off with what I consider the absolute heart and soul of any great smash burger: our incredible homemade Smash Burger Sauce. Trust me on this, once you make your own, you’ll never go back to store-bought. It’s simple, but the combination of flavors is pure magic.

  1. Grab a medium-sized mixing bowl. Into this bowl, we’re going to add our mayonnaise. I always recommend using a good quality, full-fat mayonnaise because it forms the creamy base of our sauce, giving it that luxurious texture that coats every bite of your burger beautifully. Think about how a rich sauce enhances a dish; this is no different!

  2. Next up, incorporate the ketchup. The ketchup brings a lovely balance of sweetness and acidity, a classic pairing with beef that just works. Don’t be shy about using your favorite brand here; consistency here is key, but flavor is paramount.

  3. Now, for the mustard. Two tablespoons of classic yellow mustard are going in. This adds that distinctive tangy, slightly sharp flavor that cuts through the richness of the beef and cheese perfectly. It’s a foundational element of our Smash Burger Sauce.

  4. Sweet pickle relish is next. This is such a crucial ingredient, providing not only a delightful pop of sweet and sour flavor but also a fantastic textual element. If your relish is a bit watery, give it a quick squeeze to remove excess liquid. This prevents our sauce from becoming too thin.

  5. Add the white vinegar. Just a teaspoon of this will brighten up all the flavors and give our Smash Burger Sauce an extra layer of zing. You could also use apple cider vinegar for a slightly fruitier note, but white vinegar is my go-to for its clean tang.

  6. Now for our dry spices: ½ teaspoon of garlic powder and ½ teaspoon of onion powder. These are your secret weapons for depth of flavor. They bring that savory, umami punch that you find in the best burger joint sauces. Don’t underestimate their power!

  7. If you’re looking to add a little something extra, consider ¼ teaspoon of smoked paprika. It imparts a beautiful, subtle smokiness that can truly elevate the sauce, giving it a gourmet touch. And for those who like a little heat, a small pinch of cayenne pepper will give your Smash Burger Sauce a gentle warmth without overpowering the other flavors. These are optional, but highly recommended for adventurous palates.

  8. Finally, season with salt and freshly ground black pepper to taste. Start with a small amount, then mix everything thoroughly using a whisk until all the ingredients are beautifully combined and the sauce is smooth. You want a consistent, creamy texture without any streaks. Taste and adjust the seasoning as needed. This is your chance to make it perfect for your palate. Maybe a little more vinegar for tang, or more relish for sweetness? It’s all up to you!

  9. Once mixed, cover the bowl and refrigerate the Smash Burger Sauce for at least 30 minutes. This resting period is crucial! It allows all the flavors to meld and deepen, resulting in a much more harmonious and delicious sauce. I often make mine an hour or two in advance, or even the day before, to really let those flavors develop. It’s the kind of foresight that truly pays off when you bite into your burger.

Preparing the Burger Components

While our amazing Smash Burger Sauce is chilling and developing its full flavor potential, let’s get everything else ready. Organization is key in the kitchen, especially when dealing with hot griddles and fast cooking times, so preparing all your toppings and patties in advance will make the final assembly a breeze.

  1. Prepping the Ground Beef:

    Divide your 1 ½ pounds of ground beef into eight equal portions. I aim for about 3-ounce balls per patty. Gently form each portion into a loose, golf-ball-sized sphere. It’s really important not to compress or overwork the meat at this stage. We want them loose so they can “smash” beautifully and create that irresistible craggy, lacy edge. Place these beef balls on a plate or baking sheet and keep them in the refrigerator until you’re ready to cook. Keeping them cold helps them hold their shape before the smash and makes them easier to handle.

  2. Slicing the Onions:

    Take your large yellow onion and slice it as thinly as humanly possible. I’m talking paper-thin slices here! A mandoline slicer is fantastic for this if you have one, but a very sharp knife and a steady hand will also do the trick. The goal is to get slices so thin they almost melt into the burger as they cook, adding a delicate sweetness and crunch without overwhelming. Separate the rings and set them aside.

  3. Washing and Drying Lettuce:

    Wash your green leaf lettuce leaves thoroughly and then dry them completely. Excess water on lettuce can make your burger soggy, and nobody wants a soggy burger! A salad spinner works wonders here, or you can gently pat them dry with paper towels. Arrange them on a platter with your other toppings.

  4. Arranging Pickles and Cheese:

    Get your dill pickle slices ready and your American cheese slices unwrapped and easily accessible. When the burgers are cooking, things move fast, so having everything within arm’s reach is critical. I usually stack the cheese slices right next to where I’ll be cooking.

  5. Prepping the Buns:

    Slice your brioche buns in half. I’m a firm believer that a great bun can make or break a burger. Brioche buns are fantastic for smash burgers because their slight sweetness and soft, buttery texture complement the savory patty perfectly. You can lightly butter the cut sides of the buns now, or just before toasting. Set them aside.

The Cooking Process: Mastering the Smash

This is where the magic happens! Smash burgers are all about high heat and quick cooking to achieve that incredible crust, known as the Maillard reaction. Don’t be intimidated; with a few tips, you’ll be smashing like a pro.

  1. Heating the Griddle:

    Place a large cast-iron skillet or a flat-top griddle over high heat. We want it screaming hot! This is absolutely non-negotiable for a proper smash burger. Let it preheat for at least 5-7 minutes. You should see a wisp of smoke or feel intense heat radiating from the surface. A hot surface ensures an instant, beautiful crust forms when the meat hits it.

  2. Toasting the Buns:

    While the griddle is heating, lightly butter the cut sides of your burger buns, if you haven’t already. Once the griddle is hot, place the buns, cut-side down, on the dry part of the griddle or in a separate pan over medium heat. Toast them for 1-2 minutes until they are golden brown and lightly crispy. Remove them immediately and set them aside. Toasted buns add structure and prevent sogginess, providing a perfect bed for our delicious burger.

  3. Adding Oil to the Griddle:

    Once your griddle is scorching hot, add a very thin layer of neutral cooking oil. You just need enough to lightly coat the surface. A high smoke point oil like canola, grapeseed, or avocado oil is best here. Be careful as the oil might smoke immediately due to the high heat.

  4. The Smash Technique:

    Carefully place two of your cold beef balls onto the hot oiled griddle, leaving some space between them. Immediately, using a sturdy, flat metal spatula (or a burger press), firmly press down on each beef ball until it flattens into a thin patty, about ¼-inch thick. Apply significant, consistent pressure for about 10-15 seconds to ensure maximum contact with the hot surface. This is the “smash” part! The goal is to maximize the surface area that touches the hot griddle, creating that glorious, crispy crust. If you don’t have a burger press, you can place a piece of parchment paper over the beef ball and press down with the bottom of another heavy pan.

  5. Seasoning and First Cook:

    Once smashed, generously season the top side of each patty with coarse salt and freshly ground black pepper. Let them cook undisturbed for about 1 ½ to 2 minutes. During this time, you’ll notice the edges becoming crispy and browning, and some juices starting to pool on top. Look for that deep, beautiful brown crust forming on the bottom – that’s your indication they’re ready to flip.

  6. Flipping and Adding Cheese:

    Using your sturdy spatula (a thin, flexible metal spatula works best for scraping up the crust), carefully scrape under each patty, making sure to get all that delicious crust, and flip it over. Immediately place a slice of American cheese on top of each flipped patty. The residual heat from the griddle and the patty itself will start to melt the cheese almost instantly. If you’re cooking more than two patties, work in batches to avoid overcrowding the griddle, which can drop the temperature too much.

  7. Second Cook and Finishing:

    Allow the cheesed patties to cook for another 30 seconds to 1 minute, or until the cheese is beautifully melted and gooey, and the second side has also developed a nice crust. American cheese is ideal here because it melts so wonderfully and has that classic burger joint flavor and texture. If you want to add the thinly sliced raw onions to cook slightly, you can place them directly on top of the melting cheese for the last 15-20 seconds of cooking.

  8. Once cooked to your desired doneness (smash burgers cook very quickly!), carefully remove the patties from the griddle and stack them directly onto your prepared toasted bun bottoms. For a double smash burger, place one patty on the bun, then immediately top with the second patty. Repeat the cooking process with the remaining beef balls and cheese slices until all your patties are cooked.

Assembling Your Masterpiece

You’ve done all the hard work, now comes the glorious moment of bringing it all together. This is where your patiently waiting Smash Burger Sauce truly shines!

  1. Sauce the Buns:

    Take your toasted bun tops and generously spread a good dollop of your homemade Smash Burger Sauce on the inside. Don’t be shy here! This sauce is a star, and you want to ensure every bite gets a taste of its creamy, tangy goodness. You can also spread a thin layer on the bottom bun if you like extra sauce, but I find the top bun application is usually sufficient to carry the flavor throughout.

  2. Layering the Toppings:

    On top of your stacked cheeseburger patties (which are sitting on the bottom bun), arrange your desired toppings. I like to start with a few crisp dill pickle slices. Their sharp, briny crunch offers a fantastic contrast to the rich beef and cheese. Next, add a generous handful of those paper-thin raw onion slices you prepared earlier. Their delicate sweetness and subtle bite are essential for that classic diner smash burger experience.

  3. Adding the Lettuce:

    Finally, place a few fresh, crisp green leaf lettuce leaves on top. The coolness and refreshing crunch of the lettuce are the perfect finish, adding a much-needed textural element and a touch of freshness to cut through the richness of the burger. Some people prefer to put the lettuce on the bottom bun to act as a barrier to moisture, but I find it works just as well on top.

  4. Completing the Burger:

    Carefully place the sauced top bun onto your beautifully assembled burger. Give it a gentle press to hold everything together. And there you have it – a perfectly crafted, incredibly delicious homemade smash burger, bursting with flavor, especially from that irresistible Smash Burger Sauce!

  5. Serve immediately and enjoy your culinary creation. There’s truly nothing quite like the satisfaction of biting into a burger you’ve made from scratch, especially one that boasts such an amazing crust and a truly sensational sauce. Get ready to impress yourself and anyone lucky enough to share this meal with you!

Remember, the beauty of a smash burger lies in its simplicity and the quality of its components. Investing a little time in making that perfect Smash Burger Sauce and focusing on high heat for the patties will elevate your burger game to a whole new level. Happy smashing!

A little extra tip: If you’re serving a crowd, setting up a “burger bar” with all the toppings laid out is a fantastic idea. That way, everyone can customize their smash burger exactly how they like it, making it an interactive and fun meal experience. But no matter what toppings they choose, that incredible Smash Burger Sauce will undoubtedly be the star of the show.

One last thing to consider for ultimate flavor: if you have extra rendered beef fat from cooking your burgers, you can drizzle a tiny bit over the finished patties before adding the bun. This intensifies the beefy flavor even further and is a trick many gourmet burger joints use to achieve that extra layer of richness.

I hope you enjoy making and devouring these sensational smash burgers as much as I do. It truly is a rewarding experience, from the moment you mix that glorious Smash Burger Sauce to the very last bite!

The texture contrast between the super crispy, thin patty edges and the soft, juicy interior, combined with the melty cheese, crisp fresh toppings, and the tangy-sweet creaminess of our signature Smash Burger Sauce, creates a symphony of flavors and textures that is truly hard to beat. Happy cooking!

Just one more thought: for an even more decadent experience, consider caramelized onions as an additional topping. While the raw onions offer a fresh bite, slowly cooked caramelized onions bring an incredible depth of sweet, savory flavor that pairs magnificently with our Smash Burger Sauce and the rich beef. It’s an extra step, but one that seriously pays off in terms of flavor complexity and will make your smash burger truly unforgettable.

So, get ready, gather your ingredients, and prepare to create some of the best burgers you’ve ever tasted. Your taste buds will thank you for this journey, especially for that phenomenal homemade Smash Burger Sauce!

Whether it’s a casual weeknight dinner or a weekend gathering, these smash burgers are guaranteed to be a hit. The speed and intensity of the cook, paired with thoughtfully prepared toppings and that essential Smash Burger Sauce, elevate a simple burger to an art form. Enjoy every single juicy, crispy, saucy bite!

Best Smash Burger Sauce - Quick & Tangy Homemade Recipe

Conclusion:

Well, friends, we’ve reached the delicious culmination of our journey, and I genuinely hope you’re as excited as I am about what you’ve learned today. If there’s one recipe you absolutely must add to your culinary repertoire this week, it’s this one. Why, you ask? Because this isn’t just any condiment; it’s a game-changer, a flavor explosion meticulously crafted to elevate every bite, transforming even the simplest meal into an unforgettable feast. We’re talking about an unparalleled blend of creamy richness, tangy zest, and a subtle underlying sweetness that dances on your palate. It’s incredibly easy to whip up, requiring minimal ingredients and effort, yet the payoff in terms of taste is nothing short of gourmet. Imagine that perfect balance, the way it coats your tongue with a satisfying texture, leaving you craving just one more bite. This recipe isn’t merely about creating a sauce; it’s about unlocking a new level of culinary enjoyment and making every dish feel special, without any fuss. It’s truly a secret weapon for home cooks everywhere, a simple addition that delivers profound flavor impact.

Beyond the Burger: Serving Suggestions & Versatility

This Smash Burger Sauce isn’t just a topping; it’s a versatile culinary hero waiting to be discovered in countless applications beyond its namesake. Of course, its primary calling is to grace the glorious layers of a perfectly seared smash burger. Picture this: a juicy, caramelized patty, crisp lettuce, a ripe tomato, and then that generous dollop of our incredible sauce, oozing slightly, creating the ultimate symphony of textures and flavors. But don’t stop there! Think outside the bun. This exceptional sauce makes an extraordinary dip for crispy homemade French fries, sweet potato fries, or even onion rings, adding a gourmet touch to your favorite fried sides. I love slathering it onto grilled chicken sandwiches or using it as a vibrant spread for a turkey club, bringing a much-needed zing to everyday lunch options. It’s also phenomenal with fish tacos, cutting through the richness of the fried fish with its bright acidity, or drizzled over a batch of sheet pan nachos for an unexpected, delightful twist. For a quick appetizer, try mixing it with some shredded chicken or tuna for an elevated sandwich filling, or thinning it slightly with a touch of milk or water to create a delectable salad dressing that will make even plain greens sing. Its potential truly knows no bounds; I’ve even used it as a secret ingredient in deviled eggs to give them an incredible punch of flavor!

Personalizing Your Perfect Sauce: Creative Variations

Considering variations is where the real fun begins! While the base recipe for this marvelous Smash Burger Sauce is perfection in itself, don’t hesitate to make it your own. If you prefer a little more heat, a pinch of cayenne pepper or a dash of your favorite hot sauce can add a thrilling kick. For those who enjoy a smoky depth, a tiny amount of smoked paprika or even a drop of liquid smoke can transform the flavor profile beautifully. Want to lean into the herb garden? Finely minced chives, fresh dill, or a bit of parsley can introduce a wonderful fresh dimension, particularly if you’re pairing it with lighter fare like grilled fish or a fresh salad. If you’re looking for a creamier, richer texture, a touch more mayonnaise can achieve that luxurious consistency, perfect for dipping. Alternatively, for a lighter take, you could experiment with Greek yogurt as a partial substitute for mayonnaise, though it will alter the classic flavor profile slightly, offering a tangier, fresher feel. The beauty of homemade condiments like this is their adaptability. Feel free to play with the ratios of the core ingredients – more pickle relish for extra tang, a bit more sugar for sweetness, or extra mustard for that piquant punch – until it’s absolutely perfect for your individual taste buds. Each variation offers a chance to personalize the experience and truly make it yours, making the sauce uniquely tailored to your palate for any occasion.

So, what are you waiting for? This is your invitation, a friendly nudge, to roll up your sleeves and experience the magic firsthand. You deserve to treat yourself to flavors that excite and satisfy, and I promise you, this recipe delivers on every front. The satisfaction of crafting something so incredibly delicious from scratch is immensely rewarding, and the smiles it will bring to your table are priceless. Don’t let another week go by without trying this out. Gather your ingredients, follow these simple steps, and prepare to be amazed by the results. And when you do, please, please, please come back and share your creations with me! I absolutely adore hearing about your culinary adventures. Did you add a secret ingredient? Did you pair it with something unexpected and wonderful? Snap a photo, drop a comment, or share your feedback; your insights are invaluable. Your experiences inspire not just me, but our entire community of food lovers. Let’s make this incredible sauce a staple in kitchens everywhere, and share the joy of truly fantastic, homemade food. Happy cooking!


Best Smash Burger Sauce – Quick & Tangy Homemade Recipe

This magical, tangy, and utterly irresistible homemade Smash Burger Sauce elevates any burger. Its creamy texture and vibrant tang perfectly cut through rich, savory beef, adding complexity and moisture. Simple to make, it transforms your home burger game.

Prep Time
10 Minutes
Cook Time
0 Minutes
Total Time
40 Minutes
Servings
8 servings

Ingredients


Instructions


Important Information

Nutrition Facts (Per Serving)

It is important to consider this information as approximate and not to use it as definitive health advice.

Allergy Information

Please check ingredients for potential allergens and consult a health professional if in doubt.

« Previous Post
Amazing Greek Roasted Garlic Spinach White Pizza
Next Post »
Million Dollar Beef Bacon Goat Cheese Appetizer Log Recipe

If you enjoyed this…

Marry Me Pumpkin Chicken Pasta: Creamy & Delicious!

Easy Bang Bang Chicken: Your New Favorite Weeknight Meal

Christmas Bruschetta Wreath

Christmas Bruschetta Wreath: A Show-Stopping Holiday Appetizer

Primary Sidebar

Browse by Diet

BreakfastDinnerLunchDessertAppetizer

Sweet Peach Yogurt Parfait Delight

One of my fondest memories is from a lazy summer afternoon spent at my grandmother’s house. The sun filtered through the kitchen window, casting a warm glow over the table where she would create her culinary magic. It was during one of those blissful moments that I first tasted her Peach Yogurt Parfait with Honey and Granola. The sweet aroma of ripe peaches mingling with creamy yogurt and the crunch of granola was nothing short of heavenly. It felt like summer captured in a bowl, and I still remember the joy of diving in with a spoon, each layer revealing a new burst of flavor.

When I think about that parfait, I can almost hear the gentle hum of the bees outside, reminding me of the floral notes that honey brings to every bite. The vibrant yellows and soft oranges of the peaches contrast beautifully with the creamy white yogurt and the golden crunch of granola. It’s a dish that not only looks delightful but also tastes like a celebration of fresh, wholesome ingredients.

What makes my version of this Peach Yogurt Parfait special is the careful balance of flavors and textures. I use ripe, juicy peaches, drizzled with locally sourced honey, and a homemade granola that’s bursting with nuts and seeds for an extra crunch. It’s a simple dish, but every layer is crafted with love and attention.

Let me show you exactly how to make this delightful parfait, so you can bring a bit of that summer magic into your kitchen!

Sweet Peach Yogurt Parfait Delight

Why You’ll Love This Recipe

  • Delightfully creamy texture from the Greek yogurt, paired with the juicy sweetness of fresh peaches.
  • Ready in under 20 minutes, making it a quick and satisfying breakfast or snack option.
  • Budget-friendly, using common ingredients that you may already have in your pantry.
  • Customizable with your favorite granola and nuts, allowing you to tailor each parfait to your taste.
  • Perfectly balanced flavors with the bright acidity of lemon juice and the sweetness of honey enhancing the peaches.

Ingredients

  • For the Parfait:
  • 2 cups plain Greek yogurt (or vanilla yogurt for a sweeter option)
  • 2 large ripe peaches, diced (about 2 cups)
  • 1 tablespoon fresh lemon juice (to prevent browning of peaches)
  • 2 tablespoons honey (plus more for drizzling)
  • 1 teaspoon vanilla extract (optional for extra flavor)
  • For the Granola:
  • 1 cup granola (store-bought or homemade; see notes for a simple granola recipe)
  • 1/4 cup sliced almonds (optional for added crunch)
  • 1/4 cup shredded coconut (optional for added flavor)

Let’s dive into some key ingredients that make this Peach Yogurt Parfait so delightful! First, the Greek yogurt is not only creamy but also packed with protein, making it a satisfying option for breakfast or a snack. If you’re looking for a sweeter option, you can easily substitute it with vanilla yogurt, though it may alter the overall flavor balance. Next, the ripe peaches are the star of the show; their natural sweetness shines through, so I recommend choosing peaches that yield slightly to pressure, indicating they’re perfectly ripe. If peaches aren’t in season, feel free to use nectarines or even frozen peaches—just thaw them before use. Finally, honey adds a lovely floral sweetness that ties everything together. If you prefer, maple syrup can serve as a delicious substitute.

Step-by-Step Instructions

  1. Start by preparing the peaches. Wash them thoroughly, then slice and dice them into bite-sized pieces. In a medium bowl, toss the diced peaches with 1 tablespoon of fresh lemon juice to prevent browning. Set aside for about 5 minutes while the lemon juice works its magic.
  2. In a separate bowl, combine the Greek yogurt, 2 tablespoons of honey, and 1 teaspoon of vanilla extract if using. Stir the mixture until smooth and thoroughly blended. This should take about a minute. Avoid overmixing to maintain the creaminess of the yogurt.
  3. Now it’s time to layer your parfait. Grab a clear glass or bowl to showcase your beautiful creation. Start with a generous spoonful of the yogurt mixture at the bottom—about 1/4 cup will do. Use a spoon to spread it evenly.
  4. Add a layer of the diced peaches over the yogurt, ensuring they cover the yogurt completely. You might want to use about half of what you have prepared—roughly 1 cup. This layer should be visually appealing, so arrange the peaches neatly.
  5. Sprinkle 1/4 cup of granola over the peaches. This adds a delightful crunch. Make sure to distribute it evenly to ensure every bite has that satisfying texture. Avoid packing it down too tightly, as you want it to maintain its crunch.
  6. Repeat the layers: spoon in another 1/4 cup of yogurt, followed by another cup of peaches, and another sprinkle of granola. You should have at least two layers, but feel free to add more depending on your glass size.
  7. Finish off your parfait with a drizzle of honey on top for added sweetness and a touch of elegance. If you’re using sliced almonds or shredded coconut, sprinkle them on top now. It adds a lovely visual contrast and extra flavor.
  8. Serve immediately or refrigerate for up to 30 minutes before serving to allow the flavors to meld together. However, I recommend enjoying it fresh to maintain the granola’s crunch.

Pro Tips for the Best Peach Yogurt Parfait With Honey And Granola

  • Make sure to choose ripe peaches for the best flavor and texture. A common mistake is using unripe fruit, which can lead to a less enjoyable parfait. Look for peaches that are fragrant and slightly soft to the touch.
  • Use a clear glass to assemble your parfait; this not only makes for a beautiful presentation but also allows you to see the colorful layers, which adds to the enjoyment of eating it.
  • For an even creamier texture, consider whipping the Greek yogurt with a hand mixer for a couple of minutes before layering. This small adjustment makes a huge difference in mouthfeel.
  • Be mindful of the granola-to-yogurt ratio. Too much granola can overwhelm the parfait, while too little can make it feel too creamy. Aim for about 1/4 cup of granola per layer for the perfect balance.
  • If you’re making this for a gathering, consider preparing the yogurt and peaches ahead of time and layering them just before serving. This ensures the granola stays crunchy!

Variations & Serving Ideas

There are so many ways to get creative with your Peach Yogurt Parfait! For a tropical twist, swap out the peaches for mangoes or pineapples and top with coconut flakes. If you prefer a berry flavor, mix in some blueberries or strawberries with the peaches for added color and taste. For a nutty version, incorporate chopped walnuts or pecans instead of almonds.

As for serving ideas, this parfait pairs beautifully with a side of scrambled eggs for a hearty breakfast or fresh fruit salad for a light lunch. You might also enjoy it alongside whole grain toast with almond butter for an energizing snack. The contrast of flavors and textures will elevate your meal experience!

Storage, Make-Ahead & Reheating

The Peach Yogurt Parfait is best enjoyed fresh, but you can prepare some components ahead of time. Store the layered parfait in an airtight container in the refrigerator for up to 24 hours. However, be cautious; the granola may lose its crunch if stored too long. You can freeze the yogurt and peach mixture for up to 2 months; just remember to thaw it in the refrigerator overnight before serving.

If you plan to enjoy this dish the next day, it can taste even better as the flavors meld together. Just remember to add the granola right before serving to keep its delightful crunch!

Frequently Asked Questions

Can I make Peach Yogurt Parfait With Honey And Granola ahead of time?

Yes — in fact, it tastes even better the next day as the flavors meld. However, I recommend waiting to add the granola until just before serving to maintain its crunch.

What can I substitute for Greek yogurt?

If you prefer a lighter option, you can substitute Greek yogurt with regular yogurt or a dairy-free alternative like coconut yogurt. Just remember that this may alter the creaminess and flavor profile slightly.

Can I use frozen peaches for this parfait?

Absolutely! Just make sure to thaw the frozen peaches before using them. They will still add great flavor, though the texture may be slightly softer than fresh peaches.

How do I make the parfait vegan?

To make a vegan version, substitute the Greek yogurt with a plant-based yogurt alternative, and replace honey with maple syrup or agave nectar. This keeps the parfait sweet while adhering to a vegan diet.

What other fruits can I use in this recipe?

You can mix and match fruits based on your preference. Try using strawberries, blueberries, raspberries, or even bananas. Just make sure to adjust the lemon juice as needed to prevent browning.

Sweet Peach Yogurt Parfait Delight

Final Thoughts

The Peach Yogurt Parfait with Honey and Granola is a delightful blend of creamy yogurt, sweet peaches, and crunchy granola that creates a satisfying and nourishing treat. Each layer bursts with flavor, making it a perfect choice for breakfast or a light dessert.

This is the kind of recipe I come back to again and again, especially when I want something refreshing and wholesome to start my day. The harmony of sweet and tart flavors, combined with the delightful crunch, never fails to lift my spirits!

I encourage you to give this parfait a try and indulge in its comforting goodness. Feel free to share your results or even add your own twist—perhaps a sprinkle of cinnamon or a handful of nuts. Enjoy creating your perfect parfait!

Print
clock clock iconcutlery cutlery iconflag flag iconfolder folder iconinstagram instagram iconpinterest pinterest iconfacebook facebook iconprint print iconsquares squares iconheart heart iconheart solid heart solid icon

Peach Yogurt Parfait


  • Author: Lily author
  • Total Time: 15 minutes
  • Yield: 4 servings 1x
Pin Recipe
Print Recipe

Description

This Peach Yogurt Parfait combines creamy Greek yogurt, juicy peaches, and crunchy granola for a delightful treat. It’s a perfect breakfast or snack that captures the essence of summer in every bite.


Ingredients

Scale
  • For the Parfait:
  • 2 cups plain Greek yogurt (or vanilla yogurt for a sweeter option)
  • 2 large ripe peaches, diced (about 2 cups)
  • 1 tablespoon fresh lemon juice (to prevent browning of peaches)
  • 2 tablespoons honey (plus more for drizzling)
  • 1 teaspoon vanilla extract (optional for extra flavor)
  • For the Granola:
  • 1 cup granola (store-bought or homemade; see notes for a simple granola recipe)
  • 1/4 cup sliced almonds (optional for added crunch)
  • 1/4 cup shredded coconut (optional for added flavor)

Instructions

  1. Start by preparing the peaches. Wash them thoroughly, then slice and dice them into bite-sized pieces. In a medium bowl, toss the diced peaches with 1 tablespoon of fresh lemon juice to prevent browning. Set aside for about 5 minutes while the lemon juice works its magic.
  2. In a separate bowl, combine the Greek yogurt, 2 tablespoons of honey, and 1 teaspoon of vanilla extract if using. Stir the mixture until smooth and thoroughly blended. This should take about a minute. Avoid overmixing to maintain the creaminess of the yogurt.
  3. Now it’s time to layer your parfait. Grab a clear glass or bowl to showcase your beautiful creation. Start with a generous spoonful of the yogurt mixture at the bottom—about 1/4 cup will do. Use a spoon to spread it evenly.
  4. Add a layer of the diced peaches over the yogurt, ensuring they cover the yogurt completely. You might want to use about half of what you have prepared—roughly 1 cup. This layer should be visually appealing, so arrange the peaches neatly.
  5. Sprinkle 1/4 cup of granola over the peaches. This adds a delightful crunch. Make sure to distribute it evenly to ensure every bite has that satisfying texture. Avoid packing it down too tightly, as you want it to maintain its crunch.
  6. Repeat the layers: spoon in another 1/4 cup of yogurt, followed by another cup of peaches, and another sprinkle of granola. You should have at least two layers, but feel free to add more depending on your glass size.
  7. Finish off your parfait with a drizzle of honey on top for added sweetness and a touch of elegance. If you’re using sliced almonds or shredded coconut, sprinkle them on top now. It adds a lovely visual contrast and extra flavor.
  8. Serve immediately or refrigerate for up to 30 minutes before serving to allow the flavors to meld together. However, I recommend enjoying it fresh to maintain the granola’s crunch.
  • Prep Time: 15 mins
  • Cook Time: 0 mins
  • Category: Breakfast
  • Method: No-cook
  • Cuisine: American

Nutrition

  • Serving Size: 1 parfait
  • Calories: 250
  • Sugar: 20 g
  • Sodium: 50 mg
  • Fat: 5 g
  • Saturated Fat: 2 g
  • Unsaturated Fat: 3 g
  • Trans Fat: 0 g
  • Carbohydrates: 40 g
  • Fiber: 3 g
  • Protein: 10 g
  • Cholesterol: 10 mg

Keywords: Choose ripe peaches for the best flavor and texture. Use a clear glass for a beautiful presentation. For creaminess, consider whipping the yogurt before layering. Be mindful of the granola-to-yogurt ratio. Prepare yogurt and peaches ahead of time for gatherings, layering just before serving.

Did you make this recipe?

Share a photo and tag us — we can't wait to see what you've made!

Sun-Kissed Frozen Orange Cream Slush

As a child, summer days felt like they lasted forever. I remember the sticky heat wrapping around me as I played outside, my laughter mingling with the sounds of the neighborhood. But nothing could cool me down quite like the moment I’d spot my grandmother, laboring over her blender, whipping up her famous Frozen Orange Creamsicle Slush. That vibrant orange treat, with its frosty texture and sweet citrus aroma, was like a burst of sunshine in a cup. Just one sip, and I could feel the coolness wash over me, sparking pure joy.

This Frozen Orange Creamsicle Slush has a way of making you feel like a kid again. Its creamy, dreamy consistency is a delightful balance of bright orange and soft vanilla, inviting you to dive right in. The refreshing tang of orange dances on your tongue, while the smooth creaminess envelops you in a comforting embrace. It’s a nostalgic treat that’s perfect for hot summer afternoons or anytime you need a little pick-me-up.

What makes my version of this slush stand out is the addition of a hint of vanilla bean, which elevates the flavor and adds an extra layer of richness. Plus, it’s super easy to whip up with just a few simple ingredients that you probably already have on hand! So, if you’re ready to relive those sun-soaked memories, let me show you exactly how to make it.

Sun-Kissed Frozen Orange Cream Slush

Why You’ll Love This Recipe

  • Each slush is a perfect blend of creamy vanilla and zesty orange, creating a nostalgic flavor reminiscent of summer days.
  • This refreshing treat is ready in under 15 minutes, making it an ideal quick dessert for unexpected guests or hot afternoons.
  • With just 8 simple ingredients, it’s budget-friendly, ensuring you don’t have to break the bank to enjoy a delicious slush.
  • The slush has a perfectly smooth texture, thanks to the combination of ice and ice cream, providing a delightful contrast to the bright citrus flavors.
  • It’s highly customizable; you can easily adjust the sweetness and add fresh herbs for a unique twist that suits your taste.

Ingredients

  • 2 cups orange juice (freshly squeezed or store-bought)
  • 1 cup vanilla ice cream
  • 1 cup crushed ice
  • 1/2 cup milk (whole or 2%)
  • 1/4 cup granulated sugar (adjust based on sweetness preference)
  • 1 teaspoon vanilla extract
  • Zest of 1 orange (for added flavor)
  • Fresh orange slices and mint leaves (for garnish)

The star of this Frozen Orange Creamsicle Slush is the orange juice, which provides the vibrant, citrusy base. Freshly squeezed juice will yield the brightest flavor, but store-bought options can be just as convenient. If you’re opting for store-bought, choose 100% pure juice with no added sugars for the best results. Another essential ingredient is the vanilla ice cream; it adds creaminess and sweetness. You can substitute it with dairy-free ice cream if you’re looking for a vegan option. Whole or 2% milk complements the ice cream, creating a smooth blend. If you want a lower-calorie version, almond or oat milk can be good alternatives.

Lastly, the granulated sugar can be adjusted based on your sweetness preference. If you prefer a more natural sweetener, consider using honey or agave syrup. The orange zest enhances the flavor profile, providing an aromatic pop that brings the whole slush together. Don’t skip it! It adds an extra layer of brightness that makes this slush truly special.

Step-by-Step Instructions

  1. Start by preparing your ingredients. Gather 2 cups of orange juice, 1 cup of vanilla ice cream, and 1 cup of crushed ice. Make sure the ice is finely crushed, as larger chunks can make blending difficult.
  2. In a blender, combine the orange juice, vanilla ice cream, crushed ice, and 1/2 cup of milk. Add 1/4 cup of granulated sugar and 1 teaspoon of vanilla extract. If you like a sweeter slush, consider adding a bit more sugar at this stage.
  3. Add the zest of 1 orange to the blender. This step is crucial for enhancing the citrus flavor of your slush. Make sure not to include the bitter white pith—only the flavorful zest.
  4. Blend the mixture on medium-high speed for about 30-45 seconds. Stop once the ingredients are fully combined and the slush has a smooth, even consistency. If you notice large chunks of ice, blend for an additional 10-15 seconds. Avoid over-blending, as this can make the slush too liquidy.
  5. Once blended, taste the slush. If it needs more sweetness, add a little more sugar and blend for a few more seconds. If it’s too thick, you can add a splash of milk to reach your desired consistency.
  6. Pour the slush into glasses. This recipe typically serves 4, but you can easily double it for larger gatherings. Use a spoon to help guide the slush into the glasses if needed.
  7. Garnish each serving with fresh orange slices and mint leaves. The mint not only adds a pop of color but also a refreshing aroma that complements the citrus flavors beautifully.
  8. Serve immediately and enjoy! If you’ve made extra, you can refrigerate it for a short time, but it’s best enjoyed fresh.

Pro Tips for the Best Frozen Orange Creamsicle Slush

  • Don’t skip the orange zest! It’s a game-changer for flavor. Always zest before juicing to make it easier.
  • Use a high-powered blender for the best texture. A standard blender may struggle with ice, leading to uneven consistency. If you have a food processor, that can work too, but ensure the ice is finely crushed.
  • Adjust the ice-to-liquid ratio carefully. If your slush is too thick, it won’t blend well. Start with less ice and add more until you reach your preferred texture.
  • Be cautious with the sugar! Always start with the lower amount, as you can easily add more, but it’s hard to fix an overly sweet slush.
  • For a fun twist, consider adding a splash of coconut milk or a handful of fresh fruit like strawberries or pineapple. This not only enhances the flavor but also adds a beautiful color contrast.

Variations & Serving Ideas

There are countless ways to put a spin on your Frozen Orange Creamsicle Slush. Consider making a tropical version by adding in some pineapple juice or coconut milk for a delightful tropical twist. If you’re feeling adventurous, try incorporating a handful of frozen mango or peach slices for added sweetness. For a lighter version, swap out the vanilla ice cream for Greek yogurt for a creamy yet tangy alternative.

As for serving ideas, this refreshing slush pairs wonderfully with light summer dishes like grilled chicken skewers, fish tacos, or a simple salad topped with citrus vinaigrette. The bright, zesty flavors of the slush complement these dishes perfectly, making them an ideal pairing for a sunny day.

Storage, Make-Ahead & Reheating

This Frozen Orange Creamsicle Slush is best enjoyed fresh, but if you have leftovers, you can store them in an airtight container in the fridge for up to 2 days. Just keep in mind that the slush may lose some of its texture over time as the ice melts. It doesn’t freeze well, as the ice will turn into a solid block. If you must freeze it, blend again after thawing to restore the slushy consistency. This treat is best the day you make it, as the flavors meld together beautifully overnight, enhancing its deliciousness.

Frequently Asked Questions

Can I make Frozen Orange Creamsicle Slush ahead of time?

Yes — in fact, it tastes even better the next day as the flavors meld. However, it’s best to enjoy it fresh, as the texture can change if stored for too long. If you need to prepare it ahead, keep it in the fridge and re-blend before serving.

What kind of orange juice should I use?

For the best flavor, use freshly squeezed orange juice. However, if you’re short on time, opt for 100% pure store-bought juice without added sugars. This will ensure that your slush remains flavorful and refreshing.

Can I substitute the vanilla ice cream?

Absolutely! If you’re looking for a dairy-free option, coconut milk ice cream or a non-dairy vanilla ice cream can work wonderfully. They will still provide the creamy texture and sweetness you desire.

How can I adjust the sweetness of my slush?

You can easily adjust the sweetness by modifying the amount of sugar added. Start with 1/4 cup and taste the mixture before blending. If you prefer it sweeter, add more sugar gradually until it reaches your desired level.

What should I do if my slush is too thick?

If your slush is too thick, simply add a splash of milk or orange juice and blend again. This will help achieve a more drinkable consistency while maintaining the slushy texture. Adjust gradually to reach your preferred thickness.

Sun-Kissed Frozen Orange Cream Slush

Final Thoughts

The Frozen Orange Creamsicle Slush is a delightful blend of refreshing citrus and creamy goodness, making it a perfect treat for warm days or any time you crave a taste of nostalgia. The way the bright orange flavor dances with the creamy texture truly elevates this slush, transforming it into a satisfying escape from the everyday.

This is the kind of recipe I come back to again and again, especially when I’m looking to cool down or impress guests at a summer gathering. It’s simple to make and always brings smiles all around! I encourage you to try this recipe for yourself—don’t hesitate to share your results or even put your own spin on it. Happy slushing!

Print
clock clock iconcutlery cutlery iconflag flag iconfolder folder iconinstagram instagram iconpinterest pinterest iconfacebook facebook iconprint print iconsquares squares iconheart heart iconheart solid heart solid icon

Frozen Orange Creamsicle Slush


  • Author: Lily author
  • Total Time: 15 minutes
  • Yield: 4 servings 1x
Pin Recipe
Print Recipe

Description

This Frozen Orange Creamsicle Slush is a refreshing treat that combines creamy vanilla and zesty orange flavors. Perfect for hot summer days, it brings back nostalgic memories with every sip.


Ingredients

Scale
  • 2 cups orange juice (freshly squeezed or store-bought)
  • 1 cup vanilla ice cream
  • 1 cup crushed ice
  • 1/2 cup milk (whole or 2%)
  • 1/4 cup granulated sugar (adjust based on sweetness preference)
  • 1 teaspoon vanilla extract
  • Zest of 1 orange (for added flavor)
  • Fresh orange slices and mint leaves (for garnish)

Instructions

  1. Start by preparing your ingredients. Gather 2 cups of orange juice, 1 cup of vanilla ice cream, and 1 cup of crushed ice. Make sure the ice is finely crushed, as larger chunks can make blending difficult.
  2. In a blender, combine the orange juice, vanilla ice cream, crushed ice, and 1/2 cup of milk. Add 1/4 cup of granulated sugar and 1 teaspoon of vanilla extract. If you like a sweeter slush, consider adding a bit more sugar at this stage.
  3. Add the zest of 1 orange to the blender. This step is crucial for enhancing the citrus flavor of your slush. Make sure not to include the bitter white pith—only the flavorful zest.
  4. Blend the mixture on medium-high speed for about 30-45 seconds. Stop once the ingredients are fully combined and the slush has a smooth, even consistency. If you notice large chunks of ice, blend for an additional 10-15 seconds. Avoid over-blending, as this can make the slush too liquidy.
  5. Once blended, taste the slush. If it needs more sweetness, add a little more sugar and blend for a few more seconds. If it’s too thick, you can add a splash of milk to reach your desired consistency.
  6. Pour the slush into glasses. This recipe typically serves 4, but you can easily double it for larger gatherings. Use a spoon to help guide the slush into the glasses if needed.
  7. Garnish each serving with fresh orange slices and mint leaves. The mint not only adds a pop of color but also a refreshing aroma that complements the citrus flavors beautifully.
  8. Serve immediately and enjoy! If you’ve made extra, you can refrigerate it for a short time, but it's best enjoyed fresh.
  • Prep Time: 15 min
  • Cook Time: 0 min
  • Category: Dessert
  • Method: Blending
  • Cuisine: American

Nutrition

  • Serving Size: 1 serving
  • Calories: 200
  • Sugar: 30 g
  • Sodium: 50 mg
  • Fat: 5 g
  • Saturated Fat: 3 g
  • Unsaturated Fat: 2 g
  • Trans Fat: 0 g
  • Carbohydrates: 40 g
  • Fiber: 1 g
  • Protein: 2 g
  • Cholesterol: 20 mg

Keywords: Don't skip the orange zest! It's a game-changer for flavor. Always zest before juicing to make it easier.

Did you make this recipe?

Share a photo and tag us — we can't wait to see what you've made!

Zesty Lemon Poppy Seed Delight

One rainy afternoon, I found myself in my grandmother’s cozy kitchen, the kind that always smelled like warmth and love. She was whipping up her famous Lemon Poppy Seed Loaf, a recipe that had been passed down through generations. As the batter came together, the zesty aroma of fresh lemons filled the air, mingling perfectly with the nutty fragrance of poppy seeds. I can still picture her, apron-clad, as she expertly drizzled a vibrant citrus icing over the loaf, creating a glossy, sun-kissed finish that beckoned us to dive in. It was a moment that sparked my own passion for baking, and this recipe has become a cherished staple in my home ever since.

When you take a bite of this Lemon Poppy Seed Loaf, it’s like a burst of sunshine on your palate. The loaf is beautifully golden, with a tender crumb that melts in your mouth. Each slice is speckled with tiny poppy seeds, adding a delightful crunch that contrasts beautifully with the tangy sweetness of the lemon. And that citrus icing? It’s the finishing touch that elevates this loaf from ordinary to extraordinary, with its bright, zesty flavor dancing on your taste buds.

This recipe stands out because it embraces simplicity while delivering on flavor. I’ve added a hint of vanilla to the batter, enhancing the overall taste and making it even more indulgent. Trust me, once you make this Lemon Poppy Seed Loaf With Citrus Icing, it’ll become a go-to in your baking repertoire.

So, let me show you exactly how to make it!

Zesty Lemon Poppy Seed Delight

Why You’ll Love This Recipe

  • Moist and tender crumb that melts in your mouth, thanks to the perfect balance of butter and buttermilk.
  • Bright, zesty lemon flavor paired with crunchy poppy seeds, creating a delightful texture and taste experience.
  • Easy to whip up in just about an hour, perfect for last-minute gatherings or a cozy afternoon treat.
  • Budget-friendly with everyday ingredients, making it an accessible option for all home bakers.
  • The citrus icing adds a sweet tang that elevates the loaf, turning a simple recipe into a showstopper!

Ingredients

  • 1 ½ cups (190g) all-purpose flour
  • 1 teaspoon baking powder
  • ½ teaspoon baking soda
  • ½ teaspoon salt
  • 3 tablespoons poppy seeds
  • ½ cup (115g) unsalted butter, softened to room temperature
  • 1 cup (200g) granulated sugar
  • 2 large eggs
  • 1 teaspoon vanilla extract
  • 1 teaspoon lemon zest (from about 1 medium lemon)
  • ½ cup (120ml) buttermilk
  • 2 tablespoons fresh lemon juice

For the Citrus Icing:

  • 1 cup (120g) powdered sugar
  • 2 tablespoons fresh lemon juice
  • 1 tablespoon orange juice
  • 1 teaspoon lemon zest (for garnish, optional)

Let’s dive into the key ingredients that make this Lemon Poppy Seed Loaf so special. The all-purpose flour provides the structure and base for the loaf, while the baking powder and baking soda ensure it rises perfectly, giving the loaf a light texture. For a gluten-free variation, you could substitute the flour with a gluten-free all-purpose blend. Poppy seeds not only add a delightful crunch but also contribute to the unique flavor profile that pairs well with the citrus notes.

Unsalted butter is crucial for achieving the buttery richness that makes this loaf so moist. If you’re looking for a dairy-free option, coconut oil or a vegan butter can be used instead. The buttermilk is another essential component, providing acidity that activates the baking soda for a fluffy texture. If you don’t have buttermilk on hand, you can easily make a substitute by mixing ½ cup of milk with 1 tablespoon of vinegar or lemon juice and letting it sit for about 5 minutes.

Step-by-Step Instructions

  1. Preheat your oven to 350°F (175°C). Grease a 9×5-inch loaf pan or line it with parchment paper for easy removal later.
  2. In a medium mixing bowl, whisk together 1 ½ cups of all-purpose flour, 1 teaspoon of baking powder, ½ teaspoon of baking soda, ½ teaspoon of salt, and 3 tablespoons of poppy seeds. This helps to evenly distribute the baking agents and ensures a uniform rise.
  3. In a large mixing bowl, cream together ½ cup of softened unsalted butter and 1 cup of granulated sugar using an electric mixer on medium speed for about 3-4 minutes, until the mixture is light and fluffy. Make sure to scrape down the sides of the bowl occasionally.
  4. Add 2 large eggs, 1 teaspoon of vanilla extract, and 1 teaspoon of lemon zest to the creamed butter and sugar, mixing until fully combined. You want a smooth consistency, so ensure there are no lumps of butter.
  5. In a small bowl, combine ½ cup of buttermilk and 2 tablespoons of fresh lemon juice. Alternately add the dry ingredients and buttermilk mixture to the butter mixture, starting and ending with the dry ingredients. Mix just until combined; do not overmix, as this can lead to a dense loaf.
  6. Pour the batter into the prepared loaf pan. Smooth the top with a spatula, ensuring it’s even. Bake in the preheated oven for 50-60 minutes, or until a toothpick inserted in the center comes out clean. The edges should be lightly golden brown, and the center should feel just set.
  7. Once baked, remove the loaf from the oven and allow it to cool in the pan for about 10 minutes. Then, transfer it to a wire rack to cool completely. Resist the urge to slice too soon, as it will be crumbly if it’s still warm.
  8. While the loaf is cooling, prepare the citrus icing. In a medium bowl, whisk together 1 cup of powdered sugar, 2 tablespoons of fresh lemon juice, and 1 tablespoon of orange juice until smooth. If the icing is too thick, you can add a little more juice to reach your desired consistency.
  9. Once the loaf is completely cool, drizzle the citrus icing over the top. If you like, sprinkle with an additional teaspoon of lemon zest for an extra pop of flavor and color.

Pro Tips for the Best Lemon Poppy Seed Loaf With Citrus Icing

  • Be careful not to overmix your batter; this is a common mistake that can lead to a dense loaf. Mix just until the dry ingredients are incorporated for a light and fluffy texture.
  • Use room temperature ingredients, especially the butter and eggs. This helps to create a smoother batter and ensures even baking. Take your eggs out of the fridge about 30 minutes before you start.
  • For a more pronounced lemon flavor, consider adding a little lemon extract in addition to the zest and juice. Just a half teaspoon can elevate the citrus notes significantly.
  • When measuring your flour, spoon it into the measuring cup and level it off with a knife instead of scooping directly from the bag. This prevents packing and ensures you don’t end up with a dry loaf.
  • Invest in a good quality loaf pan; it makes a difference in heat distribution, which ensures even baking. If your pan is dark-coated, reduce the oven temperature by 25°F to prevent over-browning.

Variations & Serving Ideas

For a delightful twist, consider adding blueberries or raspberries to the batter for a fruity burst of flavor. You can also experiment with different citrus fruits—try lime or grapefruit zest and juice for a refreshing change. For a healthier option, substitute half of the all-purpose flour with whole wheat flour for added fiber without compromising too much on texture.

This Lemon Poppy Seed Loaf pairs beautifully with a light salad, such as a mixed greens salad with a vinaigrette, or a cup of tea for a cozy afternoon treat. It also complements a creamy cheese platter, as the acidity of the loaf balances rich cheeses perfectly. Lastly, a scoop of vanilla ice cream on the side creates a delightful contrast of temperatures and flavors!

Storage, Make-Ahead & Reheating

This Lemon Poppy Seed Loaf can be stored at room temperature for up to 3 days if wrapped tightly in plastic wrap. If you want to keep it longer, it freezes well for up to 3 months. To freeze, wrap the loaf tightly in plastic wrap and then in aluminum foil to prevent freezer burn.

When you’re ready to enjoy it again, simply thaw it in the fridge overnight. Reheat individual slices in the microwave for 15-20 seconds or in a toaster oven until warmed through. Interestingly, many people find that this loaf tastes even better the next day, as the flavors have time to meld!

Frequently Asked Questions

Can I make Lemon Poppy Seed Loaf With Citrus Icing ahead of time?

Yes — in fact, it tastes even better the next day! You can make the loaf a day in advance, allowing the flavors to develop. Just be sure to store it in an airtight container to maintain its moisture.

Can I substitute the poppy seeds?

Absolutely! If you don’t have poppy seeds on hand or prefer an alternative, you can use sesame seeds for a similar crunch or omit them entirely for a smooth loaf.

What can I use instead of buttermilk?

If you don’t have buttermilk, you can easily create a substitute by mixing ½ cup of milk (dairy or plant-based) with 1 tablespoon of vinegar or lemon juice. Let it sit for 5 minutes before using in the recipe.

How can I make this recipe gluten-free?

To make a gluten-free version of this Lemon Poppy Seed Loaf, substitute the all-purpose flour with a gluten-free all-purpose flour blend. Just ensure that the blend contains a binding agent like xanthan gum for the best results.

What is the best way to store leftover loaf?

Leftover Lemon Poppy Seed Loaf should be stored in an airtight container at room temperature for up to 3 days. For longer storage, wrap it tightly and freeze for up to 3 months. Thaw it before serving for the best texture.

Zesty Lemon Poppy Seed Delight

Final Thoughts

The Lemon Poppy Seed Loaf with Citrus Icing is truly a delightful treat that brings a burst of brightness to any occasion. The zesty lemon flavor combined with the subtle crunch of poppy seeds creates a satisfying balance, while the citrus icing adds a touch of sweetness that perfectly complements the loaf’s tanginess.

This is the kind of recipe I come back to again and again, especially when I want to brighten up a gloomy day or celebrate a small victory. The aroma that fills the kitchen as it bakes is absolutely heavenly! I encourage you to give this recipe a try; you might just find it becoming a beloved staple in your home. Don’t forget to share your results or even add your own unique twist—I can’t wait to see what you create!

Print
clock clock iconcutlery cutlery iconflag flag iconfolder folder iconinstagram instagram iconpinterest pinterest iconfacebook facebook iconprint print iconsquares squares iconheart heart iconheart solid heart solid icon

Lemon Poppy Seed Loaf


  • Author: Lily author
  • Total Time: 13 minute
  • Yield: 1 loaf 1x
Pin Recipe
Print Recipe

Description

This Lemon Poppy Seed Loaf is a delightful treat that combines zesty lemon flavor with crunchy poppy seeds. Topped with a citrus icing, it’s perfect for any occasion.


Ingredients

Scale
  • 1 ½ cups (190g) all-purpose flour
  • 1 teaspoon baking powder
  • ½ teaspoon baking soda
  • ½ teaspoon salt
  • 3 tablespoons poppy seeds
  • ½ cup (115g) unsalted butter, softened to room temperature
  • 1 cup (200g) granulated sugar
  • 2 large eggs
  • 1 teaspoon vanilla extract
  • 1 teaspoon lemon zest (from about 1 medium lemon)
  • ½ cup (120ml) buttermilk
  • 2 tablespoons fresh lemon juice
  • 1 cup (120g) powdered sugar
  • 2 tablespoons fresh lemon juice
  • 1 tablespoon orange juice
  • 1 teaspoon lemon zest (for garnish, optional)

Instructions

  1. Preheat your oven to 350°F (175°C). Grease a 9×5-inch loaf pan or line it with parchment paper for easy removal later.
  2. In a medium mixing bowl, whisk together 1 ½ cups of all-purpose flour, 1 teaspoon of baking powder, ½ teaspoon of baking soda, ½ teaspoon of salt, and 3 tablespoons of poppy seeds. This helps to evenly distribute the baking agents and ensures a uniform rise.
  3. In a large mixing bowl, cream together ½ cup of softened unsalted butter and 1 cup of granulated sugar using an electric mixer on medium speed for about 3-4 minutes, until the mixture is light and fluffy. Make sure to scrape down the sides of the bowl occasionally.
  4. Add 2 large eggs, 1 teaspoon of vanilla extract, and 1 teaspoon of lemon zest to the creamed butter and sugar, mixing until fully combined. You want a smooth consistency, so ensure there are no lumps of butter.
  5. In a small bowl, combine ½ cup of buttermilk and 2 tablespoons of fresh lemon juice. Alternately add the dry ingredients and buttermilk mixture to the butter mixture, starting and ending with the dry ingredients. Mix just until combined; do not overmix, as this can lead to a dense loaf.
  6. Pour the batter into the prepared loaf pan. Smooth the top with a spatula, ensuring it’s even. Bake in the preheated oven for 50-60 minutes, or until a toothpick inserted in the center comes out clean. The edges should be lightly golden brown, and the center should feel just set.
  7. Once baked, remove the loaf from the oven and allow it to cool in the pan for about 10 minutes. Then, transfer it to a wire rack to cool completely. Resist the urge to slice too soon, as it will be crumbly if it’s still warm.
  8. While the loaf is cooling, prepare the citrus icing. In a medium bowl, whisk together 1 cup of powdered sugar, 2 tablespoons of fresh lemon juice, and 1 tablespoon of orange juice until smooth. If the icing is too thick, you can add a little more juice to reach your desired consistency.
  9. Once the loaf is completely cool, drizzle the citrus icing over the top. If you like, sprinkle with an additional teaspoon of lemon zest for an extra pop of flavor and color.
  • Prep Time: 15 mins
  • Cook Time: 50-60 mins
  • Category: Dessert
  • Method: Baking
  • Cuisine: American

Nutrition

  • Serving Size: 1 slice
  • Calories: 200
  • Sugar: 15 g
  • Sodium: 150 mg
  • Fat: 8 g
  • Saturated Fat: 5 g
  • Unsaturated Fat: 3 g
  • Trans Fat: 0 g
  • Carbohydrates: 30 g
  • Fiber: 1 g
  • Protein: 3 g
  • Cholesterol: 40 mg

Keywords: Be careful not to overmix your batter; this is a common mistake that can lead to a dense loaf. Use room temperature ingredients for a smoother batter and even baking.

Did you make this recipe?

Share a photo and tag us — we can't wait to see what you've made!

  • Privacy Policy
  • Terms Of Service
  • Contact
  • About
  • GDPR

Copyright © 2025 Homesmad