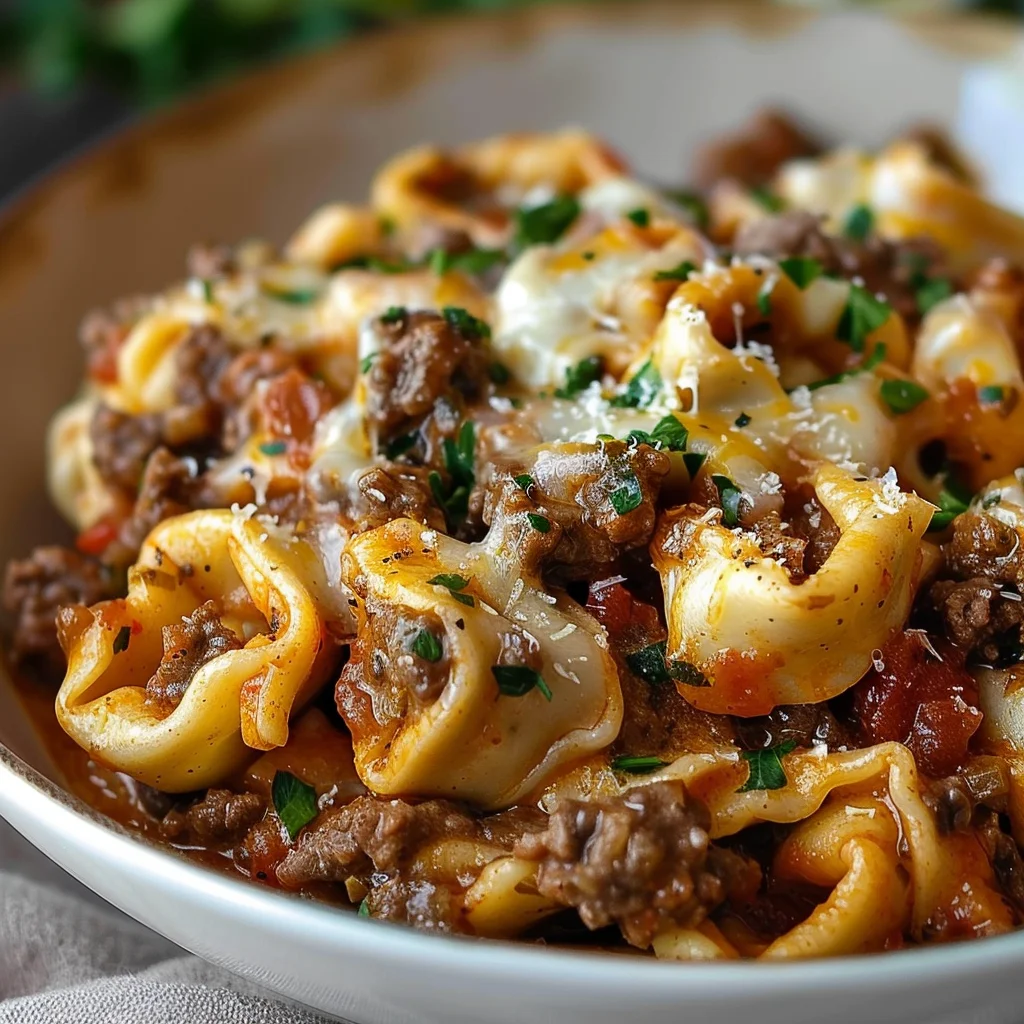
Cheesesteak Tortellini In Rich Provolone Sauce is about to become your new favorite comfort food obsession. Imagine, if you will, the iconic, savory essence of a classic Philly cheesesteak—that perfect harmony of thinly sliced steak, sweet caramelized onions, and gooey cheese—now reimagined and lovingly embraced by tender, pillowy tortellini. It’s a culinary journey that takes the familiar flavors we cherish from the streets of Philadelphia and transports them directly into a sumptuous, Italian-inspired pasta dish.
While the traditional cheesesteak holds a special, venerable place in American culinary history, this innovative recipe pays respectful homage to its roots while boldly venturing into exciting new territory. We’re not just making a meal; we’re creating an experience that brings together two beloved worlds. People absolutely fall in love with this particular rendition because of its incredible depth of flavor and satisfying textures. The succulent steak and sweet onions perfectly complement the delicate tortellini, all unified by an unbelievably smooth and rich provolone sauce that clings to every piece. This dish offers the ultimate in hearty, cheesy indulgence, providing a delightful twist that makes it both excitingly new and deeply comforting. Get ready to savor every forkful of this truly magnificent Cheesesteak Tortellini In Rich Provolone Sauce.
Ingredients:
- For the Cheesesteak Filling:
- 1.5 lbs (about 680g) high-quality ribeye steak, trimmed of excess fat
- 2 tablespoons olive oil, plus more if needed
- 2 large yellow onions, thinly sliced (about 3 cups)
- 2 bell peppers (I love a mix of green and red for color and flavor!), thinly sliced
- 8 oz (about 225g) cremini mushrooms, wiped clean and thinly sliced (optional, but highly recommended for umami)
- 4 cloves garlic, minced
- 1 tablespoon Worcestershire sauce
- 1 teaspoon sea salt, plus more to taste
- ½ teaspoon freshly ground black pepper, plus more to taste
- For the Tortellini:
- 20 oz (about 560g) fresh or frozen cheese tortellini (I usually go for fresh for the best texture)
- 1 tablespoon olive oil (for the pasta water, optional but helps prevent sticking)
- Salt for pasta water
- For the Rich Provolone Sauce:
- 4 tablespoons unsalted butter
- 4 tablespoons all-purpose flour
- 2 cups whole milk, warmed (this helps prevent lumps!)
- 1 cup heavy cream
- 1 cup chicken or vegetable broth
- 8 oz (about 225g) sharp Provolone cheese, freshly shredded (using a block and grating it yourself makes a huge difference!)
- 4 oz (about 115g) mild Provolone cheese, freshly shredded
- ½ cup grated Parmesan cheese, plus more for garnish
- ¼ teaspoon freshly grated nutmeg (a little goes a long way and adds amazing warmth!)
- ½ teaspoon Dijon mustard (secret ingredient for depth, you won’t taste “mustard”)
- ½ teaspoon white pepper (or black pepper, if you prefer)
- 1 teaspoon sea salt, or to taste
- For Garnish (Optional but highly recommended):
- Fresh parsley, chopped
- Red pepper flakes (for a little kick)
Method:
Phase 1: Preparing Your Cheesesteak Elements
- Prepare the Ribeye Steak: My first crucial tip for perfect cheesesteak meat is to partially freeze your ribeye steak for about 30-45 minutes. This makes it much easier to slice super thin, which is exactly what we want for that authentic, melt-in-your-mouth texture. Once slightly firm, use a very sharp knife to slice the steak against the grain into paper-thin pieces. You can then roughly chop these slices into smaller, bite-sized pieces if you like, ensuring they are uniform enough to cook evenly. Season these thinly sliced pieces generously with about half of your sea salt and black pepper right now. Setting it aside allows the seasoning to penetrate slightly while you work on the vegetables.
- Sauté the Onions and Bell Peppers: In a large, heavy-bottomed skillet or a Dutch oven, heat 1 tablespoon of olive oil over medium heat. Add your thinly sliced yellow onions and bell peppers. This is where patience pays off! We’re not just softening them; we’re aiming for a lovely caramelization that brings out their natural sweetness and depth of flavor. Stir occasionally, allowing them to cook down for about 10-12 minutes, or until they are tender and have developed a beautiful golden-brown color. Once they reach this stage, transfer them to a bowl and set them aside. We’ll add them back in later to avoid overcooking them.
- Cook the Mushrooms (If Using): If you’re incorporating mushrooms, add another splash of olive oil to the same skillet over medium-high heat. Add your sliced cremini mushrooms in an even layer. Resist the urge to stir them constantly! Let them sear undisturbed for 3-4 minutes until they release their moisture and start to brown beautifully. Then, you can stir and continue cooking for another 3-5 minutes until they are deeply golden and tender. This browning step is crucial for developing that rich, savory umami flavor. Once done, add them to the bowl with your cooked onions and peppers.
- Sear the Ribeye and Combine: Increase the heat in your skillet to medium-high or high. Add the remaining 1 tablespoon of olive oil. Once shimmering, add a portion of your thinly sliced ribeye steak to the hot pan, making sure not to overcrowd it. You want to sear the meat, not steam it. Cook in batches if necessary. Sear quickly for 1-2 minutes per side, just until it’s nicely browned and cooked through. As each batch finishes, add it to the bowl with the vegetables. Once the last batch of steak is almost done, add the minced garlic to the pan and cook for about 30 seconds until fragrant, being careful not to burn it. Pour in the Worcestershire sauce, scraping up any browned bits from the bottom of the pan – this is pure flavor! Return all of the cooked steak, onions, peppers, and mushrooms (if using) to the skillet, tossing everything together to combine. Taste and adjust the seasoning with additional salt and pepper if needed. Transfer this glorious cheesesteak filling to a clean bowl and keep it warm. The aroma alone at this stage is absolutely intoxicating, a promise of the deliciousness to come!
Phase 2: Crafting the Rich Provolone Sauce
- Make the Roux: In a medium-sized saucepan, melt the 4 tablespoons of unsalted butter over medium heat. Once the butter is completely melted and slightly foamy, sprinkle in the 4 tablespoons of all-purpose flour. Immediately begin whisking constantly. You’ll be creating what we call a roux. Continue whisking for 1-2 minutes, until the mixture forms a smooth paste and starts to smell slightly nutty and loses the raw flour smell. It should be a pale blonde color. This roux is the foundation of our incredibly rich and creamy sauce, so take your time here to ensure it’s cooked properly.
- Gradually Whisk in Liquids: Now, this is a critical step for a silky-smooth sauce: slowly, and I mean slowly, pour in your warmed whole milk, a little bit at a time, whisking vigorously after each addition. The mixture will seize up at first, but keep whisking, and it will gradually loosen and become smooth. Once all the milk is incorporated, gradually whisk in the chicken or vegetable broth using the same slow and steady technique. This gradual addition, combined with the warmed milk, is my secret for preventing lumps in the sauce. Bring the mixture to a gentle simmer, continuing to whisk occasionally, and you’ll notice it will begin to thicken.
- Introduce the Cream and Simmer: Once the sauce has started to thicken, pour in the 1 cup of heavy cream. Stir gently to combine. Allow the sauce to return to a gentle simmer, letting it cook for another 3-5 minutes, stirring occasionally, until it reaches a consistency where it coats the back of a spoon. It should be lush and velvety, but not overly thick at this stage, as the cheese will add more body. The anticipation for this sauce is truly building, as the creamy aroma fills your kitchen.
- Melt in the Provolone and Parmesan: Reduce the heat to low. Now for the star of the show! Gradually add your freshly shredded sharp and mild Provolone cheeses, along with the ½ cup of grated Parmesan cheese, a handful at a time. Whisk constantly as you add the cheese. It’s important to do this over low heat, as high heat can cause the cheese to separate or become stringy. Continue whisking until all the cheese has melted into the sauce, creating a beautifully smooth, glossy, and utterly decadent mixture. Taste the sauce at this point; you’ll notice the incredible depth from the Provolone.
- Season and Perfect Your Sauce: Once the cheese is fully incorporated and the sauce is perfectly smooth, it’s time to season it to perfection. Stir in the freshly grated nutmeg, Dijon mustard, and white pepper. Add the 1 teaspoon of sea salt, then taste and adjust as needed. You might find you need a little more salt, depending on the saltiness of your broth and cheeses. The Dijon mustard, though subtle, really enhances the cheese flavor and prevents the sauce from tasting flat. You want a sauce that is rich, deeply flavorful, and incredibly creamy, a true “Rich Provolone Sauce” that lives up to its name and will perfectly complement our cheesesteak and tortellini. Keep the sauce warm over very low heat, stirring occasionally, while you cook the tortellini.
Phase 3: Cooking the Tortellini
- Boil the Water: Bring a large pot of generously salted water to a rolling boil. Adding salt to your pasta water is essential; it’s your only chance to season the tortellini from the inside out, truly elevating the final dish. I usually add about 1-2 tablespoons of salt for a large pot, making it taste like the ocean. You can also add a tablespoon of olive oil to the water, which helps prevent the tortellini from sticking together, though it’s entirely optional.
- Cook the Tortellini: Carefully add the cheese tortellini to the boiling water. Stir gently to separate them, especially if they are fresh or frozen. Cook according to the package directions, or until they are al dente. This means they should be tender but still have a slight bite to them. Overcooked tortellini can become mushy, and we want that perfect textural contrast in our dish. For fresh tortellini, this usually only takes 2-4 minutes. Once cooked, drain the tortellini, but make sure to reserve about a cup of the starchy pasta water before draining – this will be our secret weapon for adjusting the sauce consistency later if needed. The tortellini should be warm and ready for assembly.
Phase 4: Assembling Your “Cheesesteak Tortellini In Rich Provolone Sauce”
- Combine Tortellini and Cheesesteak Filling: In a very large mixing bowl or your now-empty Dutch oven (if it’s large enough), gently combine the hot, drained tortellini with your warm cheesesteak filling. Use a spatula or large spoon to carefully fold them together. We want to ensure everything is evenly distributed without crushing the delicate tortellini. The vibrant colors of the cheesesteak mixture against the pale tortellini are already a treat for the eyes!
- Enrobe in Rich Provolone Sauce: Now for the grand finale! Pour your luscious, warm Rich Provolone Sauce over the tortellini and cheesesteak mixture. Using your spatula or spoons, gently fold everything together until every single tortellini and every piece of cheesesteak is thoroughly coated in that velvety, cheesy sauce. Take your time to ensure an even distribution. The aroma at this stage is absolutely heavenly – the savory notes of the cheesesteak melding with the creamy, tangy Provolone sauce. This is the moment your kitchen transforms into a true Italian-American bistro!
- Adjust Consistency (If Needed): If you find the sauce is a little too thick or clingy, this is where your reserved pasta water comes in handy. Add a splash or two of the starchy water, a tablespoon at a time, and stir until you reach your desired consistency. The pasta water helps to thin the sauce without diluting its flavor, and its starch helps the sauce cling beautifully to the tortellini. Trust me, this trick makes a huge difference in the final texture.
- Optional: Baked Finish for Extra Indulgence: For an extra layer of decadence and a beautiful golden crust, you can transfer the entire mixture into a large, oven-safe baking dish. If you desire, sprinkle a bit more shredded Provolone and Parmesan cheese over the top. Bake in a preheated oven at 375°F (190°C) for 10-15 minutes, or until the cheese is melted and bubbly and the edges are lightly golden. This step isn’t strictly necessary but adds a fantastic texture and makes it feel even more like a special, comforting meal.
- Garnish and Serve Immediately: Once assembled (and optionally baked), transfer your magnificent “Cheesesteak Tortellini In Rich Provolone Sauce” to a beautiful serving platter or individual bowls. Garnish generously with fresh chopped parsley, which adds a wonderful burst of color and freshness that cuts through the richness. For those who enjoy a little heat, a sprinkle of red pepper flakes is a fantastic addition. Serve this incredible dish immediately, while it’s piping hot and the sauce is at its most glorious. Each forkful promises a harmonious blend of tender tortellini, savory cheesesteak, and that unbelievably rich, creamy Provolone sauce. Enjoy every single bite of this truly unique and satisfying meal!
Conclusion:
And so, we arrive at the culmination of what I truly believe is not just a meal, but an experience – a symphony of flavors and textures designed to comfort, satisfy, and thoroughly impress. I’ve poured my heart into perfecting this recipe, and I genuinely cannot wait for you to discover the magic that happens when classic Philly cheesesteak elements meet the delightful embrace of pasta. This isn’t just another dinner; it’s a testament to the fact that two incredible culinary traditions can merge to create something utterly spectacular, something truly more than the sum of its parts. Every forkful is a journey, from the tender, seasoned steak to the al dente tortellini, all enveloped in that velvety, unforgettable sauce. It’s a dish that manages to be both familiar and excitingly new all at once, offering a luxurious twist on comfort food that will undoubtedly become a staple in your home.
I know you’re going to love the depth of flavor that comes from the perfectly caramelized onions and peppers, marrying beautifully with the savory, thinly sliced beef. But what truly elevates this dish to an art form is the incredible Cheesesteak Tortellini In Rich Provolone Sauce itself. It’s a sauce that clings to every piece of tortellini, ensuring that each bite is packed with that authentic, slightly sharp, wonderfully creamy provolone goodness. It’s warm, it’s inviting, and it has that profound stick-to-your-ribs quality that makes it perfect for a cozy night in, a celebratory family dinner, or simply when you need a little culinary hug. The careful balance of seasonings ensures that the robust flavors of the beef and cheese shine through without overwhelming the delicate pasta, creating a harmonious and incredibly satisfying dish that feels both gourmet and homey at the same time.
Serving Suggestions to Elevate Your Meal
While this dish is undeniably a star on its own, a few thoughtful accompaniments can truly complete the experience. I highly recommend serving this hearty dish alongside a crisp, vibrant green salad, perhaps dressed simply with a tangy vinaigrette. The freshness and acidity of the salad will cut through the richness of the sauce beautifully, providing a delightful contrast that cleanses the palate and keeps every bite exciting. Another fantastic addition would be a generous slice of crusty Italian bread or, better yet, some homemade garlic bread. It’s perfect for soaking up every last drop of that incredible provolone sauce, ensuring no deliciousness goes to waste. For those who enjoy a beverage pairing, a medium-bodied red wine, such as a Sangiovese or a Cabernet Franc, would complement the savory notes of the beef and the richness of the cheese wonderfully, enhancing the overall dining experience.
Endless Possibilities: Delicious Variations to Explore
One of the things I love most about cooking is the freedom to experiment and make a recipe truly your own. While my version of Cheesesteak Tortellini In Rich Provolone Sauce is, in my humble opinion, perfect, I encourage you to play around with it! If you’re a fan of a little heat, a pinch of red pepper flakes added to the sauce or sautéed with the vegetables can provide a fantastic kick. For an extra layer of flavor, consider adding some sautéed mushrooms alongside your onions and peppers – they bring an earthy depth that pairs beautifully with the beef and provolone. You could also experiment with different types of cheese; a blend of provolone and white cheddar could add a sharper, more complex profile, or a touch of smoked gouda could introduce an unexpected smoky note. If you’re looking to mix up the protein, thinly sliced chicken breast could be substituted for the steak, offering a lighter but equally delicious alternative. And for those who love fresh herbs, a sprinkle of chopped fresh parsley or chives just before serving can add a burst of color and a fresh aromatic finish that truly brightens the dish.
So, now it’s your turn. I’ve shared my secrets, my passion, and my absolute conviction that this recipe is a game-changer. I urge you, don’t just read about it – gather your ingredients, fire up your stove, and dive into the wonderful world of this unforgettable dish. You deserve to experience the pure joy and satisfaction that comes from creating something so delicious with your own hands. And once you’ve savored every last bite, I would absolutely love to hear about your experience! Did you stick to the recipe, or did you add your own creative twist? What was your favorite part? Please, come back and share your thoughts, your photos, or any brilliant variations you came up with in the comments below. Your feedback means the world to me, and it helps inspire other home cooks to embark on their own culinary adventures. Happy cooking, my friends, and prepare to fall in love with your new favorite pasta dish!
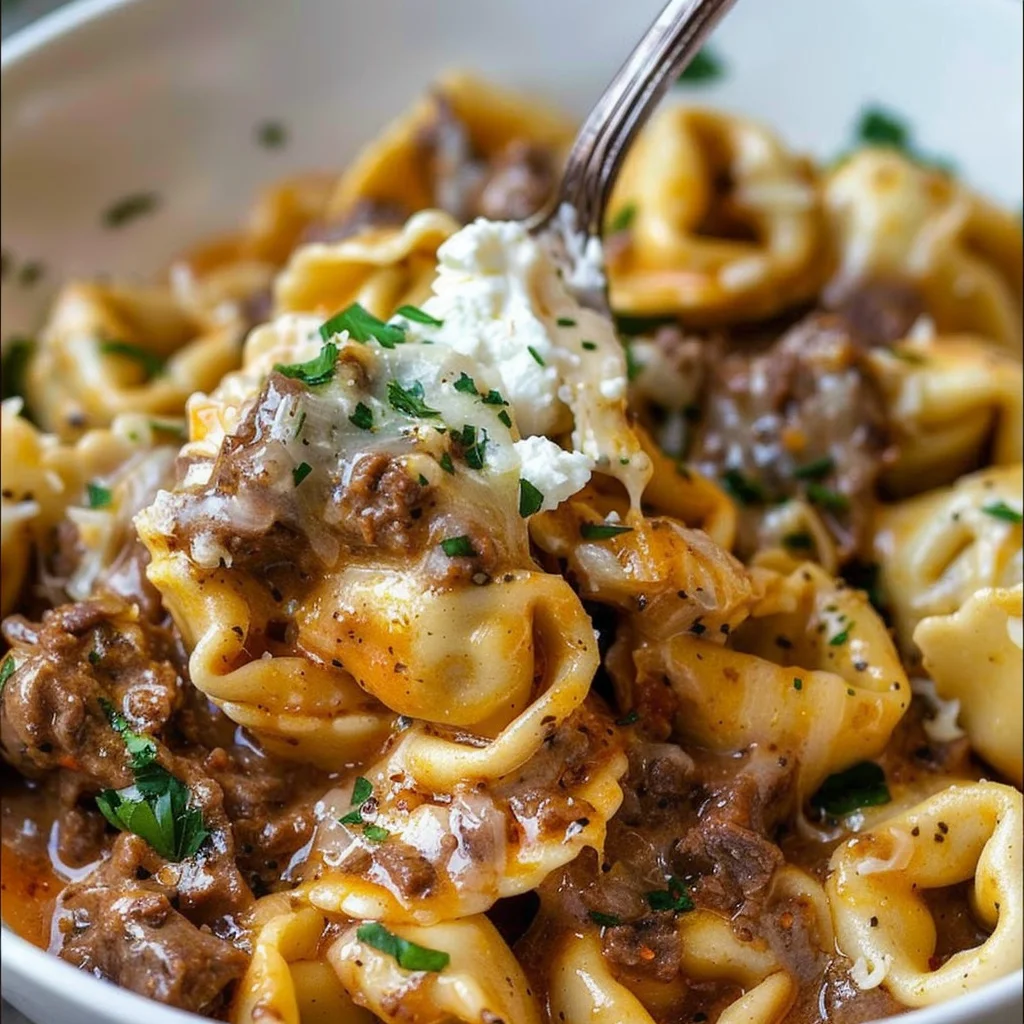
Cheesesteak Tortellini In Rich Provolone Sauce
Cheesesteak Tortellini in Rich Provolone Sauce is the perfect fusion of classic Philly cheesesteak flavors and comforting pasta. This dish brings together tender bites of beef, savory onions and peppers, and cheese-filled tortellini, all enveloped in a luscious provolone sauce. Every forkful is packed with creamy, cheesy goodness and the bold, meaty flavors that make cheesesteaks so irresistible. Whether you’re looking for a cozy weeknight meal or a dish to impress guests, this recipe delivers in both taste and texture.
Ingredients
-
1 lb beef sirloin or ribeye, thinly sliced
-
2 tbsp olive oil
-
2 large yellow onions, thinly sliced
-
2 bell peppers (green/red), thinly sliced
-
8 oz cremini mushrooms, sliced (optional)
-
4 cloves garlic, minced
-
1 tbsp Worcestershire sauce
-
1 tsp sea salt (for beef)
-
½ tsp black pepper (for beef)
-
1 package (20 oz) cheese tortellini
-
Salt for pasta water
-
4 tbsp unsalted butter
-
4 tbsp all-purpose flour
-
2 cups whole milk, warmed
-
1 cup heavy cream
-
1 cup beef broth
-
8 oz sharp Provolone cheese, shredded
-
4 oz mild Provolone cheese, shredded
-
½ cup grated Parmesan cheese
-
¼ tsp freshly grated nutmeg
-
½ tsp Dijon mustard
-
½ tsp white pepper
-
1 tsp sea salt (for sauce)
-
Fresh parsley, chopped (for garnish)
-
Red pepper flakes (for garnish, optional)
Instructions
-
Step 1
Partially freeze beef (30-45 min) for easier slicing, then thinly slice against the grain. Season with ½ tsp sea salt and ¼ tsp black pepper. In a large skillet, heat 1 tbsp olive oil over medium heat. Sauté sliced onions and bell peppers for 10-12 min until caramelized. Transfer to a bowl. If using, add another splash of oil, then cook mushrooms for 3-5 min until golden; add to vegetables. -
Step 2
Increase skillet heat to medium-high. Add remaining 1 tbsp olive oil. Sear beef in batches for 1-2 min per side until browned. Add minced garlic and cook 30 seconds until fragrant. Stir in Worcestershire sauce, scraping pan. Return all cooked beef, vegetables, and mushrooms to the skillet; toss to combine. Keep warm. -
Step 3
In a medium saucepan, melt 4 tbsp unsalted butter over medium heat. Whisk in 4 tbsp all-purpose flour for 1-2 min until pale blonde. Slowly whisk in warmed whole milk, then beef broth. Bring to a gentle simmer, whisking occasionally, until thickened. Stir in 1 cup heavy cream and simmer for 3-5 minutes until sauce coats the back of a spoon. -
Step 4
Reduce heat to low. Gradually whisk in shredded sharp and mild Provolone and Parmesan cheeses until smooth and melted. Stir in nutmeg, Dijon mustard, white pepper, and 1 tsp sea salt. Taste and adjust seasoning. Keep sauce warm over very low heat. -
Step 5
Bring a large pot of heavily salted water to a rolling boil (optional: add 1 tbsp olive oil). Add cheese tortellini and cook according to package directions until al dente (2-4 min for fresh). Drain, reserving 1 cup starchy pasta water. -
Step 6
In a very large bowl, gently combine the hot, drained tortellini with the warm beef cheesesteak filling. Pour the Rich Provolone Sauce over the mixture and fold gently until thoroughly coated. If the sauce is too thick, add reserved pasta water, 1 tbsp at a time, until desired consistency. Garnish with fresh chopped parsley and red pepper flakes (optional). Serve immediately. -
Step 7
For an extra indulgent finish, transfer the entire mixture to a large, oven-safe baking dish. Sprinkle with more shredded Provolone and Parmesan. Bake in a preheated oven at 375°F (190°C) for 10-15 min, or until cheese is melted, bubbly, and lightly golden.
Important Information
Nutrition Facts (Per Serving)
It is important to consider this information as approximate and not to use it as definitive health advice.
Allergy Information
Please check ingredients for potential allergens and consult a health professional if in doubt.