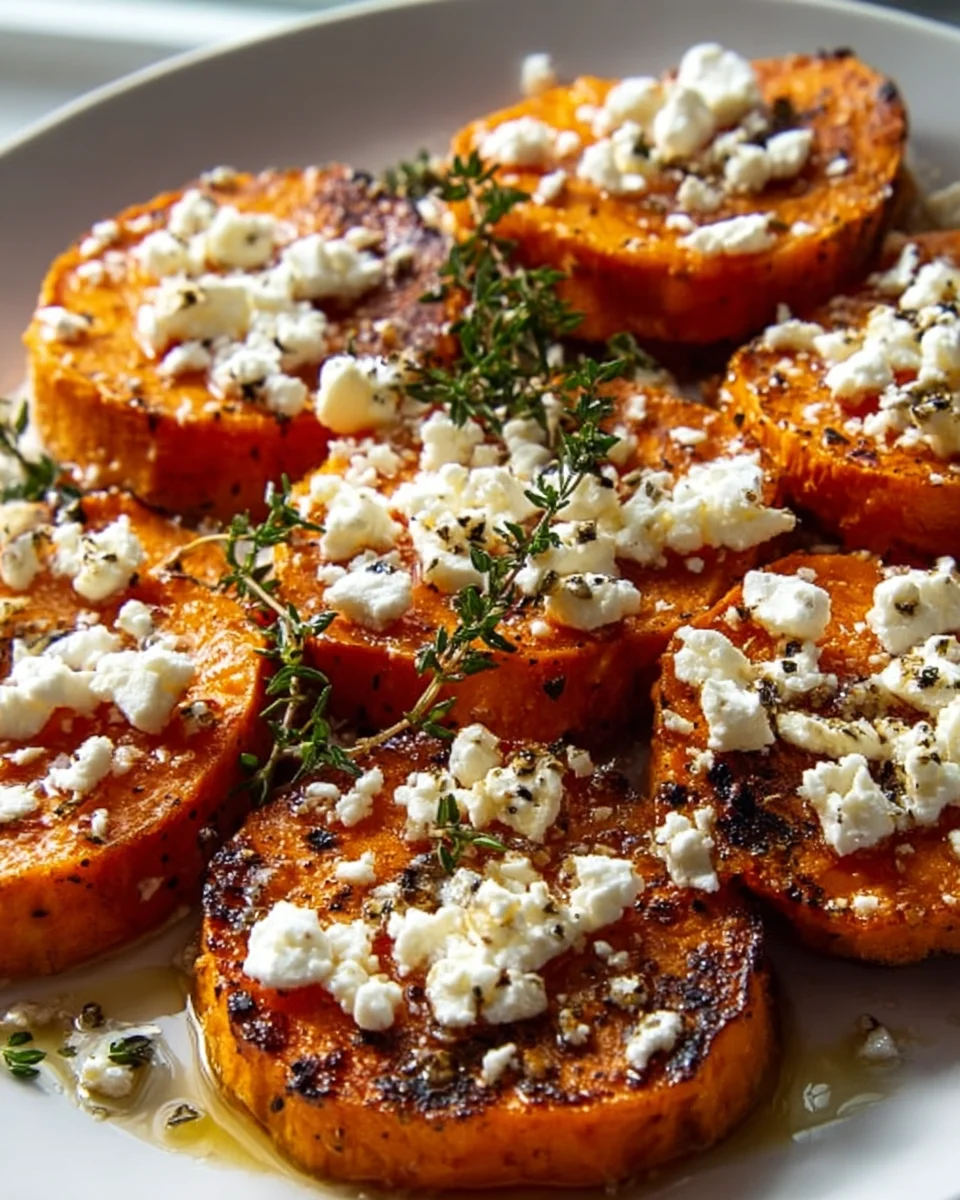
Roasted Sweet Potato Rounds With Honey Feta
Oh my goodness, get ready to meet your new favorite dish! I’m so excited to share this incredible recipe for
Roasted Sweet Potato Rounds With Honey Feta
with you. This isn’t just another side dish; it’s a vibrant explosion of flavors and textures that I know you’re going to fall head over heels for.
What makes this recipe so incredibly special, you ask? Well, it’s the magical way the naturally sweet, earthy flavor of roasted sweet potatoes perfectly harmonizes with the salty, tangy creaminess of feta cheese, all brought together by a golden ribbon of honey. It’s a symphony for your taste buds – sweet, savory, and just a little bit unexpected! I promise you, each bite is a delightful journey.
You’ll love how effortlessly elegant this dish is, making it perfect for impressing guests as an appetizer, serving alongside your favorite beef main course, or even enjoying as a light, satisfying lunch. We’re talking about simple sweet potato rounds, baked until they’re caramelized and tender, then adorned with crumbly feta and a luscious honey drizzle. It’s incredibly easy to prepare but tastes like something you’d find at a fancy brunch spot. Trust me, once you try it, you’ll be making it again and again!
Ingredient Notes
Oh, I’m so excited for you to try these Roasted Sweet Potato Rounds with Honey Feta! The beauty of this dish lies in its simple yet incredibly harmonious ingredients. I’ve carefully chosen each component to ensure a perfect balance of sweet, savory, and tangy. Let’s dive into what makes them sing!
Sweet Potatoes
-
Choosing Your Sweet Potatoes: I always recommend selecting firm, medium-sized sweet potatoes that feel heavy for their size and have smooth skin, free from blemishes or soft spots. The longer, thinner varieties tend to be easier to slice into uniform rounds, which is key for even cooking.
-
Preparation: While you can absolutely peel them for a smoother finish, I often leave the skin on. It gets wonderfully crispy when roasted and adds a lovely rustic touch, plus extra nutrients! Just make sure to give them a good scrub under cold water first. The most crucial part is slicing them into even rounds, about 1/4 to 1/2 inch thick. Too thin, and they might burn; too thick, and they’ll take ages to cook.
-
Substitutions: If sweet potatoes aren’t available, or you’re looking for a slight variation, butternut squash can work in a pinch. You’d need to adjust the roasting time as squash can cook a bit quicker, and it might be harder to get perfect “rounds” due to its shape. White potatoes would give a completely different flavor profile, but could also be roasted this way, just without the natural sweetness of the sweet potato.
Honey
-
The Star Sweetener: A good quality honey truly elevates this dish. I prefer a lighter, more floral honey, like clover or orange blossom, as it complements the sweet potato and feta without overpowering them. Its sticky sweetness helps to caramelize the feta ever so slightly when it hits the warm rounds.
-
Consistency: If your honey is very thick or crystallized, a quick warm-up in the microwave for a few seconds can make it easier to drizzle evenly over the rounds.
-
Substitutions: Maple syrup is a fantastic non-honey alternative if you’re looking for a different sweet note. It offers a rich, earthy sweetness that would also pair beautifully with the other ingredients, creating a slightly different, but equally delicious, experience.
Feta Cheese
-
The Tangy Counterpart: Feta is indispensable here. Its salty, briny, and slightly tangy flavor provides the perfect contrast to the sweet potatoes and honey. I always reach for a block of good quality feta (preferably sheep’s milk feta) rather than pre-crumbled. It tends to be creamier and less dry, and crumbling it by hand allows for more delightful, uneven texture.
-
Flavor Profile: The creaminess of the feta, especially when it slightly softens from the warmth of the roasted sweet potatoes, is just divine.
-
Substitutions: If feta isn’t your favorite, or you want to experiment, goat cheese would offer a similar tanginess but with a creamier texture. Ricotta cheese could also work if you’re after a milder, less salty, and very creamy topping, though it might need a pinch more salt to balance the flavors.
Olive Oil, Salt, and Pepper
-
Good Quality Oil: A good extra virgin olive oil is essential for coating the sweet potatoes, helping them crisp up and caramelize beautifully while roasting. It also contributes to the overall flavor.
-
Seasoning: Don’t be shy with the salt and freshly ground black pepper on the sweet potatoes before roasting. This enhances their natural sweetness and ensures they’re well-seasoned throughout. The feta brings its own saltiness, so be mindful of that when adding extra salt to the final dish.
Together, these ingredients create a symphony of flavors and textures that you’ll want to make again and again!
Step-by-Step Instructions
Let’s get cooking! This dish is surprisingly simple to put together, making it perfect for a weeknight side or an impressive appetizer. Follow these steps for perfectly roasted sweet potato rounds with that irresistible honey feta topping.
-
Preheat Your Oven: First things first, get your oven nice and hot. I always set mine to 400°F (200°C). While it’s heating, line a large baking sheet with parchment paper. This makes for super easy cleanup and helps prevent sticking.
-
Prepare the Sweet Potatoes: Give your sweet potatoes a good scrub. If you prefer, you can peel them, but I often leave the skin on for extra texture and nutrients. Now, the most important part: slice them into uniform rounds, about 1/4 to 1/2 inch thick. Consistency is key here for even cooking. If some are thicker than others, they’ll cook at different rates, and we want every round to be perfectly tender.
-
Season and Toss: In a large bowl, combine the sliced sweet potato rounds with a generous drizzle of olive oil, a good pinch of salt, and freshly ground black pepper. Use your hands to gently toss everything together, ensuring each round is lightly coated. We want them seasoned well before they even hit the oven!
-
Arrange for Roasting: Spread the seasoned sweet potato rounds in a single layer on your prepared baking sheet. It’s crucial not to overcrowd the pan. If they’re too close, they’ll steam instead of roast and won’t get that lovely caramelization. If you have a lot of sweet potatoes, use two baking sheets. Leave a little space between each round.
-
Roast to Perfection: Pop the baking sheet(s) into your preheated oven. Roast for about 20-30 minutes, or until the sweet potato rounds are tender when pierced with a fork and beautifully caramelized around the edges. I usually flip them halfway through (around the 10-15 minute mark) to ensure even browning on both sides. Keep an eye on them, as oven temperatures can vary.
-
Prepare the Feta and Honey: While your sweet potatoes are roasting, it’s the perfect time to crumble your feta cheese. If you’re using a block, just use your fingers to break it into small, uneven pieces. This texture is so much better than pre-crumbled feta!
-
Assemble and Serve: Once the sweet potato rounds are roasted to your liking, carefully remove them from the oven. Immediately transfer them to a serving platter or arrange them directly on the baking sheet if serving casually. Generously scatter the crumbled feta cheese over the warm rounds. The warmth will slightly soften the feta, making it even more delicious. Finish by drizzling honey all over the feta-topped sweet potatoes. If you like, a sprinkle of fresh thyme or a tiny pinch of chili flakes can add an extra layer of flavor and visual appeal.
Serve immediately and watch them disappear! Enjoy the delightful interplay of sweet, salty, and savory.
Tips & Suggestions
I’ve made these Roasted Sweet Potato Rounds with Honey Feta countless times, and over the years, I’ve picked up a few tricks that really help perfect them. Here are my go-to tips and some serving suggestions to make this dish truly shine for you!
Achieving Sweet Potato Perfection
-
Uniform Slicing is Key: I really can’t stress this enough! Aim for sweet potato rounds that are as close to the same thickness as possible (1/4 to 1/2 inch is ideal). This ensures every piece cooks evenly, preventing some from being undercooked while others are burnt. A mandoline slicer can be a great tool for this if you have one, but a sharp knife and a steady hand work just as well.
-
Don’t Overcrowd the Pan: This is crucial for optimal caramelization. If your sweet potato rounds are too close together, they’ll steam instead of roast, resulting in soft, pale potatoes rather than beautifully browned, slightly crispy ones. If you’re making a large batch, use two baking sheets and give them plenty of space.
-
Taste as You Go: Before roasting, taste a tiny piece of raw sweet potato with the olive oil, salt, and pepper. Adjust the seasoning if needed. The feta will add saltiness, so keep that in mind for the final dish, but the potatoes themselves need to be well-seasoned.
Elevating the Flavor
-
Herb Power: A sprinkle of fresh herbs like thyme, rosemary, or even chopped parsley as a garnish not only adds beautiful color but also a fresh, aromatic counterpoint to the sweetness. I sometimes toss a few sprigs of fresh rosemary or thyme with the sweet potatoes before roasting for a deeper, infused flavor.
-
A Touch of Spice: For those who love a little kick, a tiny pinch of red pepper flakes sprinkled over the finished dish, or even mixed with the sweet potatoes before roasting, can add a delightful warmth that plays wonderfully with the sweetness of the honey.
-
Lemon Brightness: A tiny squeeze of fresh lemon juice over the finished dish, just before serving, can brighten all the flavors. It cuts through the richness and adds a refreshing zing.
Serving Suggestions
-
Versatile Side Dish: These sweet potato rounds are an incredible side dish for almost any meal. I love serving them alongside roasted beef, grilled chicken, or even a hearty vegetarian main like lentil loaf. The combination of sweet and savory really complements richer proteins.
-
Elegant Appetizer: Arrange them artfully on a platter for a stunning and easy appetizer. They’re perfect for dinner parties, brunches, or even a cozy gathering with friends.
-
Brunch Star: Pair them with scrambled eggs, a fresh fruit salad, and a non-alcoholic mimosa for a delightful and colorful brunch spread.
Make Ahead Tips
While this dish is best served fresh, you can definitely do some prep work in advance. You can wash and slice the sweet potatoes a day ahead and store them in an airtight container in the fridge. Toss them with olive oil and seasonings just before roasting. The feta can also be crumbled in advance. However, I always recommend assembling the honey and feta just before serving to get that perfect warm sweet potato and slightly softened cheese experience.
Storage
I always find that these Roasted Sweet Potato Rounds with Honey Feta are best enjoyed fresh, straight out of the oven, when the sweet potatoes are perfectly tender-crisp and the feta is just slightly softened by the warmth. However, if you happen to have any leftovers, here’s how I recommend storing and reheating them to maintain as much of their deliciousness as possible.
Cooling and Packaging
-
Cool Completely: Before storing, allow the roasted sweet potato rounds to cool completely to room temperature. This is important to prevent condensation from building up in the container, which can make them soggy.
-
Separate Components (Ideal): If you anticipate having leftovers, it’s best to store the roasted sweet potato rounds separately from the feta and honey. This helps maintain the texture of the sweet potatoes and prevents the feta from getting too watery or the honey from becoming overly absorbed.
-
Place the plain roasted sweet potato rounds in an airtight container.
-
Store any leftover crumbled feta in a separate small airtight container.
-
Keep any remaining honey in its original container at room temperature.
-
-
Assembled Leftovers: If your sweet potato rounds are already topped with feta and drizzled with honey, simply place them in an airtight container. Be aware that the feta might get a bit more absorbed into the sweet potato and the texture of the rounds might soften slightly.
Shelf Life
-
Refrigeration: Stored properly in an airtight container in the refrigerator, plain roasted sweet potato rounds will last for about 3-4 days. If they’re already assembled with feta and honey, I’d aim to consume them within 2-3 days for the best quality.
-
Freezing: I don’t typically recommend freezing this dish. While plain roasted sweet potatoes can be frozen (they might become a bit mushier upon thawing), the feta and honey topping doesn’t fare well with freezing and thawing. The texture of the feta can become crumbly and dry, and the honey might crystallize. This dish truly shines when fresh!
Reheating
-
Oven Method (Best for Texture): For the best results, especially if you want to try and regain some of that lovely crispness, reheating in the oven is your best bet. Preheat your oven or toaster oven to 350°F (175°C). Spread the sweet potato rounds (plain or assembled) in a single layer on a baking sheet. Heat for about 10-15 minutes, or until heated through and the edges begin to crisp up again. If reheating plain rounds, you can add fresh feta and honey after they’re warm.
-
Microwave Method (Quick but Softer): If you’re in a hurry, the microwave will work, but be prepared for a softer texture. Place the sweet potato rounds on a microwave-safe plate and heat in 30-second intervals until warmed through. This method won’t bring back any crispness, but it’s efficient for a quick reheat.
While the initial freshness is hard to beat, I hope these storage and reheating tips help you enjoy every last delicious bite of your Roasted Sweet Potato Rounds with Honey Feta!

Final Thoughts
And there you have it, my friends! I truly hope you’ll give these Roasted Sweet Potato Rounds With Honey Feta a try. This dish is an absolute must-make because it beautifully marries the earthy sweetness of perfectly roasted sweet potato rounds with the delightful tang of crumbled feta, all brightened by a delicate drizzle of honey. The textures alone are captivating – a tender interior with slightly caramelized edges on the sweet potato, paired with the creamy, salty burst of the feta.
What I adore about these Roasted Sweet Potato Rounds With Honey Feta is how effortlessly they elevate any meal. They’re fantastic as a vibrant side dish, perhaps alongside your favorite beef entree, or as a sophisticated yet simple appetizer that’s sure to impress. I promise you, the balance of sweet, savory, and tangy flavors in every single bite is nothing short of incredible. Get ready to fall in love with a new go-to recipe!

Delicious Roasted Sweet Potato Rounds with Honey Feta
- Total Time: 45 minutes
- Yield: 4 servings
Description
Experience a vibrant explosion of flavors with these Roasted Sweet Potato Rounds topped with creamy feta and drizzled with honey. This elegant dish is perfect for impressing guests or enjoying as a light lunch.
Ingredients
- Sweet potatoes
- Olive oil
- Salt
- Freshly ground black pepper
- Feta cheese
- Honey
Instructions
- Preheat your oven to 400°F (200°C) and line a large baking sheet with parchment paper.
- Scrub the sweet potatoes and slice them into uniform rounds, about 1/4 to 1/2 inch thick.
- In a large bowl, combine the sliced sweet potato rounds with a generous drizzle of olive oil, a good pinch of salt, and freshly ground black pepper. Toss to coat.
- Spread the seasoned sweet potato rounds in a single layer on the prepared baking sheet, ensuring they are not overcrowded.
- Roast in the preheated oven for about 20-30 minutes, flipping halfway through, until tender and caramelized.
- While the sweet potatoes are roasting, crumble the feta cheese into small, uneven pieces.
- Once the sweet potato rounds are done, transfer them to a serving platter and scatter the crumbled feta over the warm rounds. Drizzle honey on top and serve immediately.
- Prep Time: 15 mins
- Cook Time: 30 mins
- Category: Side Dish
- Method: Baking
- Cuisine: American
Nutrition
- Serving Size: 1 serving
- Calories: 200
- Sugar: 10 g
- Sodium: 300 mg
- Fat: 8 g
- Saturated Fat: 3 g
- Unsaturated Fat: 4 g
- Trans Fat: 0 g
- Carbohydrates: 30 g
- Fiber: 4 g
- Protein: 5 g
- Cholesterol: 15 mg
Keywords: For a different flavor, you can substitute butternut squash for sweet potatoes. If feta isn't preferred, goat cheese or ricotta can be used as alternatives.