Sourdough Pesto Grilled Cheese isn’t merely a sandwich; it’s an elevated culinary encounter that promises to awaken your taste buds and soothe your soul. Imagine biting into golden-crisp sourdough bread, its distinctive tangy notes perfectly balancing the bright, aromatic essence of fresh basil pesto, all while a luxurious blend of cheeses stretches and melts into a gooey embrace. It’s comfort food redefined, taking a beloved classic and infusing it with gourmet flair.
The lineage of the humble grilled cheese sandwich is a comforting tale of American simplicity and childhood nostalgia, often a quick meal embraced by generations. Pesto, on the other hand, carries the fragrant legacy of Italy’s Ligurian coast, a vibrant sauce with roots stretching back centuries. Bringing these two venerable components together with the artisan touch of sourdough bread crafts a dish that respects tradition while innovating with flavor. People universally adore this Sourdough Pesto Grilled Cheese for its masterful blend of textures – the irresistible crunch of the crust, the tender chew of the bread, and the creamy indulgence of the cheese – coupled with an unforgettable flavor profile that is both fresh and deeply satisfying. It’s truly a delight that’s quick to prepare yet feels incredibly special, making it a perfect choice for any meal.

Ingredients:
Creating the ultimate Sourdough Pesto Grilled Cheese is an art form, and it all starts with selecting the finest components. Each ingredient plays a crucial role in building layers of flavor and achieving that perfect texture.
- Sourdough Bread: 4 thick slices of high-quality sourdough bread. Look for a loaf with a good, open crumb and a sturdy crust. The tang of sourdough is absolutely essential for this recipe, providing a delightful counterpoint to the rich fillings.
- Pesto: 4-6 tablespoons of fresh basil pesto. You can use your favorite store-bought brand, but if you have a moment, homemade pesto truly elevates this sandwich. The vibrant green color and aromatic basil, pine nut, Parmesan, and garlic blend are the heart of our Sourdough Pesto Grilled Cheese.
- Cheese Blend: Approximately 6-8 ounces (or 8-10 slices) of a melty cheese combination. I highly recommend a blend for optimal flavor and texture. My go-to is:
- 4 slices Provolone cheese (for stretch and mild flavor)
- 4 slices Low-Moisture Mozzarella cheese (for gooeyness and a neutral base)
- 2 slices Sharp White Cheddar cheese (for a punchy, savory depth)
- Optional: A sprinkle of freshly grated Parmesan or Pecorino Romano for extra saltiness and umami.
The goal here is a combination that melts beautifully, offers good stretch, and provides a complex flavor profile that complements the pesto without overwhelming it.
- Unsalted Butter: 2-3 tablespoons, softened to room temperature. This is crucial for achieving that gloriously golden, crispy crust on your grilled cheese. Unsalted butter allows you to control the overall saltiness of the dish.
- Optional Flavor Enhancers & Fillings (highly recommended for an elevated experience):
- Garlic Powder: A pinch, to sprinkle on the buttered bread for an extra layer of savory aroma.
- Red Pepper Flakes: A small pinch, for those who appreciate a subtle warmth and gentle kick.
- Fresh Basil Leaves: A few extra leaves, torn, to add a burst of fresh herbiness inside the sandwich.
- Roasted Red Peppers: 2-4 strips, drained and patted dry, for a sweet and smoky addition.
- Sun-Dried Tomatoes: 4-6 pieces, oil-packed and patted dry, for concentrated tomato flavor and chewiness.
- Baby Spinach: A small handful, for a touch of greens and mild earthiness.
- Balsamic Glaze: A drizzle, for serving, offering a sweet and tangy counterpoint that truly transforms the sandwich.
These additions can really customize your Sourdough Pesto Grilled Cheese and take it from good to absolutely phenomenal.
Prepping Your Workspace & Ingredients
- Gather Your Tools: Before you even think about grilling, make sure you have everything you need within arm’s reach. You’ll want a large non-stick skillet or cast-iron pan (my personal preference for even heat and a beautiful crust), a spatula that can handle flipping a loaded sandwich, a butter knife or small offset spatula for spreading, and a cutting board. Having all your ingredients prepped and ready to go in advance is key to a smooth and enjoyable cooking experience.
- Prepare Your Cheese: If you’re using a block of cheese, now is the time to slice it thinly or grate it. For the best melt and distribution, I find that a combination of thinly sliced and perhaps a touch of shredded cheese works wonders. Aim for slices that are not too thick, allowing them to melt uniformly and create that coveted gooey texture. If you’re using pre-sliced cheese, simply separate the slices for easy layering.
- Soften the Butter: If your butter isn’t already at room temperature, take it out of the fridge now. Softened butter is much easier to spread evenly across the bread, ensuring consistent browning and crispness. If you’re in a hurry, you can gently microwave it for a few seconds, but be careful not to melt it completely; we want it pliable, not liquid.
- Prep Optional Fillings: If you’ve opted for any of the delicious additions like roasted red peppers, sun-dried tomatoes, or fresh basil, get them ready now. Drain and pat dry any oil-packed items to prevent excess moisture from making your sandwich soggy. Tear fresh basil leaves or chop larger items to ensure they fit nicely within the bread without spilling out.
- Set Up Your Pan: Place your chosen skillet on the stovetop over medium-low heat. It’s important to allow the pan to preheat slowly and evenly. Patience is a virtue when making grilled cheese! A pan that’s too hot will burn your bread before the cheese has a chance to melt properly, leading to a disappointing experience. We’re aiming for a gentle sizzle, not a smoky inferno.
Assembling Your Sourdough Pesto Grilled Cheese
- Butter the Bread: Now comes the glorious moment of buttering your bread. Take a generous tablespoon, or even a little more, of your softened unsalted butter. Using a butter knife or a small offset spatula, spread it evenly and thoroughly from edge to edge on one side of each of the four slices of sourdough bread. You want a consistent, complete coating – think of it as creating a protective, flavor-rich shield for your grilled cheese. This butter is not just for preventing sticking; it’s absolutely vital for achieving that signature golden-brown, crispy crust that makes a Sourdough Pesto Grilled Cheese truly irresistible. If you’re using garlic powder, sprinkle a tiny pinch evenly over the buttered side of each slice now for an aromatic kick.
- Spread the Pesto: Flip two of your buttered sourdough slices over so the unbuttered side is facing up. On these two slices, spread 2-3 tablespoons of your fresh pesto. Be generous! The pesto is a star player in our Sourdough Pesto Grilled Cheese, so don’t be shy. Spread it all the way to the edges to ensure every bite is bursting with that herbaceous goodness.
- Layer the Cheese (Part 1): On top of the pesto-slathered slices, begin layering your cheese. Start with your less firm cheeses, like provolone or mozzarella. Place 2 slices of provolone on each pesto-covered bread slice, ensuring good coverage. This initial layer acts as a fantastic melting base.
- Add Optional Fillings (If Using): This is where you can truly customize your creation. If you’re adding roasted red peppers, sun-dried tomatoes, or fresh basil, arrange them neatly on top of the first layer of cheese. For spinach, place a small handful on top. Try not to overstuff your sandwich, as this can make it difficult to grill and keep intact. A little goes a long way in adding flavor without creating bulk.
- Layer the Cheese (Part 2): Now, add the remaining cheese, focusing on your cheddar or any firmer cheeses. Place 2 slices of mozzarella and 1 slice of sharp white cheddar on top of the optional fillings (or directly onto the provolone if skipping the extras). This second layer of cheese acts like a delicious glue, holding all your wonderful fillings together and ensuring maximum gooeyness.
- Complete the Sandwich: Carefully take the two remaining buttered sourdough slices and place them butter-side up on top of the cheese and fillings. You now have two fully assembled, un-grilled Sourdough Pesto Grilled Cheese sandwiches ready for the pan. Take a moment to gently press down on them to ensure all the layers are snugly fit.
The Grilling Process: Achieving Golden Perfection
- Place on the Pan: Your pan should now be perfectly preheated to medium-low heat. It should be warm enough that if you sprinkle a few drops of water, they sizzle and evaporate, but not so hot that they aggressively dance and burn. Carefully lift each assembled sandwich and place it butter-side down into the preheated pan. You should hear a gentle sizzle – this is the sound of success! If you’re cooking two sandwiches, ensure there’s enough space between them for even cooking and easy flipping.
- The First Cook (The Golden Side): Let the sandwich cook undisturbed for about 4-6 minutes. This initial phase is critical for developing that beautiful golden-brown crust and beginning the cheese-melting process. Resist the urge to peek or move it prematurely! We’re looking for patience here. The low and slow approach is what allows the heat to penetrate through the bread, slowly melting the cheese inside without burning the exterior. You’ll notice the edges of the bread starting to turn golden, and perhaps even some cheese beginning to ooze ever so slightly.
- The Flip: After 4-6 minutes, or once the underside is deeply golden brown and perfectly crispy, it’s time for the flip. Using your sturdy spatula, carefully slide it under the sandwich, making sure to support the entire base. In one confident, swift motion, flip the sandwich over to cook the other side. This is a moment of triumph, revealing the glorious golden crust you’ve worked so hard for!
- The Second Cook (Melting Magic): Now, let the second side cook for another 4-6 minutes. As this side grills, the residual heat from the pan and the warmth trapped inside the sandwich will continue to work their magic, completely melting all that beautiful cheese into a luscious, gooey symphony.
Pro Tip for Optimal Melt:
If your cheese isn’t melting as quickly as you’d like, or if your sourdough bread is particularly thick, you can achieve an even better melt by covering the pan with a lid for the last 1-2 minutes of cooking. This traps the steam and heat, creating a warmer environment that encourages the cheese to become perfectly molten and stretchy. Just keep an eye on it to prevent the bread from getting soggy.
- Check for Doneness: The Sourdough Pesto Grilled Cheese is ready when both sides are a rich, appealing golden brown, and the cheese inside is completely melted and oozing. You might even see a little bit of cheese escape and crisp up on the pan – these crispy bits are pure gold, full of flavor! Gently press down on the top of the sandwich; if it feels soft and yielding, and you can sense the melted cheese, it’s done.
Serving Your Masterpiece
- Remove from Pan: Once your Sourdough Pesto Grilled Cheese is grilled to perfection, carefully transfer it from the hot pan to your cutting board. The aroma alone will be intoxicating, a blend of toasted sourdough, fragrant pesto, and rich melted cheese.
- Rest (Briefly): Allow the sandwich to rest on the cutting board for just 1-2 minutes. This brief resting period is important because it allows the molten cheese to set ever so slightly, preventing it from all spilling out when you slice it. It also helps redistribute the heat, making for a more enjoyable eating experience.
- Slice and Serve: With a sharp knife, carefully slice your grilled cheese sandwich diagonally from corner to corner. This classic presentation makes it easier to handle and reveals those beautiful, gooey layers inside.
Elevate Your Serving:
For an extra touch of gourmet sophistication and flavor, drizzle a little balsamic glaze over the top of your sliced Sourdough Pesto Grilled Cheese just before serving. The sweet and tangy notes of the balsamic beautifully complement the richness of the cheese and the herbaceousness of the pesto, taking your sandwich to an entirely new level.
- Enjoy Immediately: Grilled cheese is best enjoyed fresh off the pan, while the cheese is still wonderfully warm and melty, and the bread is crisp. Serve your masterpiece alongside a bowl of hot tomato soup for the ultimate comfort food pairing, or with a simple green salad dressed with a vinaigrette to balance the richness.
There you have it – a truly exceptional Sourdough Pesto Grilled Cheese, crafted with care and bursting with flavor. Every bite offers a delightful crunch, followed by a savory, tangy, and herbaceous explosion that is deeply satisfying. This isn’t just a sandwich; it’s an experience.
Conclusion:
And there you have it, my friends! We’ve journeyed through the simple yet profound steps to create what I genuinely believe is more than just a sandwich – it’s an experience. If you’ve been looking for a way to elevate your comfort food game, or perhaps a delightful new staple to add to your culinary repertoire, then this is absolutely the recipe you need to try. This isn’t just any grilled cheese; it’s a symphony of textures and tastes that come together in perfect harmony, promising to make your taste buds sing with every single bite. The tangy, chewy crumb of artisan sourdough, the vibrant, herby punch of fresh pesto, and the irresistible ooey-gooey cascade of perfectly melted cheese – it all combines to create something truly magical and utterly unforgettable.
I can’t stress enough why this particular sandwich stands out in a crowded field of comfort foods. It’s the intentional pairing of ingredients that makes it shine. The sourdough isn’t just a vessel; it’s a key player, providing a depth of flavor and a sturdy, satisfying crunch that regular white bread simply can’t match. Then comes the pesto – that glorious green goodness that infuses every crevice with aromatic basil, nutty pine nuts, and sharp Parmesan. It transforms what could be a simple cheese toastie into a gourmet delight. And, of course, the cheese! A generous blend, expertly melted to achieve that quintessential pull and creamy mouthfeel that we all crave from a grilled cheese. This Sourdough Pesto Grilled Cheese is truly a game-changer for anyone who loves good food made with minimal fuss. It’s quick enough for a weeknight, yet sophisticated enough to impress any guest at a casual brunch.
Now, let’s talk about how to enjoy this masterpiece and how you can make it your own. While it’s absolutely perfect straight off the skillet, there are endless ways to serve and customize it. For a classic pairing, nothing beats a warm bowl of creamy tomato soup. The rich, slightly acidic soup beautifully cuts through the richness of the sandwich, creating that iconic comfort food duo. Alternatively, serve it alongside a crisp, light green salad dressed with a simple vinaigrette to add a refreshing counterpoint. A handful of sweet potato fries or a side of roasted vegetables would also make for a delightful and more substantial meal. For a laid-back lunch, a glass of chilled iced tea or even a light craft beer would complement the flavors wonderfully.
Ways to Personalize Your Sourdough Pesto Grilled Cheese Experience:
Don’t be afraid to experiment and tailor this recipe to your own preferences! The beauty of a grilled cheese is its incredible versatility. Here are some ideas to get your creative juices flowing:
- Cheese Varieties: While I love a good sharp cheddar and provolone blend, consider adding some creamy Fontina, tangy goat cheese, or even a smoked Gouda for a different flavor profile. Mozzarella offers an incredible melt, and a touch of Parmesan grated directly onto the bread before grilling can add an extra crispy, cheesy crust.
- Pesto Power-Ups: If you’re feeling adventurous, try different types of pesto. Sun-dried tomato pesto offers a sweeter, tangier twist, while a kale or spinach pesto can add an earthy, nutrient-rich dimension. You could even swirl a little sriracha or red pepper flakes into your pesto for a subtle kick!
- Add-Ins Galore: This is where the real fun begins! Think thinly sliced tomatoes, caramelized onions, roasted red peppers, or even a handful of fresh spinach wilted into the sandwich. For meat lovers, a slice of crispy prosciutto, ham, or even thinly sliced turkey can elevate it further. Just remember not to overfill, as it can make grilling tricky.
My hope is that this recipe inspires you to step into your kitchen and create something truly delicious. I promise you, the reward for a few minutes of effort is immense satisfaction. Imagine that first bite – the crunch, the gooey cheese pull, the burst of pesto, and the tangy sourdough – it’s pure bliss! So, please, give this a try. Make it for yourself, make it for your loved ones, and savor every moment. And when you do, I would absolutely love to hear about your experience! What variations did you try? Did you pair it with soup or salad? Did it become your new go-to comfort food? Share your stories, your photos, and your triumphs. Your feedback and creativity are what make this culinary community so vibrant and inspiring. Go forth and conquer that craving – your ultimate Sourdough Pesto Grilled Cheese awaits!
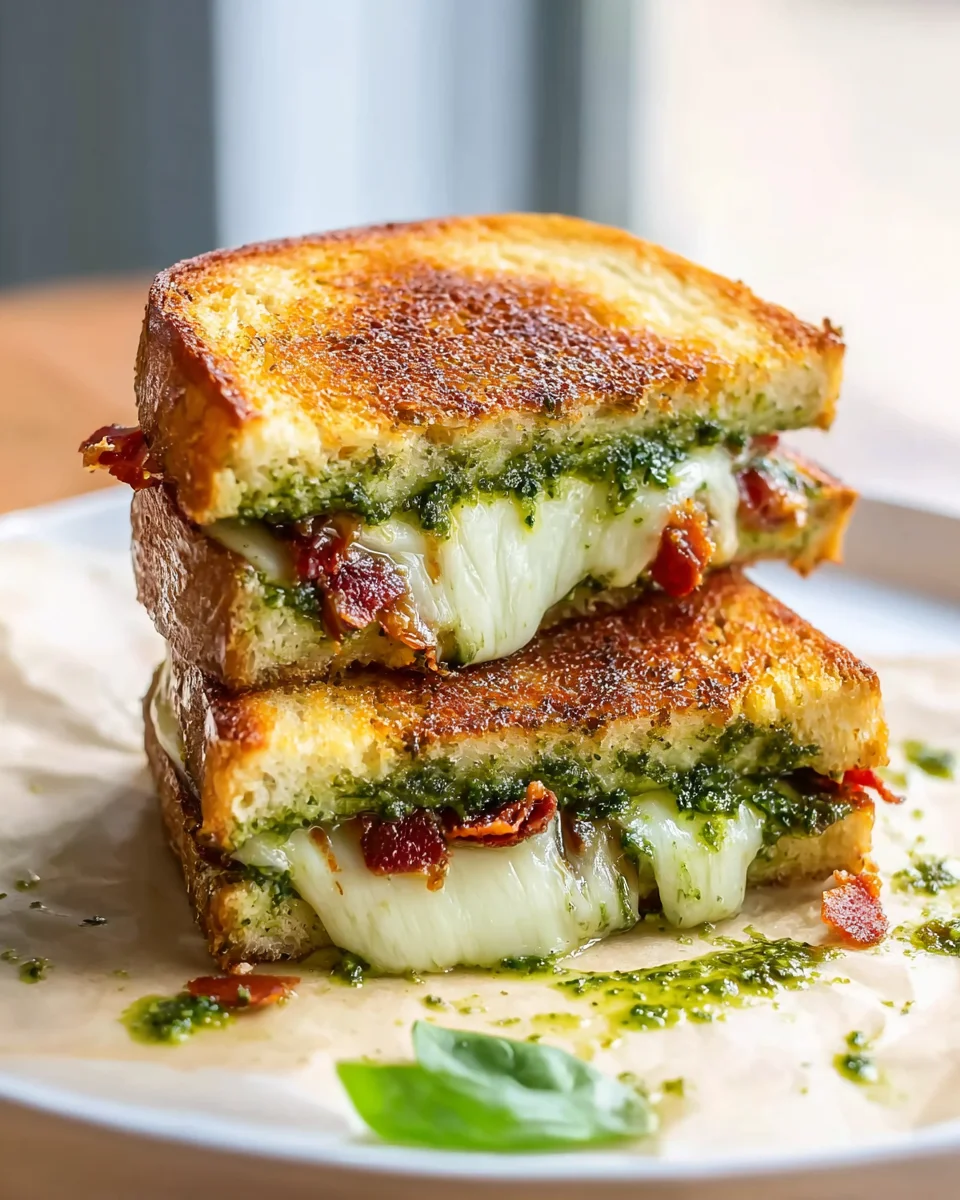
Ultimate Sourdough Pesto Grilled Cheese
This Sourdough Pesto Grilled Cheese recipe promises an elevated culinary encounter, featuring golden-crisp sourdough bread, vibrant fresh basil pesto, and a luxurious blend of melty cheeses. The key is perfectly toasted sourdough that’s golden and crispy on the outside. To avoid sogginess, ensure you pat the mozzarella dry with paper towels and spread pesto sparingly.
Ingredients
Instructions
Important Information
Nutrition Facts (Per Serving)
It is important to consider this information as approximate and not to use it as definitive health advice.
Allergy Information
Please check ingredients for potential allergens and consult a health professional if in doubt.